Leaderboard


Popular Content
Showing content with the highest reputation on 05/10/2020 in all areas
-
4 pointsI finished up the wiring harnesses today. Then added the final wire to the relays box. I ended up having to use #8 AWG welding cable for that since my other choice turned out to be too old to solder on. I hope you can make that fat wire work Fishfiles, its all I got left that isn't tarnished yet from exposure to oxygen and aging. It is the positive supply wire that goes to relay #30 terminal which supplies power for two 14 AWG wires that connect to your two fans while the relay is engaged. There is 7 feet of it.... so it should reach your battery box if you want it to. So anyway, after those harnesses and power wire were done I connected the gizmo up to my battery bank to test everything for the first time. It works! So I drowned those wires entering the relays box with JB-weld to seal them and set the box aside to cure overnight. Next up, gotta dremel the enclosure cover for the display window and the buttons. This is the most difficult part of each FCU build for me. I'm gonna wait until the weather is warmer so I can do that work outdoors in the sunshine where I can see what I'm doing. I expect that two more afternoons of tinkerin' should finish it up.
-
3 pointsTo all Mothers -- even those that just have a pet --- Happy Mothers Day
-
3 pointsSome progress photos of yesterday! I managed to refit the bearing houses and two blade drums, the bearing roller for the driving belt and I had started drilling out the 16mm holes for the top link pins but the drill bit is like butter so I have to keep sharpening it. Going to purchase a better bit. One these holes are done I will get started on fitting the engine. It's starting to look more like a mower again than just lots of pieces lying around!
-
2 pointsBest Oil Change Method : = Frequently
-
2 pointsthis is one way to have fun riding , and mowing ... no engine !! and the blade is easy to get to! (sharpen) body pertection, with this outfit comes to mind ...
-
1 pointHi, Welcome to ATV Honda! It sounds like your rear brake cable may be seizing up. If your rear brakes work fine using the brake pedal then a new OEM cable will probably fix it. Let us know what you learn...
-
1 pointthe cable could be kinked, or the spring near the back axial broke.
-
1 pointHi: Big Welcome Here
-
1 pointWelcome to ATV Honda!
-
1 pointSweet work! got my shipment from Mouser yesterday! I got 1 of the 10 Nichicon electrolytics but no Panasonic relays, which are backordered. But that’s a question i had for ya @retro—is that Panasonic relay 769-alq309 the same Bosch automotive relay you referred to generally? I got a report format going here with some table, figure and appendices references. Got your text. So now i can break out the text into separate topics — working out an organizational style. Got my wife’s garden nearly done; incorporated some compost—need to add several bags of clean sand to keep the clay broken up. Gonna create a wildflower bee and butterfly haven behind her rose garden
-
1 pointI think this picture was taken in Oklahoma
-
1 pointAnd don't call me till after 9pm so my calls are free!!
-
1 pointWelcome over!! It is a good group here.
-
1 pointHappy Mother's Day to all the Mothers Happy Mudders Day to all the Mud Riders and a happy mothers day to all the other mother s !
-
1 pointWife is already upstairs getting her lesson plans ready for this week for her class so she can enjoy the rest of the day.
-
1 pointI got it done and man the Amsoil does make a difference. I had no idea what I was missing. Lower temps and alot smoother, quieter too.
-
1 pointGreat! I will include a couple copper ring terminals and some adhesive lined shrink tubing then, they are heavy enough to be crimped or soldered onto the wire, or both.
-
1 pointHooking another #8 wire to the battery should not be any problem , the 450 has two Duracell atv batteries and both have double threaded holes on each terminal , makes winch , sounds and lights a easy hook up --- 4 positive and 4 negative threaded holes
-
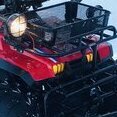
1 pointFinal mounting of the amp and fan controller , should be water proof , hope I don't have a over heating problem , might have to snorkel the box
-
1 pointCheers everyone! And yea it was standard in a lot of the later models over here @_Wilson_™ and thanks @bcsman I really would be stuck if I had to choose between which one I could keep forever tbh 😂 @Fishfiles thanks for that, my rev limiter is astronomical, and it's noticeably quicker than any other 300 I've been on, was it just till 1990 they had the bigger cams? I assumed it did, but wasn't 100% sure
-
1 pointYou won’t get all of the oil out with an extraction pump. Best to use the drain plug when there is one. My Rubicon has 2 drain plugs because one won’t get all of the oil out the transmission. I have an extraction pump but I only use on anything with no drain plug like the rear diff on my truck.
-
1 pointI had to do an oil change on a work truck years ago and my gen set at the same time, asked the helper if he could drain the motor oil and I'd tend to the gen set. After it was all said and done we left the shop and headed home in the truck, asked him how everything looked, he said fine but the oil was reddish in color, at that point I realized he drained the transmission, then added an extra amount of oil in the engine. Last time I let anyone do an oil change without me......lol
-
1 pointIt takes a bit of creative fabbing (aka cobbling) to shoehorn a W1209 into those tiny enclosures, eh @shrade! 🙂 I have made three of these gizmos, this is the 4th one. The W1209 and its enclosure are barely larger than my old Zippo cigarette lighter. It wasn't until I had finished putting the 2nd one together that I had these fabbing and assembly methods down pat. R&D costs time and money... I wasted a few parts trying.... but I am rewarded every time now, they're much easier to build than the first two gizmos were. 🙂 @Goober I am going to send ya a china LM2596 buck converter along with the solder. It's an adjustable voltage power supply that can be dialed down to 10 volts DC to power the W1209s and accepts any DC input voltage >/= 1.5 volts higher than the output. You can connect this to a 12 to 30 volts DC power supply or a 12 volt battery to power up your W1209 boards for tinkerin'. I'll solder some leads onto it before its mailed.
-
1 pointAlright, I started with a fresh W1209 board today. First thing make sure that the LED module is down against the PCB where it belongs. If not, suck the solder off it and push it down against the PCB and reflow the LED connections. This one was looking good. Then desolder the onboard relay, power/ground/relay output headers, the pullup resistor labeled R2 (on this PCB version) and the thermocouple headers. Throw them in the trash if you wish, they're useless china garbage. Use either a solder sucker or rosin desoldering braid to clear the pads on the PCB of any old solder as you remove those parts. Here is a populated board and the one that I stripped of parts today for comparison. Next I filed off the PCB along the lower edge (lay an aggressive file on the bench and pull the edge of the PCB down the file) to match the contour and shape of the enclosure back to locate the W1209 board as low and as close as possible to the bottom of the back half. This is necessary so the LED display will fit inside/below the raised section of the enclosure top. You'll see what I mean later on when the top gets dremeled out for the display LED window and the three buttons. I am shooting for an .008" gap between the lower edge of the PCB and the back half of the enclosure, once the PCB is mounted. So the PCB is no longer square on its lower edge once that filing is done... it matches the shape of the enclosure. After the filing is done center the PCB over the four mounting lugs and mark the four locations on each corner of the PCB for the next step, as shown in this photo. Here is the back side view of the PCB after filing the lower edge. Notice the contour... you can see that I filed away as much of that lower edge as I could without filing into the ground plane trace on one side and without severing one of the relay output trace holes on the other side. Once this PCB is fitted into the enclosure the gap between the lower edge of this PCB and the enclosure will be no more than .008". I use a round file to notch out the corners where I marked for them so the PCB will fit down over the lugs in the enclosure back. I also used my dremel with a 60 degree pointed burr chucked in it to grind away portions of those four mounting lugs in the enclosure back so that the PCB will fit down just barely below the top of the widest part of each lug. So two steps... first file the PCB corners where they are marked. Then grind portions of the mounting lugs down so that the PCB, once it's located on those four lugs, is recessed below the top edge of those lugs. Photos can explain it better than I can... I'll post them in a bit... but lets move on, got other stuff to do too. Next I soldered two short #24 AWG leads onto the two pads where the R2 labelled pullup resistor was removed from the PCB. On the opposite ends of those leads I soldered on a multi-turn (25 turns)10K Ohms Bournes (series 3386, or alternately, series PV36) trimpot. I pre-adjusted the trimpot to measure about 5.1K ohms initial setting before soldering it onto the leads, since I am using that trimpot for calibrating the homebuilt oil temp sensor to the STM8S microcontroller, during final assembly. At this point I screwed the home made aluminum mounting bracket onto the back of the enclosure back using four screws that I had shortened already, which threaded into drilled and tapped holes in the bracket. Before starting those four screws each hole and screw was squirted with Ultra-black silicone gasket maker to prevent water from getting past those screws and getting inside the enclosure. Then I drilled six holes (#53 drill bit) in the back of the enclosure for the six #24 AWG wires (two separate harnesses) that will need to be connected up inside. The two-wire oil temp sensor harness is made of #24 AWG stranded & tinned copper wire that is about 67 inches long with a waterproof connector soldered onto the opposite end and sheathed with black shrink tubing. The other four wires coming out of the enclosure go to the Power Supply & Relays box. Those four #24 AWG wires will be sheathed in shrink tubing and have a waterproof connector soldered onto their ends tomorrow to complete that 32" long harness. Here is a pic showing the notched PCB and almost everything else that has been explained so far.... except for the grinding I do on the mounting lugs, that's in the next photo. Inside the enclosure back half where the six wires enter through their respective holes, those wires are folded over sharply (to prevent them from pulling out when glued) then soldered onto the PCB pads where each of them belong. There is a green wire and a blue wire inside the two-wire oil temp sensor harness that get soldered into the PCB pads where the original thermocouple header was removed. The four-wire PS/Relays box harness contains a red wire that supplies 10 volts positive, a black wire 10 volts negative, a yellow wire 5 volts positive going to the primary relay and a white wire 5 volts negative that goes to the primary relay inside the PS/Relays box. Then those wires are drowned in JB-weld where they enter the back of the enclosure to seal out water and to prevent those wires from being pulled back out. The plastic is roughed up with 400 grit sandpaper then wiped clean with 91% alcohol before the JB-weld goes on. I also clean all residual soldering flux off from the PCB after soldering those six wiring connections as part of final preps for the back half of the enclosure. In this photo you can see the grinding that I did with the dremel burr in order to recess the PCB slightly below those lugs. The PCB should be recessed down about .008" below the top of the fattest part of each lug. You don't have to make those recesses pretty when you grind them out either, just get them the right depth. Because JB-weld is gonna fill and cover all of the ugly that is created in the next set of steps... I like to wet a microfiber cloth with alcohol before beginning these final assembly steps of the back half of the enclosure, so I can wipe away any stray JB-weld fingerprints from the enclosure before clamping the entire back half in the vise while the JB-weld cures. I precut two pieces of masking tape for holding the trimpot in place as well. I tend to make messes when I only got one hand trying to control two shifting parts at once. Anyway, this looks pretty easy but its not.... I took a shortcut here... by gluing every part at once with JB-weld rather than one step at a time. So with an alcohol cloth and tape at the ready, I coated the recessed areas of the mounting lugs with JB-weld and also spread some on the back of the PCB where each of the four corners were filed out. Then the PCB was pressed down into those four recesses and held there while I used my other hand to add JB-weld to the tops, sides and holes in the PCB to securely and permanently mount it. Once those four corners were done I spread some JB-weld onto the bottom of the trimpot and held that down in place with tape. Then I wrapped it in another piece of cloth and clamped it lightly in the vise while all of the JB-weld cures. A final little-dab'll-do-ya on the two trimpot wires holds those securely to the PCB, between the tactile switches. More to come tomorrow!
-
1 pointRedneck Goose Neck
-
1 pointThe 87 350D was the oddball. 86-87 350A had one electrical system 87 350D was a one year only electrical system 88-up was a third electrical system They don't interchange, so if you have an 87 350D, most if not all of the electrical system is going to be specific to that one year/model. Hard parts should all interchange, but if you're doing any electrical make sure anything you get is specifically off of an 87 350D.
-
1 point
-
1 point
-
1 pointI just swapped a Yamaha big bear 350 master cylinder onto my 300 fourtrax. Easy.
-
1 pointNope, you can use a 420, 500, or any number of other master cylinders. I got a used one from a 500 parts bike I had, and used the microswitches built into it to wire up a start-in-gear feature when the brake lever is held back (like the newer machines) and added brake lights to my daughter's 97 300
-
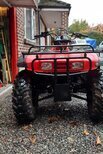
1 pointNo problem shwagy , I have TRX250 Fourtrax and ATC250 ES master cylinders on my 300s , I like them because I had a bunch for free and they have a bigger reseviour ---- my 450 is running a Yamaha Grizzy master -----seems most masters have that same size Banjo fitting and handle bar diameter ----the reverse lockout might not be the same on a 420

.thumb.JPG.8002e396bd3bfa33ab4cf3a9c2b733af.JPG)