Leaderboard


Popular Content
Showing content with the highest reputation on 03/15/2021 in all areas
-
8 pointsWell that is exactly my train of thought. Earlier in this thread I wasn’t sure what to do, pretty demotivated. After browsing the local classifieds and seeing what people are asking for these machines $$$ (all due to COVID) I figured I may be better investing more $ into it than selling and buying something else. At least I know the machine and what had been done to date at that point versus buying something else and maybe starting from scratch. I know it’s a Honda and it’s reliable, it ain’t no CAN-AM IRS machine. But it’s going to do me for now and I hope it stays running lol. I do have to say thanks to all on this thread that chimed in and helped. If it wasn’t for the help and input from the members not sure I would have ventured down this path. Everyone’s help is greatly appreciated! I won’t be going anywhere’s, hope to post up in the Custom Thread I started and still clean up a few things I intended to do. I do have a ball joint on hand lol I need to replace too! But I’ll be around reading threads, helping and most likely getting help! Good bunch of folks here, reminds me of the Jeep forums!
-
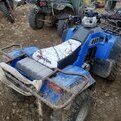
6 pointsSo, I finally got the nerve to pull the fuel tank and see if there was anything I could do to fixe the fuel level indicator/sending unit as it would occassionally flash 1 to 2 bars only when full and then no bars. I pulled the tank. removed the sending unit and discovered the pivot shaft was pretty floppy from 33 years of wear. I shimmed it up with some stainless steel shim material and got it to start showing level again. Cleaned out some rust and water in the fuel tank and put it all back together and now it's happy. I decided I needed to pull the fuel tank when I look inside and the color of the gas was opaque. foggy. Not right. Now it's clear after getting some crud out of there. I also added a heal shifter lever as my upper foot hurts when I shift with the toe shifter.
-
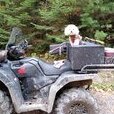
5 pointsWas riding up at camp. Tried to cross a beaver run by a dam. Ice was plenty thick but the water dropped a foot since it froze. Ice collapsed so I backed out.
-
4 points
-
4 points
-
4 pointsAfter my engine and carb rebuild I had the overflow hose drip. I removed the carb and cleaned out the float area with good results. Then had the drip come back, this time I opened up the overflow screw and let it run for a few seconds. I ended up putting one of the inline fuel filters like I have on my golf cart and mowers. Never had a problem since, change the filter when it looks dirty. I had the tank off initially when rebuilding everything and tried to flush out and dump upside down, but never felt I got everything out. I didn't want to try to remove the fuel shutoff assembly as I have read horror stories when removing the 2 bolts. If there is a problem and the nuts inside the tank drop off there is not much you can do to put the shutoff valve back on. I figure everything working as it is now so don't fix it if it ain't broke I go by......
-
4 pointsVisited Idaho's state Capitol building while visiting my brother, amazing structure built in 1905. Tshirt weather in Boise, drove up to local ski hill, had a free ride down, guy running it was pretty funny, what a great acriviry for families. Mount Hood from the Columbia Gorge, Multonomah Falls in the Gorge.
-
4 pointsJust wanted to update and give another thumbs up for the Shindy carb kit...it arrived as advertised and the quality is excellent...the kit even had an extra o-ring (tiny one) and a couple bigger ones I assume for different models. Carb went together great, very nice fit and finish on everything in the kit. As to the OP, my drain screw didn’t look the greatest but I got it cleaned up and hope that fixes my drip. I’m going to take @Fishfiles and @Goober advice and clean my gas tank before I put the carb back on. Probably gonna replace the fuel line too. Will keep y’all posted...
-
3 pointsThis is why you point a camera at your other camera....lol
-
3 pointsSmarter than the average Bear, eh!!!
-
3 pointsWelcome to the forum. If you google "youtube 420 crank" there is a 4 part series that shows a complete tear down of a 420 Rancher bottom end. Your 2012 500 Foreman motor is the same as the 420 motor in that video. You can also download the factory service manual free if you look right below the header at the top of the page under "service manuals" You can do it with the engine in the frame, but it's much easier to do it with the engine out. If you want to try with the engine still installed, wash the wheeler very thoroughly and stand it up on the rear rack, and then remove the front cover on the engine. You can see what needs to be done in the videos I mentioned.
-
3 pointsYeah you gotta put it in and ride it just like slime. The only difference is starch drys fast when it get enough oxygen. So it will roll around until it finds the gap and then when it starts to seep out the hole it hardens and seals. Its is mostly used with sand dunes riders. And works really good on beadlock wheels. But it will work on non-beadlocks aswell. I have it in all 8 of my tires. My mx and my xc tires. All are beadlock but the mx fronts. Before sta-flo i had 3 tires that would air down very slowly. 2 of them were my mx tires that sit off the quad most of the time. I just checked them after sitting in a stack all winter and none of them lost even 1 psi. All the xc tires on my quad are the same way. Not even a single psi lost sitting all winter.
-
3 pointsI paid $900 for mine, 88 TRX350D Foreman. Sold the snow plow that cam with it for $200. So, $700 starting. Then the spending began. Lol. engine top end overhaul including bore and new piston, rockers, chain, gaskets, carb kit, front tires, some missing plastic, oil filters, handle grips, led headlight, both clutches, intake valves, seat, seat cover, totaled another $1028.56. So I'm in mine for $1728.56.
-
3 pointsMel & TB.. its coming soon.
-
3 pointsDon't have cotton wood here, but I will burn pine, spruce, cedar, it all burns in my stoves....lol
-
3 pointsI'm sure there has been some birds eye maple gone into my stove.... And I'll burn anything that fits into the stove....
-
3 pointsHah! Been there. Love the stuffed teddy bear thingy in the back.
-
3 pointsShine a small but bright flashlight into the tank. There are two screens inside the tank. one on the primary and one on the reserve suction line. Use about 18 inchesof weed wacker line or (careful!) a piece of cut brake/throttle cable to ream the suction lines. Sediment and rust can clog these lines. i have had to use a drill to directionally bore thru a clogged line-careful! Dont drive the cable thru the intake screen! the reserve suction line cannot completely empty the tank so you must occasionally drain the tank to remove condensate. this is my tank after a vinegar and BB wash
-
3 pointsI paid $2200 for mine and had around $700-800 US in my engine project. And like you have a good reliable machine hopefully for many years now, at least the engine...
-
3 pointsI know guys that put more than that into one , it should last you a long time , you could have paid that much for one and was taking a chance on what you got , you know what you got and learned how to work on it , all kinds of ways to look at it , prepping that shift motor is a plus -- don't run off now that it is running , stick around
-
3 pointsHeres the manual for TRX 250 Recon 05-11 hope it helps someone out, fun little machine TRX250 Recon 2005-11.pdf
-
3 pointsGot myself another project to get done
-
2 pointsHad an old oil drum out in the back 40, decided to make a little wood sleigh..... Just a start, needs a bit of modifications but its a good start, and the price was right on materials......
-
2 pointsThat's about the only kind of shots going in my body ----- I like the way you pour shots , filled to maximum capacity
-
2 pointsBlue, white, and green are usually the headlight wires. Green is ground, Blue is high beam, white is low beam.
-
2 pointsI use sta-flo liquid starch. Put it in just like slime. Can get it at walmart dirt cheap. And there is zero mess when removing a tire like slime.
-
2 pointsYea i'm the same. Free wood is free wood to me. I clean my chimney every year anyway.
-
2 pointsWas mid upper 70's here over the weekend. This morning I see oaks have started sprouting again.
-
2 pointsStaying cold here.
-
2 pointsGoober looks just like the one I got when I bought my 98 450ES, easy hookup for sure...
-
2 pointsI put a used plow on the new 86 instead because i want to run that rig some more. actually found a NOS Cycle Country mount kit (15-1540 The bumper is mounted higher that the accessory bumper on my other quad. more slack—makes adjustments easier. But the push tube still held by the big old punkin on these Chili Peppers this manual plow kit (cycle country made two in ‘90s) is for later model quads that were higher and wider. So on this later model the lift handle interferes with the quad handlebar grip. Drive over Pin in the push tube (used old axe handle to lift the tube ends) Set the float, then the lift lock
-
2 pointsdukes of hazzard fan ...
-
2 pointsCongrats! Good work!! Keep the RPMs down during the first two hours of runtime, constantly varying the RPMs (light acceleration under load, followed by deceleration cycles) and don't allow the motor to idle more than a few seconds at a time, except while warming the piston up after cold startups. Put a minimum of two hours (you didn't put a new camshaft in it, so no need to change oil after one hour) on the motor before you change the oil & filter the 1st time. When you change the oil make sure that the motor is fully warmed up and yank the oil plug & filter as soon as you shut the warm motor off. After changing the oil & filter allow the motor to cool off completely and readjust the valves. Take it easy on the motor during the 1st 10 hours of it's new life then ride it however you wish. Change the oil again between 15-20 hours and have fun with it!
-
2 pointsI just cut them as is for the most part, climb on the pile, start at the top and work my way down. I'm totally shocked that the truck driver came down the driveway, bought it all off a guy, $2,000 for 15 chord delivered, semi had about an hr drive from where it was cut. Got another 4 chord or so on the other side of the yard to cut up also, so I have about 20 chord here.....
-
2 pointsYou call that a being a Honda Hoarder !! I know , I am one of them , you don't know how many times my arm and hand have returned from the throwing position in route to the garbage can , it's like glued to my fingers
-
2 pointsIn 2012 we were riding along a beach in Cook Inlet. Were scads of eagles hanging out on the bluff. My son was 7 and I was starting to worry a group of them would swoop down and carry him away. Last pic is a group we ran up on eating a pile of fish guts. Poor photos, camera phone back then wasn't very good.
-
1 point
-
1 pointThere’s a filter between the petcock and the pump
-
1 pointOh yeah ah sry, no I don't know who won....
-
1 pointJust finished watching, what a awesome car Martin had after a few key adjustments!
-
1 pointHere’s 3 NOS OEM TRX350D gear change harnesses! https://www.ebay.com/itm/232715042607
-
1 pointgood deal, sounds like you have this ready to enjoy some riding.
-
1 pointdirty mind test
-
1 pointI go in Monday to schedule my third knee surgery. Sure was fun abusing my body, but the price is being paid now! Should be another cleanout and the goal is to put off knee replacements as long as possible. I put the scheduling off until after this past Friday, which was supposed to be my latest fight. My normal bout was cancelled but I accepted an "exhibition" two weeks prior to the 12th, as a last minute replacement. It was a good time and it was against someone that they would never match me against in a real fight, but I basically went in and let them box their brains out, and I kept them honest with some action. It was tremendous fighting, even in exhibition, in front of a crowd, and I hope I can get my next knee surgery scheduled SOON so I can be ready for a June fight.
-
1 pointBeing under water that long with the battery still connected plays havoc on the wiring , especially the ones with voltage going thru them , eats the strains away and turns it green inside the covering --- as far as the engine being under , have always heard and seen it first hand after Katrina , it is not always how long it was under , it is how long till you get it flushed out and running , after getting it out the water is the crucial time to act quick cause when the air hits it , it is going to rust it quick ---- seen many engine go thru 7-14 days of being under water and survive to this day --- if it is running ok and the oil looks good , send it till she blows mate'e
-
1 pointyep that's how i cut mine from the top of the pile with saw angle down, never had much issue with kick back, but i kinda combine plunge cutting with this method at times, sawing at the highest point with the saw flat, at the end of the pile just to catch the highest log, and go from there .
-
1 pointMy favorite tools are Deep Creep, Permatex Anti-Seize, Permatex Dielectric grease, contact cleaner and a box of plumbers flux brushes. I think you’ll want a pack of those brass brushes too i freed up the yolk on a bulldog hitch yesterday; you’re right @Fishfiles I emptied that spray can completely on that hitch. i was sceered of using that 5000 lbs trailer on my brand new Ford Superduty crew with 8ft bed. Got that oil worked into the spring seat real well. Now I'm good oh yeah one last thing. Try not to get oil on the camo. The print is only on the surface and i think chemicals can damage that finish—not positive about it tho
-
1 pointTake your time , don't rush , I know you want to hear it run , haste makes waste ---- "Anything worth doing , is worth doing right the first time or not at all " , that was my Grandpa's saying Don't forget to stager the ring gaps and don't let any ring gap line up with the wrist pin bore holes
-
1 pointNice---I liked the idea when I first saw them, but wondered how well the solder flowed into the joint and if it made a cold joint Looks pretty good to me on that last picture where you cut it in half I might put a little flux on the wires to help the joint, but I am going to pick some of these up for sure
-
1 pointHere it is cut in half.