Leaderboard


Popular Content
Showing content with the highest reputation since 03/25/2024 in all areas
-
6 pointsMy ES is too dang reliable and I find myself with extra time on my hands, time that others seem to use working on their machines. For us ES owners, what do we do with that extra time? Please and Thank You. WM ES Owner
-
5 pointsThanks Jeep for your humility concerning this subject. Thanks Wilson for the personal message to say hi. I'm back for the first time in many months.....many months. I enjoyed this forum for the most part but left several years ago (with just a few visits per year) because of the politics and religion. This is the first post I viewed and to my pleasure discovered this new opinion concerning volatile issues. I am a strong conservative Christian man that has learned to be very careful.....I have very strong opinions like everybody else but realized that Truth in Love trumps all else. I'm back for a while to see how it goes. You "old timers" may remember that I'm not a huge four wheeler enthusiast yet I own two and that my real passion is dirt bikes. I do enjoy listening to conversations about certain problems and even contributing if I have some insight. This feels good and it's good to be back.
-
4 pointsOkay, not quite what you think, but it is a Honda. Have some friends who are back in country do to some unrest where they've been serving as missionaries for the last almost 40 years. Had a very short amount of time to get out leaving their business and belongings behind. Back in the states til August of next year while they regroup and make a new plan. While here they are going to need to do some traveling to raise more financial support. So will be doing that over a fair amount of this spring and early summer. Their travels will take them all over the U.S. so they figured they might get a small toy hauler, 18ft, and save some hotels along the way. Also thought they would take a toy along as they go to help the monotany of their time on the road. So last fall for one of their meetings, they flew to Dallas, and while there, purchased a Honda Gold Wing and drove it back to Montana. They'll put that in their little toy hauler and take it a long. Soooo...... most of the winter my friends stuff has been in my wife's ear about how much fun it is, and all of the other people we both know that have bikes that we can get out on rides with. It didn't take much convincing, I've wanted to get a bike for a long so started looking a lithe over a month ago and finally found one. So last Friday after work took off for Eastern North Dakota to go get my new to me purchase. Was a miserable trip. I was pulling a 17ft empty cargo trailer and drive in 30-45 mph head/cross wind the entire way. Pulled into my buddy's house in Bismarck at 2 am, but by the time we visited and I got settled it was 3:30 am and was up at 7:30 ready to drive the remaining 2½ hours. He had different plans so after breakfast we didn't get out of Bismarck until after 9:30. Had 40 to 45 mph wings the remaining distance. Long story sutures short, got home Sunday evening at 6 pm. More wind, rain, snow m, and ice on my way home. 1450 miles. Not sure how folks can live in that part of the country. Stopped and took pics from four directions. Absolutely nothing you see in any direction. Ended up with a 2008 1800, very nice shape only 25,000 miles. Trails don't open till mid June so will have some time to ride before atv season starts.
-
4 pointsSo the long awaited update is here. The Foreman is out of my shop and back on the farm. Thanks to the help of ol Mr RTV himself aka Shade tree 🤣, the machine is FIXED!!! It was a process and I had all but given up but Shade talked me off the ledge. I ended up taking that rear engine cover off and replaced the Ignition spark generator or the pick up coil inside the case. That was the part keeping us from getting spark. I did keep the CDI/ ICM I replaced on along with the new voltage regulator and coil. After some issues with the neutral switch and having to remove and install the rear cover (a total of 5 times...)🤷♂️🤦♂️ I got the unit back together today and ran it. I let it idle for 10 min which it couldn't do prior and took it for a 1 mile ride with no issues. Im happy to say its all fixed up and its back to pushing feed for dairy cows. I want to say as a newbie to the site here, it was quite refreshing to talk to people who knew their stuff and pointed me in the right direction. I definitely look forward to being a member here and I greatly appreciate the help from Shade and the others!! Thanks again
-
3 pointsAs some of ya'll know, i've came into a couple golden machines ?!. i call them big john, and little john. they are a kwik-way boring bar machines. they are very very old and very very rare to find them , let alone that works ?!. ok..little john works, but needs some shadetree touch to it ?..lol. big john does very well !. i had to bore out a cylinder that came on this stupid trx300ex to a 74.45mm piston. i did get it bored out with the old cutter that came with it, but i did break down and purchase two new cutting tips to go into the holders. one is a rough cut, the other is a fine cut. with some practice, i'll get to make some cash on the side from doing bor jobs, sounds boring eh ?..lol. really though...its getting harder and harder to locate folks that can bore cylinders, let alone cheap, and fast ?. i will not be sending my cylinders out any longer to get bored out. here is a pic of big john, and little john i took today when i was working on this trx300ex.
-
3 pointsNice old guy bike
-
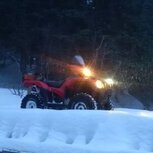
3 pointsIt's been snowing here since Thursday afternoon. I'm done with winter...lol
-
3 pointsJust wanted to take a minute to thank Ron for the repairs on my speedometer/cluster. Sent from South Carolina to Alaska and I had a working dash in 2 weeks. I definitely recommend this to anyone having doubts about doing it. Ron is a standup guy.
-
3 pointsThank you so much Jeep. You were 100% correct. After replacing the oil pump chain and installing the engine, I was still waiting on some new seals/boots for my front drive shaft. Being impatient to give the machine a try to see if everything worked, I covered the front differential to protect from dirt, and drove the machine up and down the road a couple of times. I would never have guessed that without the front drive shaft in it would cause all of these problems. Put the drive shaft with new seals & boots in last night and everything is working perfectly! Thanks again!
-
2 pointsTires for the truck. The sipper may be down for the count, blowing oil out from somewhere. Yea I know what tire threads do to undies around here….. kinda why I wanna start one…..
-
2 pointsVery true, that maybe a warning sign, but first it would be ignition fuse blowing .Went for short ride...wow, like a new machine, idles sweet, plenty of power, so happy, showing 3,250 miles in 14 years..thanks again guys.
-
2 pointsSUCCESS!!! I got in new OEM PCM today, along with OEM coil (x2), relay and idle air control valve, cranked right up and idled beautiful, coil stayed cool, no blown fuses. Thank you EVERYONE for your input and knowledge and motivating me not to give up..all back together so ride later after grass mowing..once again THANKS to you all who also put up with my whining lol...guess this thread is DONE..maybe it will help someone in the future, I know personally I learned ALOT about my machine.
-
2 pointsHi @Kyle9076 I would say it's the capacitor for the pull start -- just unplug it -- tape it up good and plug it back together
-
2 pointsIt was the ECU. Got a used one from PSN today and it fired right up. Gotta get everything put back together and get it out of the yard.
-
2 pointsUpdate.....I sent my combination meter (speedometer) to AKATV and I couldn't be happier. With the speedo now working, this has totally cured shifting issues and other minor hiccups engine related. If anyone is having mysterious driveability problems, and the speedo doesn't work, I strongly recommend getting it fixed. The service this gentleman provides is impeccable. Thank you.
-
2 pointsIt can get a bit light in the front end when climbing snowbanks loaded I've found. But I can travel faster on rough ground. Counter weight on the front rack helps. Power steering is great that way. But any quad I've had or have are tippy when loaded climbing stuff. But weight on a bit of a slope I don't find bad. Neighbor has a 2000 350 es and he loves running around on mine.
-
2 pointsI wanted to let all members know that member @Fat Tire has a lead on on a couple NOS Honda Speedometers for the Foreman 450S footshift model 1998-01, absolutely brand new in the box, and one used one with under 300 miles in VGC If you have the "black screen of death" common to the 450S, or yours is water damaged and/or non-repairable etc.. and you have found that these are discontinued- I would quickly look him up, I expect they will not be around long If I get any requests, I will forward them to him as well. -AKATV
-
2 pointsleast its not a can am !..lol.
-
2 pointsThings around here are "so flat you can watch your dog run away for 2 days" but at least we have trees!
-
2 pointsNice! Great bikes! I had a new one in late 2001. Abused the crap out of it.
-
2 pointsThis is a buddy of mines pic. You can see part of the flame on the lower left (7 o'clock)
-
2 pointsYup, g/f and I biked up by the dam to watch, bunch of ppl already there. Got real dark & cold all at once. Quite the site!
-
2 pointsPretty cool thing to see.
-
2 pointsWe’re going to drive about 45 min nw to get into totality. It’s going from about an hour west of me to an hour north of me, so we’re going to try to catch it in the middle of nowhere, where hopefully we can avoid the crowds.
-
2 pointsMy house will be in the shadow tomorrow. I'm almost in the middle of total coverage, so it should be dark here for about 4 min plus. Is your house in the path?
-
2 pointsI spent big money on a fancy Battery Tender for four batteries. I just replaced the battery for the first time on my 2014 TRX 420....They pay for themselves.
-
2 pointsHas been a bit since @Goober was here. Hopefully he's ok and just doing RLS.
-
2 pointsOK thanks for the help I fixed it valves were way out of adjustments runs great now and starts fine
-
2 pointsUpdate Big thanks to jeepwm69, I ordered an oem carb and installed on the bike. Reset the codes and the bike runs through all gears in every setting, including ESP. Still having issues with the screen going blank intermittently but otherwise the bike is operational now. Just goes to show that cheaper isn't always better!
-
2 pointscalling @AKATV.
-
2 pointssure the water is fine..until the sharks show up ?!..rofl.
-
2 pointsi have visited there, what a bunch of bs-ers. yet i visit quite often.
-
2 pointsThanks everyone for the welcoming greetings! I’ve been poking around the site and finding lots of helpful tidbits. This definitely seems like a positive and active forum! I’m glad to be a part of it.
-
2 pointswelcome bigaxejack, nice to have ya here !. fine bunch of helpful folks here. both of your machines i know very where as far as mechanic wise.
-
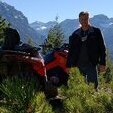
2 pointsWelcome, great group of folks here. We'd love for you to share some of the mountain scenery with us.
-
2 pointsDo we at least have matching jackets? lol
-
2 pointsjust guessing, lack of round up ?..lol.
-
2 pointswith it being 24 yrs old ?, its hard to narrow your issue down. the piston, or bore can be worn ?, the connecting rod can have play in it ?. wrist pin top at rod can be worn out ?, valves can be out of adjustment ?. really hard to tell you what it can be. the only way you will find out, is too tear the top end down, and inspect the piston, bore, valves, rings, connecting rod. BEFORE you tear it down !!. make sure to have a top end gasket kit, and a tube of yamabond or hondabond on hand !...DO NOT USE RTV SEALANT ANYWHERE ON THIS ENGINE !!!. i'll go out on a limb here, and say your piston, jug, connecting rod is worn out..one of these..or all 3 need to be fixed.
-
2 pointsMy ATV was only running on 1 cylinder.. not sure why 🤣😂
-
2 pointsWelcome aboard. Does it drive in auto mode? You need a good strong battery on these for them to work right. If you have a good battery on the machine, try initializing the system. Machine in neutral Hold up and down shift buttons in and turn key to on position Hit up, down, up on the shift buttons, then open and close the throttle within 5 seconds. That should re-initialize all the computer crap. See if that changes anything.
-
2 pointsSo anyways, let me tell you about why our country is going to crap.... 😅
-
2 pointsas always Jeep....you have my appreciation and support in your policies. thanks! Ed
-
1 pointGot another PLASTI_DIP video... and it's on chroming this go round and i think they have nailed it! The test samples Look great!... i'll send ya via PM.....
-
1 pointWelcome aboard. @AKATV
-
1 pointFirst thing I'd do is check the condition of the splines on the front prop shaft - the ones near the front of the engine can get stripped, common problem on those older Honda's.
-
1 pointYea we are in there too with TBR. Schools getting out 3hrs early today. I have my welding helmet with me lol 😎🎇
-
1 pointWell, continuity and resistance tests are meaningful only when a wire repair bonds every copper strand inside the wire together and you're 100% sure of that. So for instance, if a broken wire is soldered back together but several of the strands did not get bonded, but two or three strands did get bonded, then that wire repair would test as a good one, but would not necessarily conduct all of the current that the wire (repair) is required to handle during operation under it's normal full current load. In that case the wire would only measure a higher resistance than normal while under load. That is the reason why @Melatv suggested that you redo the repair that has the all-in-one solder/heat shrink gimmick on it. You can never be sure that the wire strands got hot enough for solder to flow into them to create a bond when using those sort of shortcut gizmos.... the wire conducts heat away quickly along it's length and commonly leaves you with a pretty pool of melted solder --- but a cold solder joint. A good temperature controlled soldering station is a must-have for harness repairs. Weller is one of the best affordable brands...
-
1 pointThese ES preps are a one-time routine maintenance procedure. By following this guide thoroughly and completely several problems that Honda created at the factory will be solved. Among those ES faults are: Honda ES systems are not waterproofed, neither electrically or mechanically Honda uses the wrong type of grease in their ES systems Honda uses insufficient amounts of grease in their ES systems (which is a good thing because the recommended grease itself is garbage) Due to excessive friction in stock ES systems reliability is non-existent, battery current required for operation is ridiculously high and the ECM is at risk for burning out You will need basic hand tools, a tub of NLGI #2 synthetic grease, dielectric grease, cleaning solvent, warm soapy water and most of the other supplies in this photo. For this guide I am using a 350 Rancher ES. All other Honda ES systems are similarly assembled so these steps apply to all of them. Begin by cleaning up the front cover and ES reduction gears cover and shift motor areas to prevent dirt and grime from getting in your work. Then unplug the harnesses and remove the reduction gears cover assembly which includes the shift motor and angle sensor in this case. Remove the reduction gears from the cover and move them to a work bench for further disassembly and cleaning. Do NOT drop the shift motor or magnets housing as those magnets can shatter or loosen from the housing. Remove the shift motor from the reduction gears cover and disassemble the shift motor completely. Inspect the copper commutator bars and the brushes for sticking, arcing or excessive wear. The commutator should be smooth and blackened with no signs of heavy arcing or erosion. Do NOT polish or sand on those commutator bars. Those bars have a thin layer built up of graphite lubricant on them. If you remove that layer you are forcing the commutator to wear in to the brushes again, which greatly reduces the life expectancy of the motor. Leave them alone. Clean the magnets housing and the armature with warm soapy water and soft plastic brushes and rinse, then squirt them both down with rubbing alcohol to remove the rinse water from them. Set them aside to dry. If you see any corrosion around the gasket sufaces of the housing or nose, remove the corrosion using sandpaper or a scotchbrite pad. You'll need clean, shiny surfaces for sealing watertight during assembly. Prep those previously leaky gasket surfaces now. Clean the reduction gears cover and small support bearings thoroughly in solvent. Clean the gears and all of the remaining metal parts in cleaning solvent as well and blow them all dry. Using a finger tip, push synthetic grease past the gaps in the metal bearing shields into each of the support bearings in the reduction gears cover until those bearings are completely packed with synthetic grease. Each bearing will take ya about 3 or 4 minutes to pack so expect to spend at least 15 minutes on them. You should feel them drag on the thick grease while turning them once you get them packed full. Now is a good time to clean up inside the front cover on the motor too, and get those support bearings repacked with synthetic grease. Note: It is very common to find one or more of those tiny reduction gear support bearings installed crooked in their bores from the factory. If you find one not installed properly, straighten it up in its bore by tapping on its outer race with a plastic screwdriver handle. The outer edges of the races should be flush with the chamfer of the bore. Failure to fix crooked bearings results in reduction gear(s) rubbing on the aluminum housings causing them to bind up. Binding gears can cause the shift motor and/or the ECM to burn up. Repack the ball bearing on the end of the armature with synthetic grease by pushing grease inside the bearing past the gap in the metal shield. Add syn grease to the bronze bushing inside the magnets housing and wet the shaft where it fits into that bushing. Be careful not to get any grease on the armature outside of that bushing and shaft end. Put a small amount of grease inside the rubber seal lips in the nose of the motor to lubricate that seal. Reassemble the brushes assembly. Coat the rubber gasket (o-ring on some models) liberally on both sides with silicone gasket maker. Depress the brush springs & brushes into their holders and place two small alligator clips (or bent pieces of wire) to hold those two brushes back so you can set the nose of the armature shaft down into the nose housing. Remove the two alligator clips from the brushes once the armature is down in the nose and clamp the end of the shift motor shaft lightly in a vise (or you can get a good grip on it with your fingers and hold on tight) while you lower the magnets housing down over the armature. If you let go of the end of the armature shaft while lowering the magnets housing down the armature will pull out and your brushes and brush springs will fly away. Hold on tight... then put your final two or three bolts in and snug them up. That completes the shift motor and reduction gears cover assemblies preps. The shift motor is now properly lubricated and is sealed up tight. Its fully submersible, you can shoot it with a pressure washer as often as ya want to and it won't ever need any more of your attention. Now move your shift motor back to your ATV... where you have already repacked the support bearings in the front cover. Remove the rubber o-ring gasket from the cover and coat it liberally with silicone gasket maker. Stuff it back into its groove in the front cover once it has been completely wetted with gasket maker. Also remove the o-ring gasket from the nose of the shift motor and coat it liberally on all sides with silicone gasket maker before putting it back in its groove. Coat each of the reduction gears liberally with syn grease. Don't be shy with it... stuff those gear teeth full of grease and make sure both sides of the gears are wetted with grease before installing them into their repacked support bearings. Then install the shift motor assembly onto the dowel pins in the cover. Apply silicone gasket maker to both sides of the o-ring gasket for the angle sensor and install the angle sensor into the reduction gears cover. In this case (350 Rancher) the shift motor harness must be routed underneath the angle sensor before the sensor is snugged down. Do NOT overtighten those screws. Now hold the bracket in place and snug each of the four mounting bolts down in a criss-cross tightening pattern. Do NOT overtighten any of those mounting bolts. You are now back where you began. Next up, adjust the change clutch per the service manual. Remove both front and rear fenders. Open EVERY wiring harness connector pair on the ATV and pack dielectric grease into each connector to seal out oxygen and water. Do NOT skip this step, this is very important, saves you 100s of $$$ and countless hours of your time! Just do it and don't be caught whining about it! 🙂 Finally, clean the frame and motor grounds and clean and dielectric grease the battery terminals. You will need a battery installed in your ATV that is in decent condition. Put your fenders and trim back on the ATV. Enjoy your properly prepped and now bulletproof Honda ES system. You're done working on it for at least ten more years, more 'n likely 20. Have fun with it!
-
1 pointI was cleaning out one of my sheds a few weeks ago and decided to move my parts/project machines out to the trees. My 89 has been my tow truck and it worked good for the job. Cleaning out the shed I got my old 5518 honda tractor going (deck was shot) so it's getting turned into my new tow truck.
-
1 pointThese are a little less... fish-eyed no gopro shots here It was after this picture that my son realized why I like my 700xx so much... Clearance baby! I zipped right through those ruts and he.. well let's just say he got to really test out those new skid plates