shadetree
-
Content Count
5,645 -
Joined
-
Last visited
-
Days Won
195
Everything posted by shadetree
-
must be trying to charge that elec ford ??..rofl.
-
you forgot to say '' here..hold my beer..i got this ! ''..rofl.
-
try another seal, be very careful how you install it, also..inspect the area where the seal fits, see if it's damaged ?, any kind of nick inside right there will cause a leak. worse case..the finale shaft is bent, if it is ?, then the engine will need to be pulled, split in order to replace the shaft.
-
it'll buff out...no worries...yeah...not !..lol.
-
sometimes it pay's to listen to me...lol. thanks for the update !.
-
take the wrist pin, install just the length of one end into the top of the connecting rod, the width of the top of rod, now lift up and push down with the outside end of wrist pin, there should not be any movement what so ever, if there is ?, the the rod is bad.
-
ty, you were right, i was wrong, i seen that es on the palstics..and went with that..lol..sorry :-).
-
ty 4 pic, you was right, i was wrong..i'm too old for this crap !..lol.
-
good deal, ty for the pic, you are correct, that is a fm model !. we will get you fixed up !.
-
ahhh..ok..i did not see you mention this ?.sorry !. can you post a pic of the left handle bar grip ?, i ask, cuz i see the buttons for an es model ?.
-
please stop calling this atv a trx450fm..it is a trx450ES !!. but the rear brake on both models are the same. what you found is the rear backing plate where the large o-ring lip was busted, very common on rear brakes when they do not get serviced much, owners tend to hammer on them, then they break them !. never hammer on the brake shoe cam !, spec where the lever attaches to on the outside ?, it mushrooms, then you can't get the cam back through the backing plate, let alone get the lever back on it. edit: was confirmed, this is an fm model, my mistake.
-
first thing you need to do is down load the service manual from the site here, FOR THAT MODEL AND YEAR !. second thing you need to do is rip that motor all the way down, go through it piece by piece, and inspect every part. chances are, the rod is bad, and this means the rod will need to be replaced ?, or the whole crank might need to be replaced ?. once you get this done, its a matter of seeing what all parts you may need to put it back together. count on a new D.I.D. cam chain, complete engine gasket kit, complete oil seal kit, tube of yamabond or hondabond ( this is just for any place there is not a gasket ?! ). you will more than likely need to have the top end bored over, and a larger piston kit. BE WARNED !!, this is a electric shift model going by the pics you have posted ?, personally, i would not own an electric shift..9 out of 10 times they are a money pit, more trouble than what they are worth. some folks love them, i myself , hate them !..lol.
-
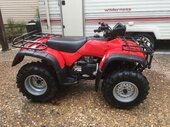
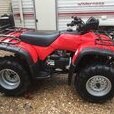
wait !!. you need to make sure you know what model you have !! ?, the pics you posted in your intro show a trx450ES model, and you said you bought a trx450fm ?, big difference !. from the pics you posted in intro, i see a trx450ES , this is a electric shift model, is not a manual shift model !.
-
for the record, your very first post said you bought a 2003 trx450fm ^^ ?, but the pic's you posted shows a trx450ES, which means, this atv is an electric shift, not a manual shift. big difference !.
-
welcome to the forum.
-
 but..but..you did not say where you got the grease idea ?, and where you got the hacksaw blade in visegrip idea from ?..sigh..but good job bro !.
 -
Also, when you line up the timing marks ?, and you have the pull starter off ?, notice the line on the pull starter cage ( stamped on one of the tangs ) ?, it goes from tip backwards in center of tang towards the back engine case. now look at the back engine case right behind the cage, at about 12-1 o'clock stamped on the case , these timing marks must line up when you set the T mark in the sight hole ?!, if they do not ?, then the cam chain is stretched .
-
pro tip !. remove the intake adjustment / inspection cap. remove the rear pull start ( yes..its in a tight spot , but will make this process go a lot easier ! ) remove the sight cap for timing mark ( right side near the pull starter ), remove the spark plug. with a 17 mm socket and ratchet, turn the crank case at the pull starter bolt to line up the T mark in sight hole, now rotate the crank with the 17mm socket/ratchet BACKAWRDS VERY SLOWLY !, as you are doing this, watch the intake valve, sooner or later the intake valve will start to go down , if it does ?, rotate the crank with the 17mm socket/ratchet clockwise ( to the right when sitting on atv ), get the timing mark back in the site hole where you started..DO NOT GO PAST THE STARTING POINT WHERE YOU STARTED !. once the T mark is in the sight hole ?, now adjust both valves. if the intake valve never started to go down when you went to turn the crank backwards ?, this means you had the T mark in the sight hole on the exhaust stroke !, you want the piston on TDC+ top dead center on the compression stroke when you set valves. PLEASE KEEP IN MIND, WHEN TURNNG THE CRANK BACKWARDS WHEN YOU FIRST STARTED TURNING ?, THE INTAKE VALVE WILL NOT START TO GO DOWN AS SOON AS YOU START GOING BACKWARDS !!. the crank has to turn a few before the intake starts to go down. Back to process, if intake valve did not move at all ?, turn the crank clockwise right back to where you started, then do a full 360 spin, get the T mark in sight hole, stop, turn the crank backwards from here, the intake valve SHOULD start to move now ?, now go back clockwise, stop the T mark in the sight hole, adjust the valves. DO NOT CONFUSE THE PROCESS HERE !. it all depends on what the intake valve does when you start turning the crank backwards ?, then follow my advice here to see when you adjust valves :-).
-
Rebuilding my 2000 Honda TRX 250 Recon. Need some help!
shadetree replied to Viktor_AZ's topic in Engine - Drivetrain
as long as it does not come in contact with the rocker faces at all ?, simply smooth it down best you can, re-use it. if the lobes are rough ?, then its best to replace it with used or new cam. BE SURE TO REPLACE CAM CHAIN AS WELL !. i use nothing but D.I.D. cam chains, or oem from honda..which by the way..honda does in fact use D.I.D. cam chains in new atvs !. by now you have guessed this project is adding up fast in cost ?, TRUST ME..MOST OF US HAVE BEEN THERE, DONE THAT ?, AND STILL GO TROUGH IT ALL THE TIME !. don't sweat it..once its all back to running ?, pat yourself on the back..have a cold one..enjoy your work !. -
don't bother trying to get it apart, they are not made to come apart, save your brain cells, just buy a new solenoid.
-
i understand perfectly, you are not explaining it correctly..but yeah, i will drop it, please let us know when you get the main jet needle seat.
-
welcome to the forums, please start a thread in the utility section if ya have not already ?.
-
Rebuilding my 2000 Honda TRX 250 Recon. Need some help!
shadetree replied to Viktor_AZ's topic in Engine - Drivetrain
see if power sports nation has a used lower case/cases ?. they might even have a crank ?. you still will need to replace the crank bearings with new regardless. -
partzilla sells each part seperate..same as if you walked into a dealership, no oem carb parts come in a kit, but if you purchased a shindy carb rebuild kit from say..ebay ?, then you would get the complete carb rebuild kit, just will not get the choke parts. honda does not sell a full carb rebuild kit..you have to buy each single part seperate !...lol.
-
honda does not sell carb parts as a kit, you have to purchase each carb part seperate. online kits from shindy..all come as a complete kit, you do not get the choke parts though...just the main carb parts.