Fishfiles 20,145 Posted December 31, 2019 Reminds me of Bird's Eye Maple ----Blue Zulu , maybe put some of your wood workin projects in a thread I started Arts/Crafts/Hobbies under the Chat heading ---- I just done a wood working restoration thing , I am about to post a pic of it in that thread 1 Share this post Link to post Share on other sites
Bluezulu49 99 Posted December 31, 2019 Unfortunately, I do not number woodworking among my meagre talents. Turbo is the woodworker in our family. He will probably post more when he comes back after the New Year. 1 Share this post Link to post Share on other sites
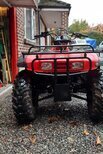
Turbo Twister 545 Posted January 4, 2020 (edited) Hi all, I had everything typed out and lost my internet connection so I'll do the short version of my story this time incase I lose it again!! I was advised to go to a Honda quad dealer in central Cork so i took the advise and brought my bike in. I was getting annoyed that the fan unit hasn't worked and we couldn't figure out why. Ed (the recommended mechanic) did a voltage test first. He found that the regulator was faulty and was drawing more than 15volts when the bike was running, so he went and searched for a new one which luckily he had 1 in stock. A quick change of this and your voltage dropped to 14.72volts at full rev. The second test he did, he removed a small metal side cover on the right bottom side of the engine, revealing a blue wire. He earthed this wire back to the negative of the battery and turned on the ignition. He said if the fan was correctly wired it would come on with the oil temperature light beside the neutral green light on the dash, unfortunately it didn't. The 3rd test required removing the front bumper and plastics, the front fenders and lights to access the cdi and wiring below the front of the handlebars. Ed replaced the cdi on my bike with a different one, he said the cdi I have didn't have a power supply for a fan unit (which it didn't). The next issue was trying to find the correct wires to connect the loom of the cdi to the fan. Not going into detail here as I was a bit confused about what Ed was doing, we called my dad to ask for a wiring diagram and a link to a parts breakdown diagram. After pulling out the exploded diagram for the wiring loom, we agreed between us that the loom on my bike is not the correct loom for the fan and it will need to be replaced in order for the fan to work properly. I have left the bike with Ed for the next 2 weeks and hope he can fix the electronic problems aswell as the kill switch that also never worked. I offered to pay for his time done to date and he refused, so I gave him a €40 tip to drown his sorrows with beer for the hassle I brought on him😂 He is genuinely interested in fixing the bike but more importantly he knows what he is doing. He also said once all the repairs are done, providing an annual service is done the bike will easily last 15-20 years more. So far what has happened with parts: New regulator. New cdi box that has a proper feed for a fan. Will require a new loom for the bike. Oil leaks will be repaired whole bike is dismantled. The second photo is a honda 500 4wd that my cousin bought yesterday from the same guy who is fixing my bike. Edited January 4, 2020 by Turbo Twister 3 Share this post Link to post Share on other sites
Fishfiles 20,145 Posted January 5, 2020 If it were me , I would run a toggle switch to that fan , the fan isn't really necessary , it was an option 2 Share this post Link to post Share on other sites
Bluezulu49 99 Posted January 5, 2020 9 hours ago, Fishfiles said: If it were me , I would run a toggle switch to that fan , the fan isn't really necessary , it was an option I discussed this with the mechanic who is used to servicing this model. He said that when it is working correctly, the fan operates in very short bursts and is not rated for continuous operation. If we wire to a toggle switch we have no way of knowing how long to run it or when the oil temperature is low enough. There is also the distinct possibility of forgetting to turn off the fan and burning out the motor. There are also the problems of the non operational kill switch and reverse light not working, both of which seem to point to loom issues. Share this post Link to post Share on other sites
Fishfiles 20,145 Posted January 5, 2020 I let them fans run with no problem yet , I wouldn't be afraid of over running that fan ---if the fan were to ever go out , I'd replace it with a automotive fan motor 4 of my atvs have coolers with fans , 2 are the stock OEM fan motors , 2 are after market automotive fans , all of them are toggle switch controlled , I turn them on after I start up and let it run till I kill the engine , not that you would ever do it , but I turn the fan off when I go into water that reaches the fan ---- the after market automotive fans are much quieter and seem to blow more air and would almost bet , but can't confirm the automotive fans draw less amps being 20 year newer and newer technology I wouldn't have a problem wiring the fan to the accessory wire , so it would run as soon as the key was on and turn off with the key , but I want to be able to turn it off in water ---------- one day I am going to rewire it so it goes thru the toggle switch from the accessory wire , it will come on automatic and then I can still turn it off 1 Share this post Link to post Share on other sites
_Wilson_™ 6,565 Posted January 5, 2020 He said if the fan was correctly wired it would come on with the oil temperature light the toggle switch would work fine ... (that's how mine is done.... I've only tested it a couple of time to confirm it worked properly) Now.... Let me get this straight.... The fan ONLY comes on when the oil temp lite activates due to high temp.... Then cuts off when the oil temp lights does ?? If so.... Then YES A toggle switch would work.... However....,for my own personal preference .... I would,like to personally control that cooling fan (not alow the engine to get hot enough to activate that oil temp light/fan) @Turbo Twister when you talk to ED again.... Do me a favor.... Ask at what temperature does that high oil temp light come on 1 Share this post Link to post Share on other sites
Fishfiles 20,145 Posted January 5, 2020 I don't think you want the fan to come on when the temp light does , that is way too late -------- seems to me when the temp light comes on it is in the critical state and about to be burnt up , in all the riding hours I have done on 300s , I can't only think of a couple of times when I seen the light come on from over heating , and it was smokin' hot when it happened --- LOL ---- Retro did a lot of experimenting with the fan temp activation on his Gizmo thread on the old site , sure there are some temps there to look at Share this post Link to post Share on other sites
retro 4,048 Posted January 5, 2020 Ya by the time the overheat temp light comes on the oil temp sensor has been overheated and its shot. Of course at that point the motor is about shot too... oil is cooked bad. EDIT: Gonna start another FCU gizmo thread near the end the month when I begin to build a gizmo for @Fishfiles 450. 4 Share this post Link to post Share on other sites
machinecrook 68 Posted January 6, 2020 I run mine on a toggle switch. Hauling wood up hill on first gear doesn't cool it quickly. During hot and humid summer temps; I'd get back home and the bike would be smoking (yet the light never turned on). Installed the fan with a toggle switch and it solved my problem. I let it run the whole time I'm hauling wood or when I feel it become hot. No issues yet. 2 Share this post Link to post Share on other sites
jeepwm69 7,605 Posted January 6, 2020 I was looking at that temp cooling gizmo thread last week. Local kid asked when the fan should cut on on his 350 Rancher. He was at 350Deg with no fan. I told him it should probably cut on about 230 and shut off at 215. That's what I gathered from reading that thread. 1 Share this post Link to post Share on other sites
retro 4,048 Posted January 6, 2020 Yeah, every Honda oil temp sensor measures differently, so some motors might reach 220 degrees oil temp (or higher) before the fan turns on and some (or most) might kick the fan on a lot sooner. As the sensor degrades with age the fan kick on temp keeps rising until the motor cooks. My 2000 Rancher bone stock reached 218 degrees oil temp (on average, its difficult to get an accurate oil temp using a laser temp gun) measured at the hose fitting entering the oil cooler before I wired a 100k ohms pot in parallel with the oil temp sensor to provide a small amount of adjustability. Then the following year the programmable FCU gizmo was fashioned by @wheelsquad and I to provide the ultimate in fan control. Honda provides a crappy low quality (and very lazy) thermistor inside their oil temp sensors that are not even usable in a decent FCU system. Brand new $40 sensors are useless slugs... total garbage. For less than $3 I can gut those sensors and put a high precision 10k ohms thermistor in the brass that will last for many decades longer than a Honda sensor will. 7 Share this post Link to post Share on other sites
TBRider 1,407 Posted January 7, 2020 On mine for some stupid reason I noticed mine kicking on more often than before, temp bar stays at 2 bars. Share this post Link to post Share on other sites
retro 4,048 Posted January 7, 2020 Check that the oil cooler is not clogged up with mud and grass seed? Sometimes they can look OK but be clogged up in the middle. EDIT: Unless you're talking about a liquid cooled motor? Share this post Link to post Share on other sites
Turbo Twister 545 Posted January 7, 2020 No word on the status of the bike yet, I will contact them soon for an update. You guys sure know a lot about sensors and electronics! It's not my forte! I finally got around to the trailer again this evening.. I sparked an idea in my head to fit an adjustable stump so I can have the trailer hitch off the ground when I'm working on it (axle stands are a pain when the object they are holding/balancing is too light), so this helped with steadying the trailer big time! I'll cut the leg to height when its hitched to the bike so it's not sitting on the ground when attached, making it easier to adjust. (Don't have the bike to check the heights anyway). I got a side welded on this evening and had enough so I'll hopefully jump into it again tomorrow evening and get the sides finished.. 3 Share this post Link to post Share on other sites
Turbo Twister 545 Posted January 10, 2020 (edited) I got stuck into the 3rd side of the trailer this evening and when I had welded the 3 outer bars on, I decided to take a break from that and work on a triangular piece for in front of the wheels (Thanks @Melatvfor that idea!). Here's what I came up with.. I only had time to make up 1 prototype but I'm quite happy with it as I just cut out a 30° angle in opposite directions meeting at a point on some 40mm box iron, bent the steel to close the gap and then welded the joint together. Im not a fan of open ended steel where water and mud can sit inside and rot the steel so what I have come up with should avoid those issues.. The outer most point of the triangle is about 15mm proud of the outer edge of the tyre so it should avoid any trees or obstacles I come across.. Hope to make up the other one tomorrow before welding them in situ. How much clearance would you guys recommend leaving between the front of the tyre and back of the triangle? I was thinking about 50mm/2inches max? Edited January 10, 2020 by Turbo Twister 1 Share this post Link to post Share on other sites
Melatv 789 Posted January 10, 2020 Hi: It would depend on what air pressure you run in your tires and the weight you have in the trailer - I run around 10 psi in each tire -- keeps trailer from bouncing around. -- the trailer tow bar is a pipe in side a pipe, so it will swivel -- had problem with the hitch lifting the rear of the bike when the trailer was going over large rock and stumps. -- pipe in the pipe made a big difference. 3 Share this post Link to post Share on other sites
Turbo Twister 545 Posted January 11, 2020 11 hours ago, Melatv said: Hi: It would depend on what air pressure you run in your tires and the weight you have in the trailer - I run around 10 psi in each tire -- keeps trailer from bouncing around. -- the trailer tow bar is a pipe in side a pipe, so it will swivel -- had problem with the hitch lifting the rear of the bike when the trailer was going over large rock and stumps. -- pipe in the pipe made a big difference. The tyres on mine are quite narrow, I might be able to get slightly wider ones to fit the rims on it. I'll keep the steel a minimum of 50mm infront of the tyre so. Is your hitch attached to a pipe inside a pipe? I went with square box iron but I have several holes drilled on the inside tube so I can adjust the length of the drawbar when towing. There is no left to right wiggle with it. The max weight I will have in the trailer is about 150-200kg. The sides are only 300mm (12inches) high deliberately, so I don't overload for the bike. It's to carry chainsaws, milling equipment, a passenger on rare occasion and some planks or firewood. Share this post Link to post Share on other sites
Fishfiles 20,145 Posted January 11, 2020 Nice work as always Turbo... Mel , gave a great idea of the pipe inside a pipe , so the pipe attached to the hitch will twist on uneven terrain and not put that twisting force on the hitch and trailer ---- I have quite a few parts I have been saving for a trailer build , I am going to use Mel's idea for the hitch tube , I have a Bull Dog hitch that I can make fit right to the end of a pipe , have you ever seen a Bull Dog , I had a pic of a guy's boat hang over the side of s bridge still attached to the bumper and it didn't let go ---- the plan on my next trailer is a dump trailer , I have bed off a Workhorse cart , it is made of high strength plastic , holds about a yard of dirt and dumps with an actuator , got the axle , hubs , rims and tires , just would need to build a frame --- I could use a trailer like that ^ 1 Share this post Link to post Share on other sites
Melatv 789 Posted January 11, 2020 (edited) Hi: This is how I built it. Edited January 11, 2020 by Melatv 5 Share this post Link to post Share on other sites
Fishfiles 20,145 Posted January 11, 2020 Mel , very nice, thanks for the pic ----- so what did you used , something like 2 " and 1 1'2 ? Share this post Link to post Share on other sites
Melatv 789 Posted January 11, 2020 27 minutes ago, Fishfiles said: Mel , very nice, thanks for the pic ----- so what did you used , something like 2 " and 1 1'2 ? I used 2.5" schedule 40 and 2" schedule 40 -- pipe was free at the time. -- but long as you can find a pipe to go inside a a pipe go for it. 2 Share this post Link to post Share on other sites
Turbo Twister 545 Posted January 11, 2020 Got really stuck into the trailer today. I had planned to go hunting with my dad but work got in the way! So when I got back I made up the second triangle shaped bracket for infront of the wheels. I welded both on at 65mm infront of the tyres. I also got the 3rd side fit and came up with a brain fart on how to beef up all 4 sides. Dad purchased a threaded riveter a few months ago, so I drilled through the tail gate x4 and through one skin of the rear of the side parts, fixing a threaded rivet to the ends of each side. Then I bolted the back on to the sides using 4x M8 bolts. I also did this on the front piece either end at the top to tighten all 4 sides against eachother. As a result of the above, I shouldn't need to pin the front or sides to the main frame, meaning assembly/unassembly time is reduced.. but a trip on rough terrain will answer that question! I just have to cut the checker plate now and paint everything before fixing it permanently to the sides and floor. 3 Share this post Link to post Share on other sites
Melatv 789 Posted January 11, 2020 Hi: That's a good spot -- it sure will keep the trailer from getting caught on a tree -- great job with your trailer build 2 Share this post Link to post Share on other sites
Turbo Twister 545 Posted January 11, 2020 51 minutes ago, Melatv said: Hi: That's a good spot -- it sure will keep the trailer from getting caught on a tree -- great job with your trailer build Thanks @Melatv! it has been enjoyable all beit a bit frustrating at times! I hope to have it ready before I get my bike back from the mechanic, they haven't look further into it yet as they have an open weekend to showcase the 2020 honda quads at an event, so hopefully I hear back sometime next week. 3 Share this post Link to post Share on other sites