Turbo Twister 545 Posted March 17, 2020 Got stuck into some painting today, all 4 sides are now painted and once dry, I will cut the aluminium checker plate to length and fix it all together. I also painted some parts of the trailer frame but will need to flip it and do the top side when I get a chance. I think the steel plates on the underside will be big enough for the new trailer suspension units dad got (hopefully!) I made up a steel bracket for my trailer (in a previous photo above) last week and fixed it to the trailer with dad earlier. We used 6mm aluminium threaded rivets which are a fantastic idea! Now, my tarp doesn't need a temporary prop anymore and will permanently stay on the trailer to keep the water out. 2 Share this post Link to post Share on other sites
Turbo Twister 545 Posted March 17, 2020 I also had time to clean the brake guard and rear diff guard, give them a coating of etch primer and paint the two of them with a 1st of 2 coats of oxide paint. It's very shiny paint and less wasteful than spraying in my opinion. The sun is gone now and it's getting cold so I'm doing another bend of steamed beech before I go inside. Share this post Link to post Share on other sites
Turbo Twister 545 Posted March 22, 2020 Some progress photos of the trailer!😁 The weather is really nice today so an ideal time to work outside. I got the top of the frame painted and fixed stainless rivets through the checker plate to the frame. I have also done the two sides, just the front and rear to go. As dad previously mentioned, the old suspensions were knackered so I'm still waiting for the new ones to show up before fully completing the trailer. I will probably fit the new hitch in a few days time as that part is still drying. I bought small reflective rectangles for the front sides and rear so will be fitting these at some stage today. More photos to come. 4 Share this post Link to post Share on other sites
Turbo Twister 545 Posted March 22, 2020 Taking shape. 3 more reflectors to fit, then it's just the hitch, suspension units and wheels! 3 Share this post Link to post Share on other sites
Turbo Twister 545 Posted March 22, 2020 I'm contemplating lining the inside of the trailer with plastic and using it as a hot tub in the summer! Finished internal dimensions are 1160mm x 850mm (I no longer use an imperial tape measure as everything in Ireland is metric calculated). Roll on the next outing so I can finally put this to some good use! (When I get the wheels)! 1 Share this post Link to post Share on other sites
Turbo Twister 545 Posted March 22, 2020 I also got the brake drum bash plate fixed onto the quad, along with 4x new rubber mounts. I have to fit the rear drive bash plate aswell but the weather turned cold very quickly so I will do it another day.. 4 Share this post Link to post Share on other sites
Turbo Twister 545 Posted March 23, 2020 An hour later, I finally got the bugger on! The front bolt hole wouldn't line up at all, it was only off by about 3mm so I bored the hole an extra half mm and managed to persuade the bolt in. Things looks great when they step clean and new! Next few jobs on the bike include repairing 2 of the mud guards, they became loose on the metal supports during my last outing. The left inner fender needs bolting at the bottom, I only noticed this wasn't refit a day after I got it back from the garage🤔 I also intend to remove the skid plate to replace one of the bolts I snapped and I'll cut out a hole for the engine oil drain bolt as suggested by one of you wizards a few months back, think it may have been @shadetree? 3 Share this post Link to post Share on other sites
Fishfiles 20,145 Posted March 24, 2020 Nice , looking good ---- the new rubber bumper plugs on the skid guard puts it over the top first class , LOL A old iron worker trick which may have helped you , put in all the bolts that align finger tight , put an awl or line up punch in the hole that is mis-aligned , pry the tool over to make the hole align , tighten up the bolts with a wrench while holding pressure on the tool , sometimes the metal will stay and you can get the bolt in 1 Share this post Link to post Share on other sites
Turbo Twister 545 Posted March 24, 2020 11 minutes ago, Fishfiles said: Nice , looking good ---- the new rubber bumper plugs on the skid guard puts it over the top first class , LOL A old iron worker trick which may have helped you , put in all the bolts that align finger tight , put an awl or line up punch in the hole that is mis-aligned , pry the tool over to make the hole align , tighten up the bolts with a wrench while holding pressure on the tool , sometimes the metal will stay and you can get the bolt in I think the reason the front bolt was so hard to get aligned was because some of the rubber mounts were too big (long). I took 2 of the longer ones out and replaced them for stubby ones and this helped a lot, while still maintaining a gap between plate and rear drive. Share this post Link to post Share on other sites
Fishfiles 20,145 Posted March 24, 2020 I can see where you are coming from , you might have been able to put a jack under the cover and jack up , it may have bent it a bit and lined it up Share this post Link to post Share on other sites
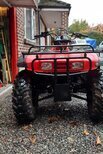
Fishfiles 20,145 Posted March 24, 2020 Your trailer looks good , waiting on a pic with the bike and trailer behind it 1 Share this post Link to post Share on other sites
Turbo Twister 545 Posted March 24, 2020 2 hours ago, Fishfiles said: Your trailer looks good , waiting on a pic with the bike and trailer behind it Me too! Still waiting on the new suspension units so I can fit the wheels and bearings. 2 hours ago, Fishfiles said: I can see where you are coming from , you might have been able to put a jack under the cover and jack up , it may have bent it a bit and lined it up I did indeed have to use a jack to get it into place, but I had to remove the back wheel to get at the front bolt. I'm glad it's on now, no more worries about hitting either of those components off big rocks or tree stumps etc. 1 Share this post Link to post Share on other sites
Turbo Twister 545 Posted March 26, 2020 I have purchased a new tow hitch for the bike, an extendable but also quickly detachable one so I can pull dads trailer with it (the hand hook on his trailer opens up very high and fouls the storage box where the original hitch is). I sprayed the nut with oil yesterday to allow it soak in, but I still needed a 6ft long box section of steel on the wrench to open the bugger!💩 after I got some movement, I put an offcut of plywood behind s vice grips on the top of the tow ball so as the protect the rear drive case from damage. It worked a treat! The new hitch is in the post so it will probably take at least a week before it arrives.. 2 Share this post Link to post Share on other sites
jeepwm69 7,605 Posted March 26, 2020 25 minutes ago, Turbo Twister said: I have purchased a new tow hitch for the bike, an extendable but also quickly detachable one so I can pull dads trailer with it (the hand hook on his trailer opens up very high and fouls the storage box where the original hitch is). I sprayed the nut with oil yesterday to allow it soak in, but I still needed a 6ft long box section of steel on the wrench to open the bugger!💩 after I got some movement, I put an offcut of plywood behind s vice grips on the top of the tow ball so as the protect the rear drive case from damage. It worked a treat! The new hitch is in the post so it will probably take at least a week before it arrives.. I would look closely before you put a long hitch on there. I have one like this on my 09, which has a basket on the back. It will pull light loads ok, and the length is nice to get it out from under the rear basket, but a long hitch puts a tremendous amount of leverage on the rear axle, and will twist it up under the wheeler if you overload it. https://www.princessauto.com/en/detail/atv-receiver-hitch/A-p8251704e 2 1 Share this post Link to post Share on other sites
Turbo Twister 545 Posted March 26, 2020 Dad was talking to one of you guys a few days ago and gave some great advice on how to replace the rubber grommet (plug) in the top right side of the engine. I have sprayed the whole head with grease cleaner and once dry, I will run the engine to see exactly where the oil leak(s) is/are coming from. While waiting for said cleaner to dry, I noticed that the front right side of the bike looked lower than the left side (front right wheel as sitting on the bike), so I got a tape measure out and sure enough, the left side was an inch lower (I emptied the box on the front rack beforehand). It wasn't until I jacked up the bike I noticed a flat tyre, so I thankfully sorted that worry out (thinking it might have been a bad front spring!) I am currently tightening up the front hub nuts as the wheels are rocking a little, so I'll fill that tyre with air and wet it with soapy water to see can I find any air leaks.. I suspect it's a leaking valve. Share this post Link to post Share on other sites
Turbo Twister 545 Posted March 26, 2020 1 minute ago, jeepwm69 said: I would look closely before you put a long hitch on there. I have one like this on my 09, which has a basket on the back. It will pull light loads ok, and the length is nice to get it out from under the rear basket, but a long hitch puts a tremendous amount of leverage on the rear axle, and will twist it up under the wheeler if you overload it. https://www.princessauto.com/en/detail/atv-receiver-hitch/A-p8251704e I never thought about that! To be honest, the bike will probably never pull any more than about 150-200kg. But you do make a valid point! Share this post Link to post Share on other sites
Turbo Twister 545 Posted March 27, 2020 The suspension units arrived today, along with the mower deck for my next project! I greased everything up and have assembled both wheel units. To my luck, the holes from the old suspensions match like for like with the new ones, I just had to drill 2 extra holes on each side of the trailer for the 6 holes per new unit. I have to get new bolts so I cannot complete the trailer until I have them. Share this post Link to post Share on other sites
Turbo Twister 545 Posted March 31, 2020 As it turns out, there was a mix up with the suspension units that came for my trailer, I got two units for the same side of the trailer, ( I didn't cop it until I had them both greased and hubs assembled). Long story short, they took the wrong one back this morning and dropped out the opposite side. I still can't fit them as I cannot purchase bolts due to CV19.. grrr!! Share this post Link to post Share on other sites
Fishfiles 20,145 Posted March 31, 2020 Bummer Turbo !!! Hey , you got a deadline to meet on this build , LOL = patiences my friend !!!! Good things come to those that wait .... 1 Share this post Link to post Share on other sites
Turbo Twister 545 Posted April 8, 2020 (edited) On 3/31/2020 at 1:03 PM, Fishfiles said: Bummer Turbo !!! Hey , you got a deadline to meet on this build , LOL = patiences my friend !!!! Good things come to those that wait .... Only seeing this now! For some reason, even though notifications are turned on for this thread, I don't get any when someone posts! The replacement suspension unit arrived late last week and I eventually ordered bolts to mount them, I also got bolts to refix the several parts I removed from the mower deck. Haha, the deadline is, and always will be "2 months time" if anyone asks! Forgot to add, the new tow hitch also came yesterday, it will only be used for towing the mower or dads little trailer (now that it can actually be hitched on the bike). The tail of it is removable which will be handy. Edited April 8, 2020 by Turbo Twister Share this post Link to post Share on other sites
shadetree 5,864 Posted April 8, 2020 not done yet ??..wth !!!..lol. 2 Share this post Link to post Share on other sites
Turbo Twister 545 Posted April 8, 2020 4 hours ago, shadetree said: not done yet ??..wth !!!..lol. Too busy with work! Although it looks like we will be closing down again after this week due to our council pulling the plug on the job! We were in this week after getting the green light but they changed their minds, so I can finally finish the trailer and get back to working on the mower. 2 Share this post Link to post Share on other sites
Fishfiles 20,145 Posted April 10, 2020 I been looking for your deck build to show up on the vintage mower site Yesterday my buddy called me up and asked me if I want a craftsman lawn tractor that he wants out his garage. Free. Says it ran last time he used it. He doesn’t have much grass to cut any more as he added a shop ,drive way and some gardens I told him for sure. Suppose to pick it up this weekend. 2 Share this post Link to post Share on other sites
jeepwm69 7,605 Posted April 10, 2020 The problem with cheap mowers is the parts aren't cheap to fix them up! I picked up a John Deere 112L a couple of months ago. $125, and all it needed was two new tires on the front and a new battery to be useable. Dang muffler is shot though, and a replacement costs more than I paid for the mower. No aftermarket options either! Share this post Link to post Share on other sites
shadetree 5,864 Posted April 10, 2020 1 hour ago, jeepwm69 said: The problem with cheap mowers is the parts aren't cheap to fix them up! I picked up a John Deere 112L a couple of months ago. $125, and all it needed was two new tires on the front and a new battery to be useable. Dang muffler is shot though, and a replacement costs more than I paid for the mower. No aftermarket options either! i trick i learned on a 2 cylinder lawn tractor i had years ago, muffler was shot, it was 2 cylinders into one muffler. i went to tractor supply, bought two reg old timer lawn mower straight mufflers, some gavl pipe adapter fittings, screwed them to the mufflers, then single screwed the mufflers into each separate cylinder, tim allen special !, looked pretty dang cool, rofl. 2 Share this post Link to post Share on other sites