Mossboss 7 Posted January 12 Newbie here, Have been having shifting issues with my 2003 450 es, I installed the angle sensor bypass kit and I am able to shift from neutral to reverse and back and to 1st and back but my display is flashing 5 times indicating a bad ecu, could this be effecting the shifting from 1st up, I can use the emergency shifter and go through all the gears with no problems. Really getting frustrated with this electric shift Thanks Share this post Link to post Share on other sites
jeepwm69 7,611 Posted January 12 Welcome aboard. If you put an angle sensor bypass kit on, that should have eliminated the ECU from the process. Have you removed your shift motor and cleaned the gears under the shift motor? Does it TRY to shift to 2nd when you hit the upshift button in 1st? @retro's write up here kinda shows the process of cleaning up the shift motor and gears. Also, have you tried adjusting your clutch? 2 Share this post Link to post Share on other sites
Mossboss 7 Posted January 12 Yes sometimes other times you can’t hear it, so with the bypass kit the shift numbers on the display will always flash? Share this post Link to post Share on other sites
jeepwm69 7,611 Posted January 12 Yes. I converted a 350 from ES to footshift, and the ECU will always throw error codes since it can no longer get a proper reading from the ECU. In your case, you added a bypass kit, in mine, I added a footshifter. 1 Share this post Link to post Share on other sites
Mossboss 7 Posted January 12 Ok then I will concentrate on pulling the shift motor and cleaning it Share this post Link to post Share on other sites
retro 4,048 Posted January 13 Hi Mossboss, here is a guide that if followed completely should get your stock ES shift system working again. Generally there is no need for a bypass kit, not until the shift ECM fails. Even then it's always wiser to fix the ES right. Make sure that you put all of the original Honda parts (including the OEM angle sensor - aftermarket parts do not work) back on your Foreman after prepping according to the guide. Let us know how it goes. Have fun! 1 Share this post Link to post Share on other sites
Mossboss 7 Posted January 13 Thanks for the info retro, I think I have more problems, Ok here is where I Stand, I can shift between 1-N-R no problem with electric shift, but to shift up I have to move the foot lever a little before I can shift up to 2,3,4 gear, once in third I can down shift to 2 and back to 3 with no problem but once I go to 2 Ihave to move foot lever a little to get it to go to 1 and neutral Share this post Link to post Share on other sites
retro 4,048 Posted January 14 Why did you put a ES shift bypass kit on it? Were the symptoms the same before you plugged in the ES bypass? Please explain. Here is the clutch adjustment instructions from the service manual, you'll need to adjust the clutch after you follow the ES prep guide completely AND return the ES system to stock. You haven't properly prepped it yet, so you can't expect the ES to work...... wash out the old hardened white grease and make sure that the reduction gears are not rubbing on the case or cover and make sure that the tiny support bearings are not cocked in their bores. Use synthetic grease liberally.... pack the support bearings full of grease and coat the gears & gear teeth good and thick. Everything is in the guide.... Keep us posted and have fun! 2 Share this post Link to post Share on other sites
Mossboss 7 Posted January 14 Symptoms before were it would not shift , took off motor and cleaned and regressed with lithium grease, reinstalled and still no shift. Installed bypass kit and that’s when I found it shifting as stated in my last post Share this post Link to post Share on other sites
Mossboss 7 Posted January 14 Just trying different things, as I won’t be able to do the full prep that you sent me until spring as I don’t have garage to work in out of weather (from New England) Share this post Link to post Share on other sites
retro 4,048 Posted January 15 I can sympathize with that.... I prepped my Rancher ES during the winter with 2 feet of snow already down.... no shelter. I took the parts indoors to complete the work, but I had to wash the tiny bearings in the front cover, pack them with grease and reseal the shift motor cover outdoors. I spent two days on it if I remember right. If you have a good multimeter you can check the Angle Sensor resistance (manually shift up and hold - shift down and hold - to measure resistance) at rest and each direction of sensor rotation as the service manual instructs. Let us know if we can help. Share this post Link to post Share on other sites
Mossboss 7 Posted January 15 Out of curiosity, how much should the adjustment bolt turn before you get resistance? Share this post Link to post Share on other sites
retro 4,048 Posted January 15 When the change clutch is properly adjusted there should be 1/4 turn of the adjusting screw counterclockwise, where initial resistance is felt. The initial resistance that you'll feel is the adjusting screw making contact with the clutch release hardware. If you were to continue to turn the screw against resistance you would be releasing the clutch with the screw which is a bad thing to do - you would be making the clutch slip. If you were to back out the screw from the initial resistance more than 1/4 turn clockwise you would be providing too much slack in the release mechanism - in that case the clutch may not fully release during shifts which may cause shifts to fail. So it is imperative that you only allow 1/4 turn of slack in the adjusting screw for proper clutch operation. Turn the screw in and out a few times to get a feel for finding the first contact of the screw against the change mechanism.... you should be able to feel the screw making contact without forcing it at all. Then back it out 1/4 turn exactly, hold the screw still while you tighten the locknut down. Put some grease on the threads of the screw and locknut to prevent those threads from rusting and seizing up. Share this post Link to post Share on other sites
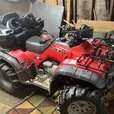
Mossboss 7 Posted January 15 (edited) Ok braved the cold today and pulled shift motor, found the large gear is broken, the tit that goes into shift motor side bearing broke off, it is stuck in bearing. How do you remove bearing from housing so I don’t damage it, Edited January 15 by Mossboss Added photos 3 Share this post Link to post Share on other sites
jeepwm69 7,611 Posted January 15 Well I'd say you found your problem. That's going to require a little bit of brain to get out. Maybe drill a tiny hole, screw in an easy out and pull on it? Be hard to drill since it will want to spin. Maybe tack weld on it a bit and see if you can pull it out by grabbing the weld? Or just order a new cover on ebay. Used would probably be cheap. 1 Share this post Link to post Share on other sites
THH 295 Posted January 15 There are a couple of ES motors on PSN for 49 bucks. Share this post Link to post Share on other sites
Mossboss 7 Posted January 15 (edited) I ordered the gear and bearings fro partzilla, so I am going to try and just take bearing apart and remove it and install new bearing Edited January 15 by Mossboss Share this post Link to post Share on other sites
retro 4,048 Posted January 15 You can put the cover in a pot of water and bring the water to a boil. Then fish the cover out of the hot water and rap it sharply on a piece of soft wood or something soft. Those bearings will all fall out of the cover..... then you can push the broken gear stub out of the bearing. Wear gloves when handling the hot cover and attach a short piece of wire to the cover before you dip it, so you'll be able to pull the cover out of the hot water without risking a burn. Immediately after the bearings cool down lay them down on a flat, clean surface and force synthetic bearing grease into each bearing until they are fully packed using your finger to push grease past the metal shields. The metal shields have a narrow gap in them where they will accept grease. Packing them with grease immediately will force all of the water out of the bearings and prevent them from immediately beginning to rust. So have your synthetic grease ready.... Congrats on finding the problem! Stay warm! Share this post Link to post Share on other sites
retro 4,048 Posted January 15 Make a mental note where each bearing come from so you can put them back. Then you reinstall each of the bearings by gently tapping them down into their bores while keeping them straight. You can use the end of a plastic screwdriver handle to tap them down until each one is flush with the bottom of the narrow 45 degree chamfer that is machined into the top of each bearing bore. The key thing here is to drive the bearings in straight. If any one of them is cocked sideways in a bore even just a tiny bit, the reduction gear will bind against and rub against the cover which will cause excessive friction and a no-shift issue. Keep us posted on your ES prep. 1 Share this post Link to post Share on other sites
Mossboss 7 Posted January 20 (edited) Well had to pick up a small propane heater to warm my shed up a little to make it tolerable to work on quad, got the new bearings in and replaced the broken gear, cleaned up the old grease and put new synthetic grease in it, sealed the motor cover with gasket maker and also the gear cover, installed new angle sensor, added dielectric grease to connectors for motor and angle sensor, tested good, had to adjust change clutch, shifts really well now, nice and easy, tried it in the yard and boy what a difference from before. Thanks retro for all the information and answering questions, appreciate it. Will clean and grease the rest of the electrical connections when it gets a little warmer, also finish wiring in brake lite I installed on back of seat Edited January 20 by Mossboss 3 Share this post Link to post Share on other sites
retro 4,048 Posted January 20 Awesome! Thanks for sharing! Have fun, hope you hang around. Share this post Link to post Share on other sites