
Gremlin
-
Content Count
88 -
Joined
-
Last visited
Everything posted by Gremlin
-
 Anybody on the best way to weld it up? Thinking patch and maybe a cross plate but welcome suggestions.
 -
Literally! Its painful seeing the scores you guys get for the money you pay🤢😖 haha
-
Sounds like a 20 bucks or less a knuckle kinda deal. Or a pay forward/trade. Thanks guys!!
-
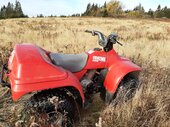
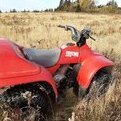
It is a project! Lol It has always been the machine I really wanted so to rebuild it and customize it is BIG motivation for me. Lol And speaking of rust. Dang it! Flipped the frame to cut off the plow mount they had on it. Figured I might find a bad spot. Not really. But found one in the front. Advice peeps on how best to weld that up. I'm thinking just a patch as the rest of the tube is solid but open to some expert advice here. Lol see scary rust pics! Atlantic Canada is the Rust Capital!! Haha
-
So got a set of 420 knuckles to do the front disk conversion on my 350 rancher. And a different front diff. What can I sell the 350 knuckles for? What are they worth? Also the front brakes and front diff? Thanks!
-
Hahahaha So my other half half wanted an sxs but honestly, the pioneers are too utilitarian and the talons hadn't come out. Besides that I wanted a trail version for the width. Ended up with a Candy Ann. Its actually been 2 great years of riding it but never holds a candle to the fun I have in the Hondas!! Maverick trail is actually an amazing machine! It is still a 3 to 1 ratio for hondas so I feel that is ok! Haha
-
10-4! I think I got it pretty clean without removal. Since it is a rebuild from the ground up I want to clean every nook and cranny of everything....especially wire connections. Nothing worse than trying to track down an electrical issue!!
-
Thanks @Goober! It dis not seem like it wanted to budge so I didn't force it. I ended up flushing it with electric contact cleaner and put the dielectric to it. All the other switches came right out for cleaning. I will pay attention to the % vinegar I use. I went at one of them yesterday the old fashion way. Usually I would use rust check converter which I have had luck with in the past but these parts may be too pitted for that so will try the vinegar. I plan on doing small batches. The bottom one I scraped, sanded. The top was just scraped. No converter or vinegar yet.
-
It may require a washer for spacing before the nut. What a pain.
-
So, after grinding off the rust and examining the bolts....it was obvious it was going to be a gong show. They came out but only after one snapped off in the head, then the easy out snapped off in the head. The one I thought was going to break didn't and the one I thought would be cooperative wasn't. Had to retap and the stud is at a very slight angle now but I think it should work. I hope anyway. Thanks for all the advice guys. I hope to never, EVER have to attempt that again, ever!
-
Thanks! I have yet to clean the used 400at diff and shaft up. They looked pretty square. Hard to tell with the dirt. Lol
-
Oh boy.....not looking forward to having to drill them out. Fingers crossed. I'm going to soak these for a few more days. Not sure if it will help but..... Thanks guys!
-
Thanks for that mountain of information! I was wondering about the bushings. I removed everything else but had left the bushings in. I have all new (as they are interchangeable amongst the other machines) but they are good so hated to waste them. I have nothing but time. I don't however have a full time heated garage. Would there be funes to worry about to just let the container sit in the basement? Of course doing messy activities outside. The angle grinder and dremel was the plan with the frame. No fear of the grinder, only a very healthy respect.
-
Keep your fingers crossed for me. Lol. Think I'll heat cycle a bit and try to draw in some PB Blaster for a few days.
-
They are lefty loosie? Not a reverse thread? Should I use propane or map? Aluminum is such a heat sink. I'll try with the removers first and if they won't I'll weld some nuts on. Welder isnin a different building so not anxious to move the engine there in the snow. Lol
-
Oh I will!! Just had my disaster for the project. Snapped my exhaust bolts on the replacement engine. Guy I got it from destroyed the nuts trying to get them off. Posted in the engine section for advice. Luckily still studs showing. But ! it. Lol
-
So the motor I bought to replace my 350 was bought from a guy that destroyed the nuts trying to get them off. I soaked in PB for 2 weeks, heat cycles but just snapped them both off. Nuts!! There are still some of the studs showing. Should I attempt with stud remover? What is my best next course of action and can I replace them easily I dont mess the threads? My worst fear realized. Hahaha
-
I have a hole there. I'll poke at it some more. Lol
-
Ok. I'm sanding off what I can but parts on the frame and a arm's are pretty pitted in areas. I'll try the vinegar!! Thanks!
-
Very time consuming but the proper way to go. I had read that. Just plain white vinegar? How long do you let it sit? I have a lot of work ahead of me but it will be totally worth it!! It'll be a creamsicle 2.0! Hahaha
-
I haven't taken them off before either. Seems like it should pop off but want to verify with someone best way so I i don't crack it. Lol I'm cleaning every nook and cranny of this quad.
-
Cleaning the harness and switches. Does the kill switch just pop off? The red slide part. Got everything else off but the kill wouldn't budge and wanted to be sure there isn't a trick to removing.
-
Looks awesome. I'd be glad if my clean one turned out as food as your dirty! Haha The silt is terrible to get off!
-
How long do you let it sit? Do you worry about it putting the aluminum? And same for knuckles?
-
Comparison shots. 400at and 350 diffs. What is going to be my best product for getting the housings clean? The next month or two will be clean, clean, and clean some more.
