
TrxPipUK
-
Content Count
283 -
Joined
-
Last visited
Posts posted by TrxPipUK
-
-
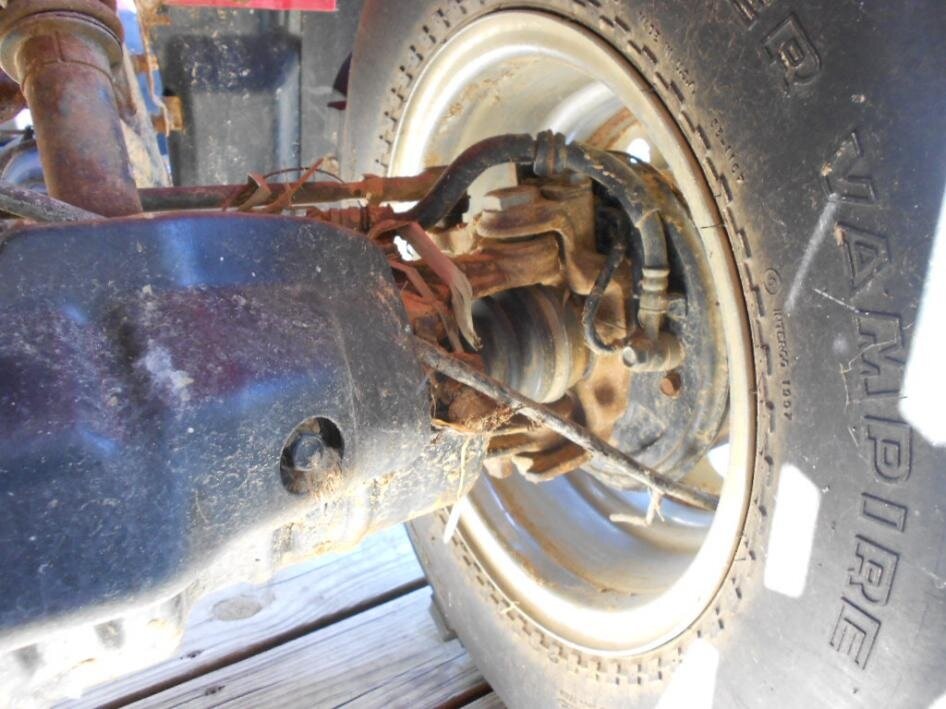
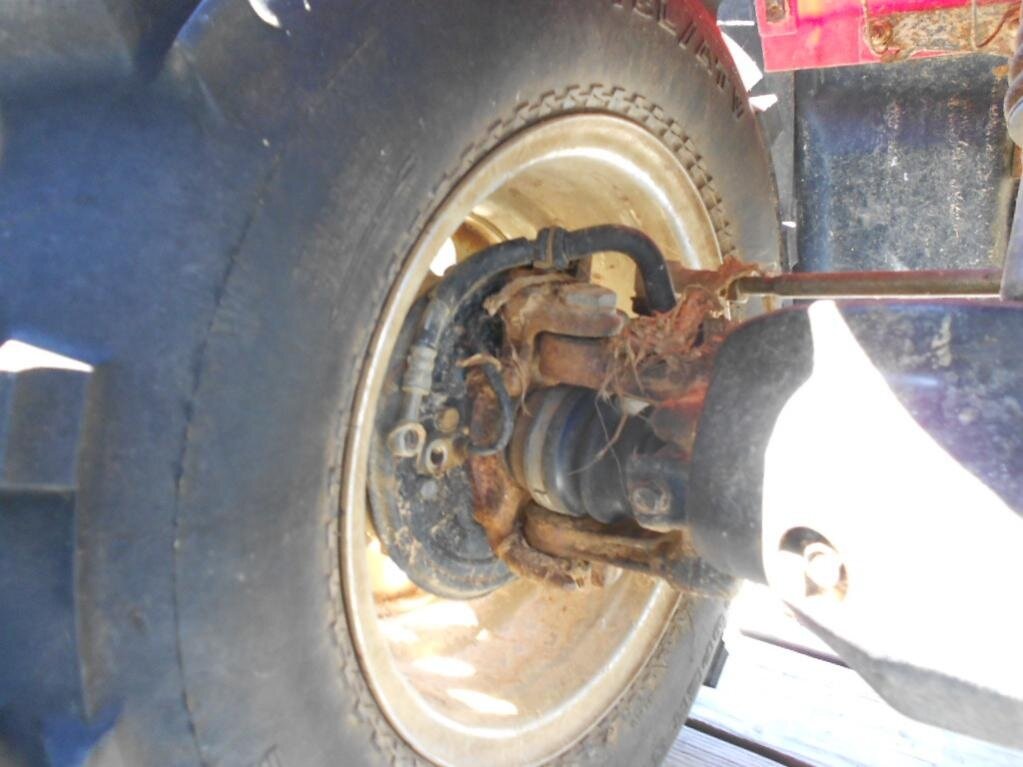
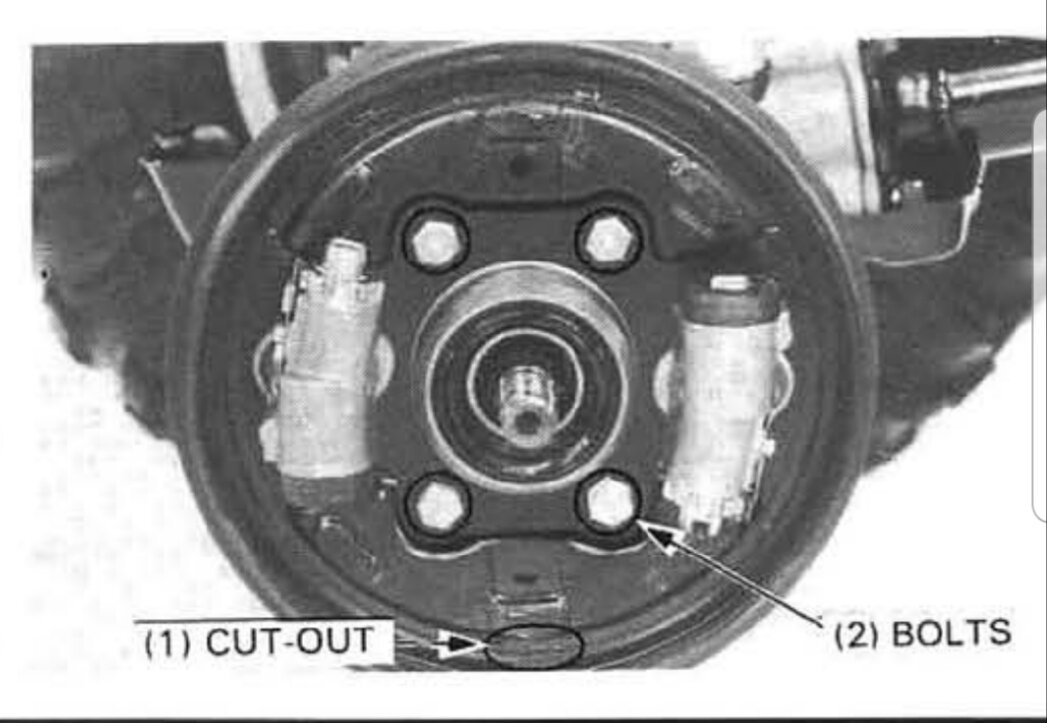
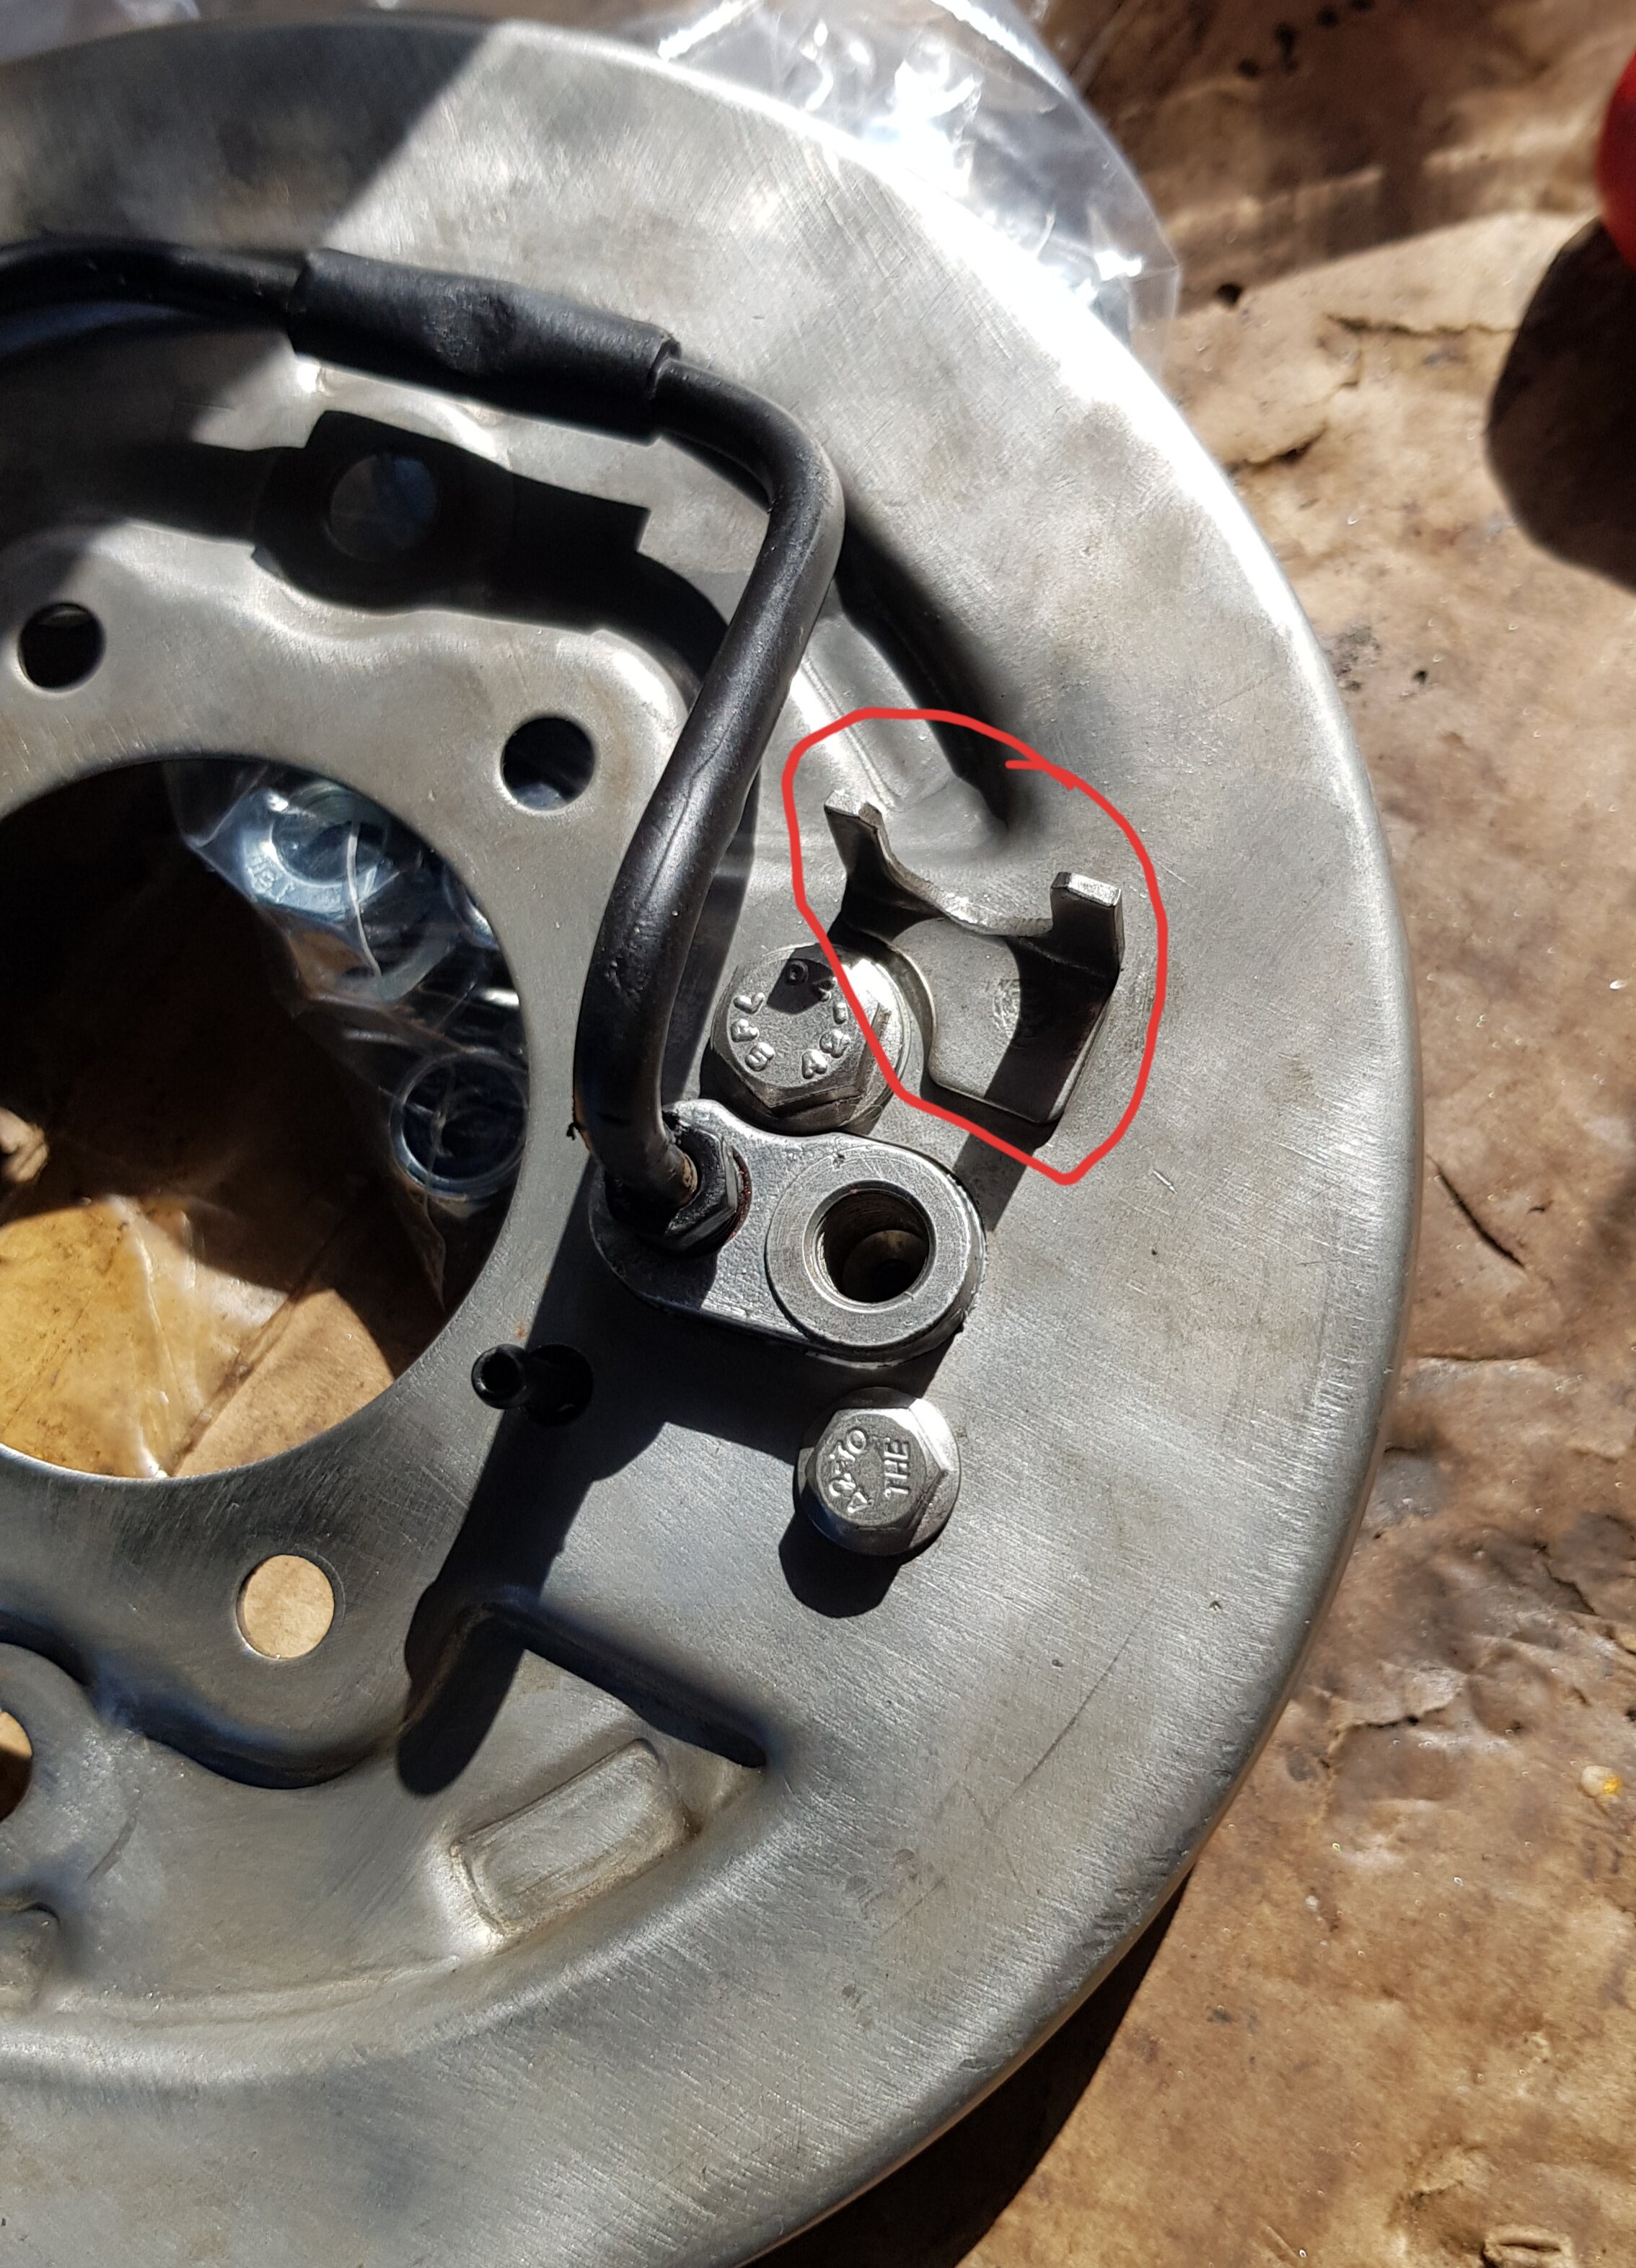
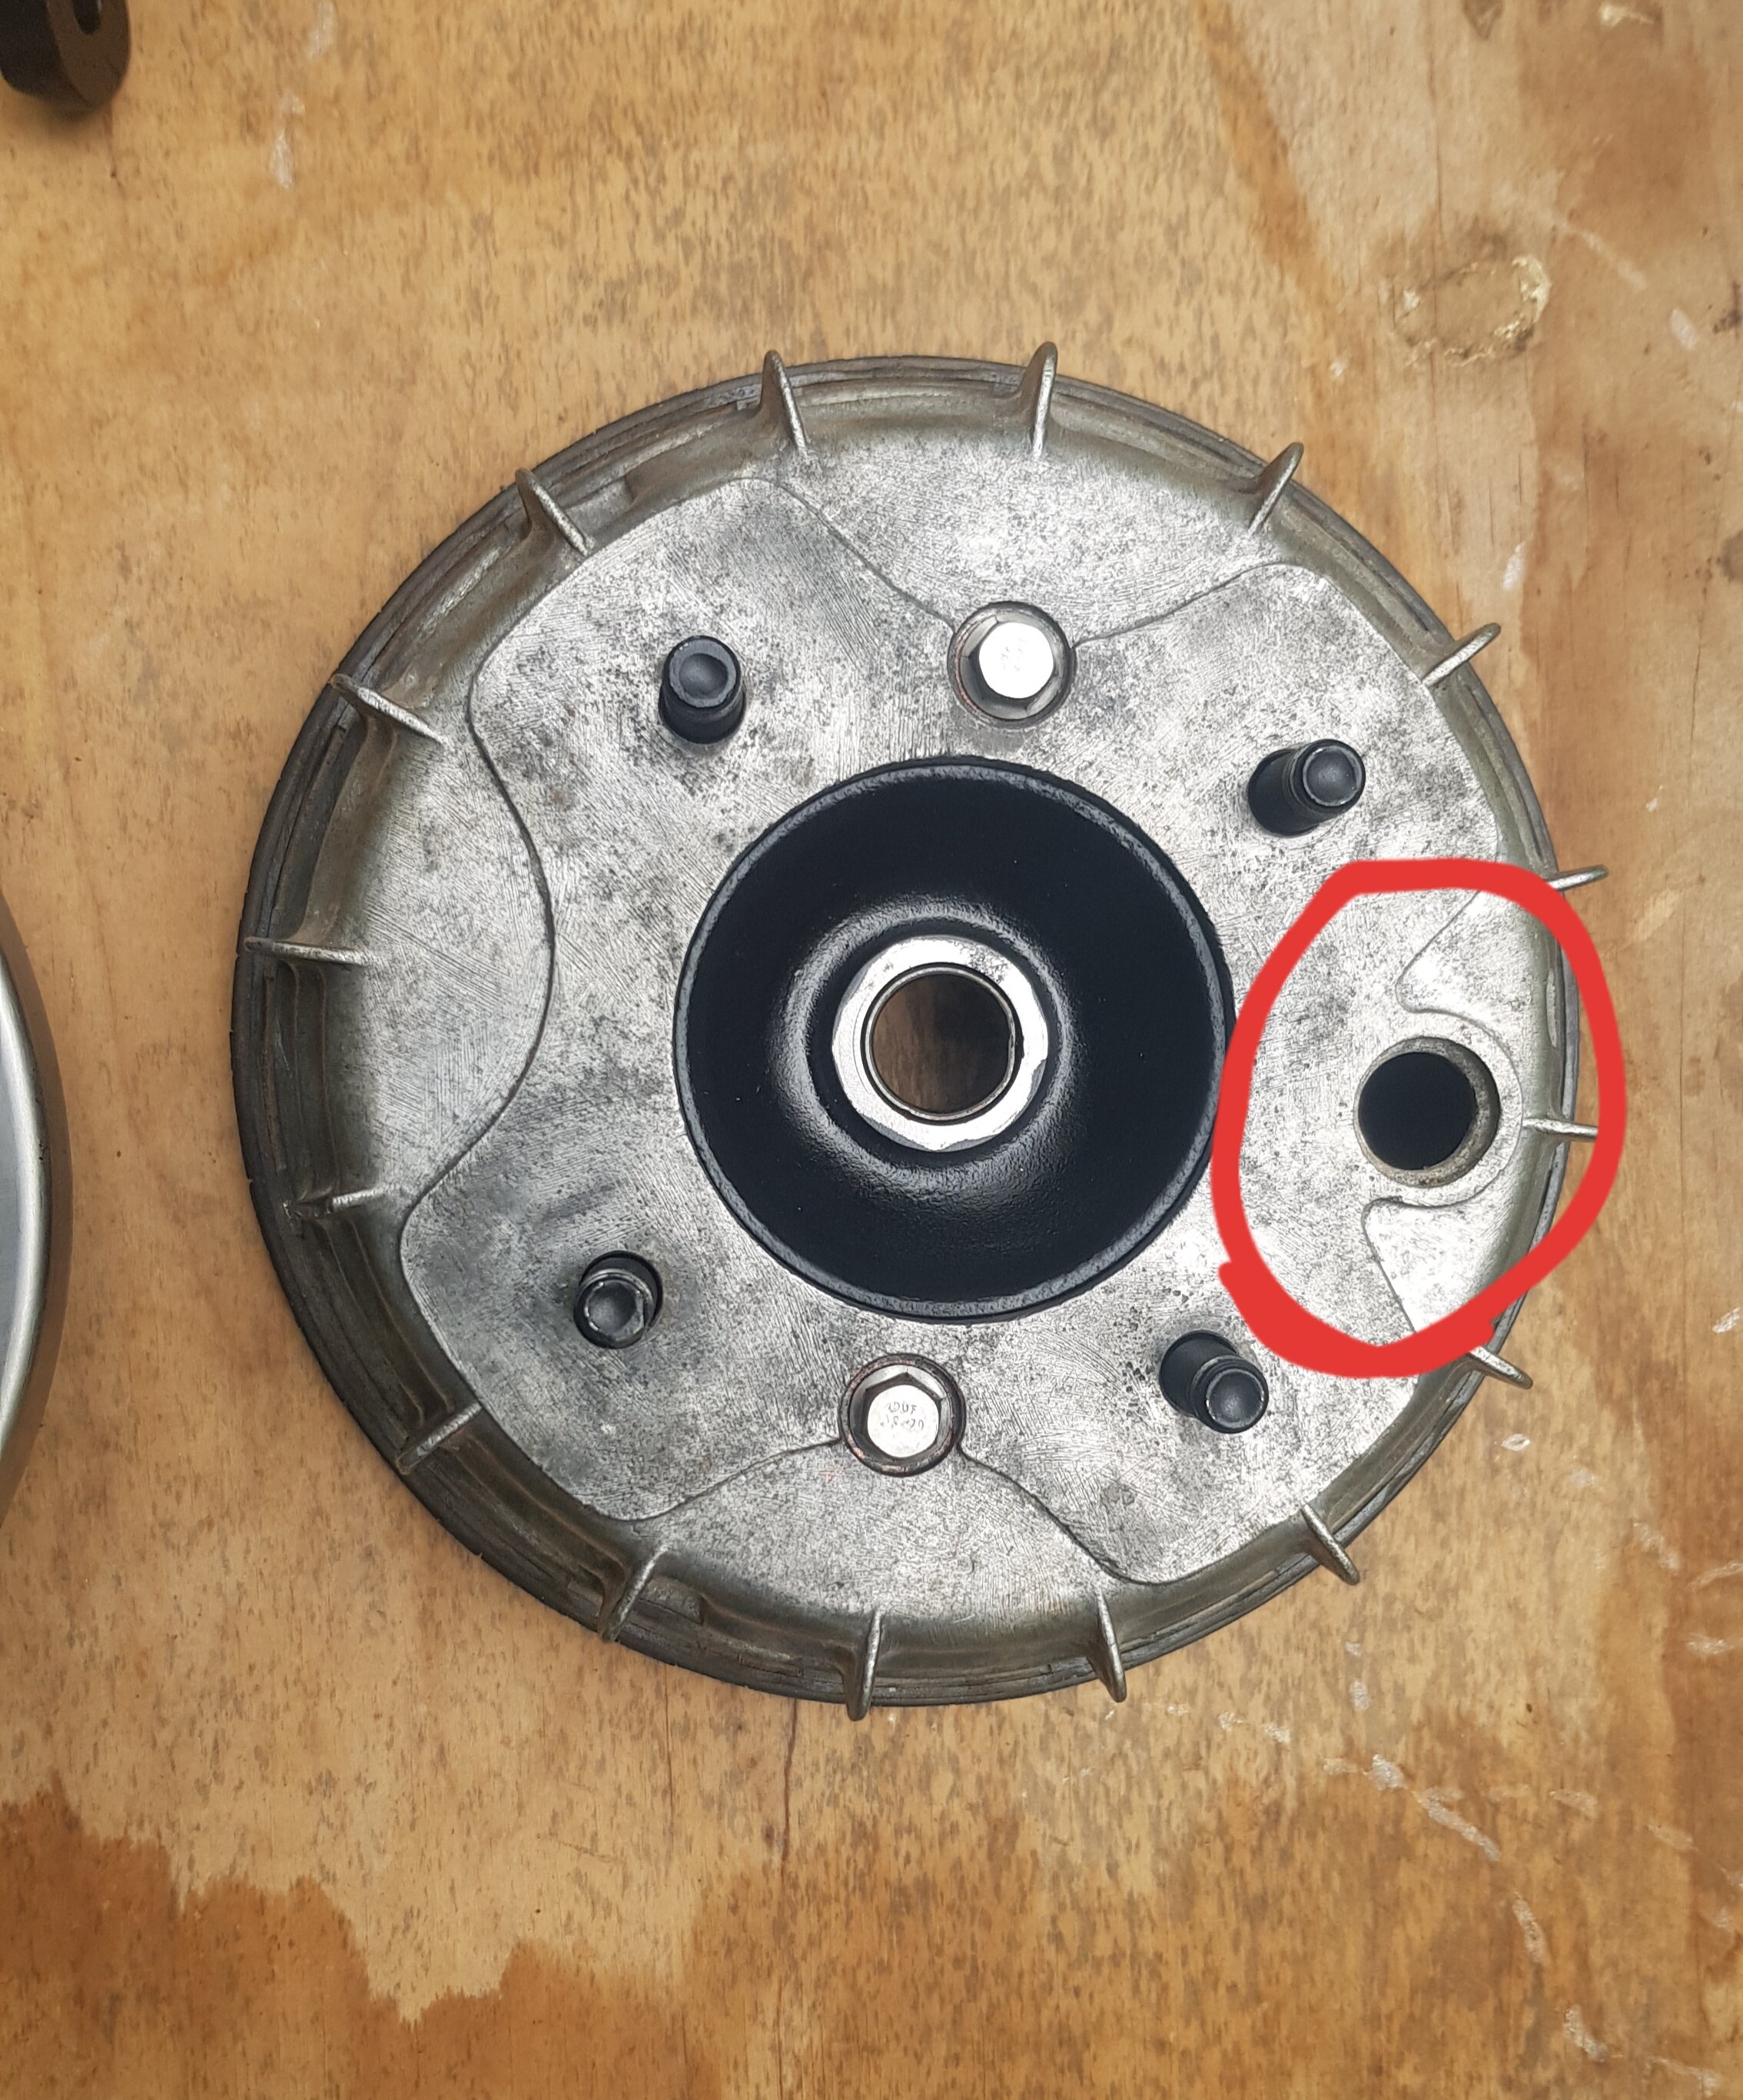
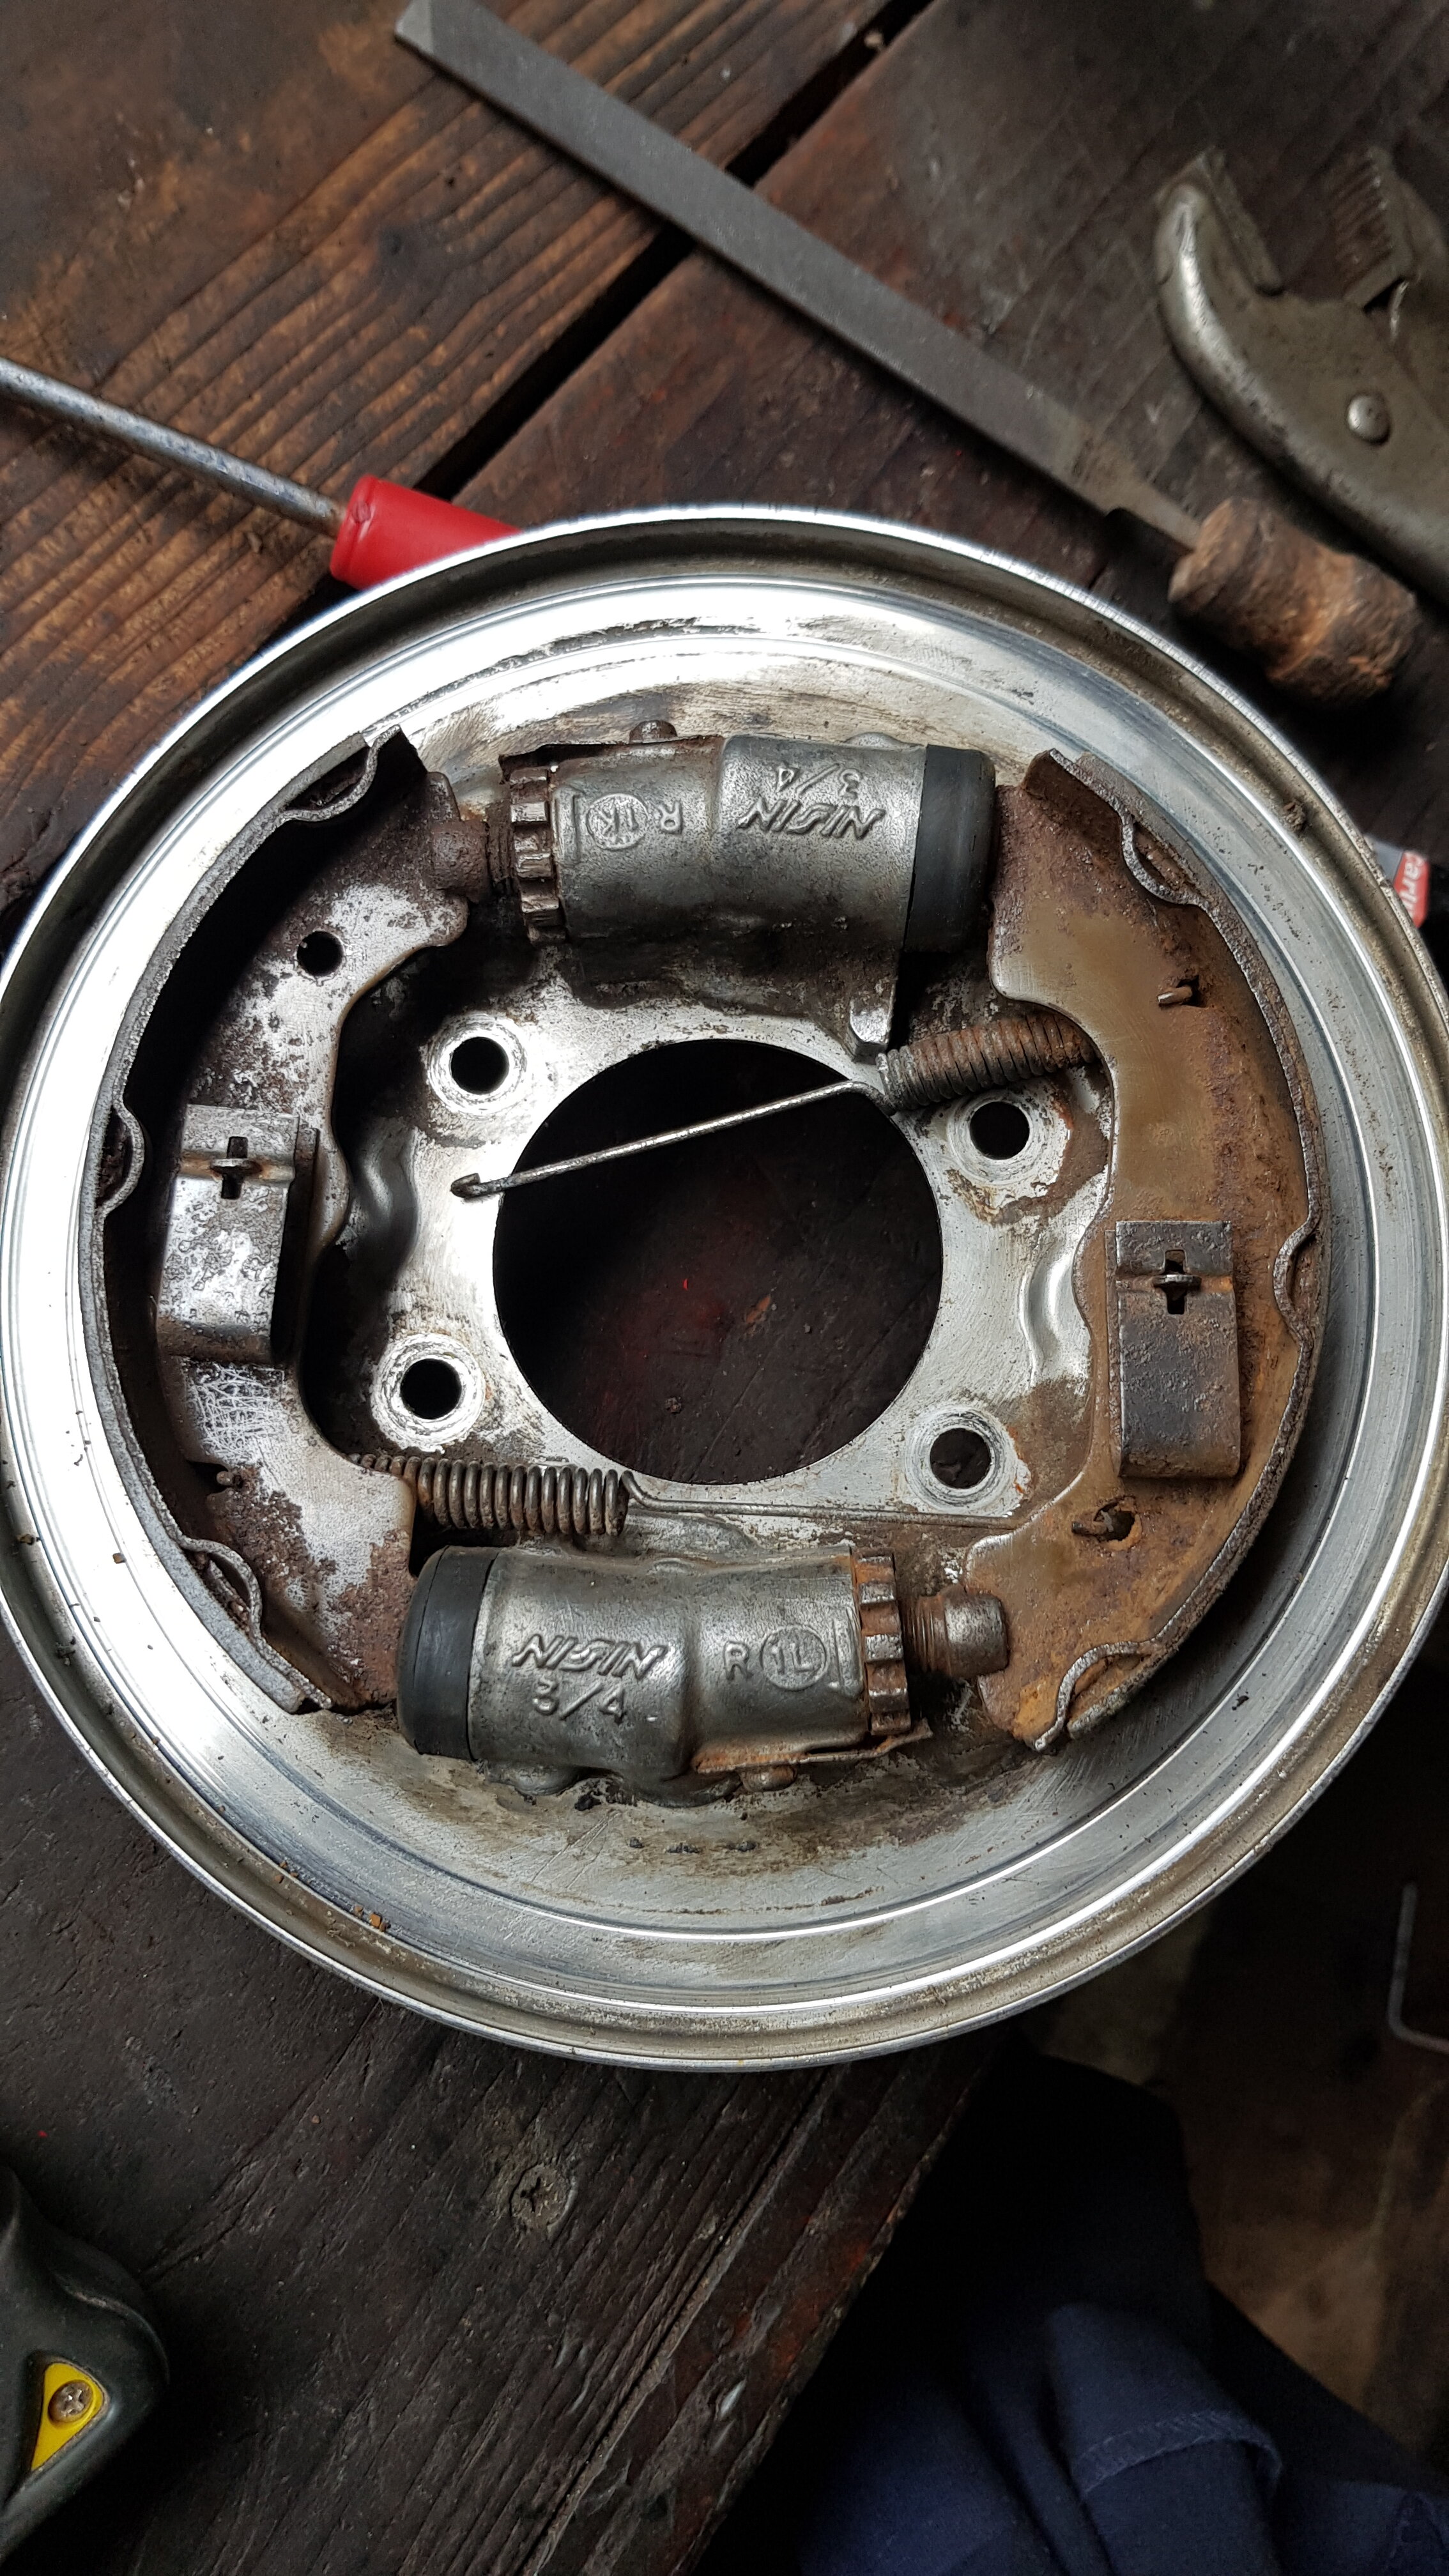
17 minutes ago, _Wilson_™ said:that's the front left backing plate panel ... the u holds the brake line from the front wheel cylinder, and the vent line also goes to the front there should be a nipple right to the back side of the wheel cylinder .. the back wheel cylinder should have the bleeder screw ... I'm thinking that cut out is for water drainage .. and that 1st pic...that a twig .. lol not the vent line ... lol
these pics are from shades 86 build ... so the credit goes to him!

Awesome! Thanks for that @_Wilson_™. That's just what I needed, perfect.
(Thanks @shadetree for the pics lol)
-
 2
2
-
-
Hi all wondering if one of you guys could help me here... I'm re-assembling the the front brakes and not sure which way around things go? The manual says assemble with the cut out at the bottom. But I can't see any sort of "cut out" on my backing plate. Also, where does that U section that sticks out the back go? Towards the front or the back?
Thanks

-
12 hours ago, shadetree said:any word on the where abouts of your bearing and plugs ?.
Been checking the tracking every day lol. Looks like it's just about to leave you guys and head off over the pond 🙂
-
1
-
-
On 8/18/2020 at 9:13 PM, sled_22 said:Pip,
I must say, it looks like you've done a great job thus far. It read the entire thread start to finish the other day and half way though i'm saying to myself, just split the cases, you won't regret it when you see whats in there. And now I bet you're glad you did. Great job cleaning up without a parts washer as well. I did the same thing a few weeks ago without a parts washer. I used starter fluid and actual aerosol parts washer. Both worked fine imo.
Since you're on the home stretch, a little advice: Take your time, be patient with the rings and make sure you have the timing set correctly.
Good luck can't wait to see the first start up video.
-Sled.
Thanks man, appreciate your words there! Yes, I'm so glad I split the cases and did it properly! It won't always be a worry at the back of my mind now lol, it did clean up pretty good as well yes.
Thanks for that advice there, I'll make sure I double check and triple check the timing when I get to that 🙂
Pip
-
1
-
-
12 minutes ago, shadetree said:least i can do to keep a classic on the trails !..lol. some day, some where, some one, will come to my rescue !..lol.
Can't thank you enough seriously... lol
-
1
-
-
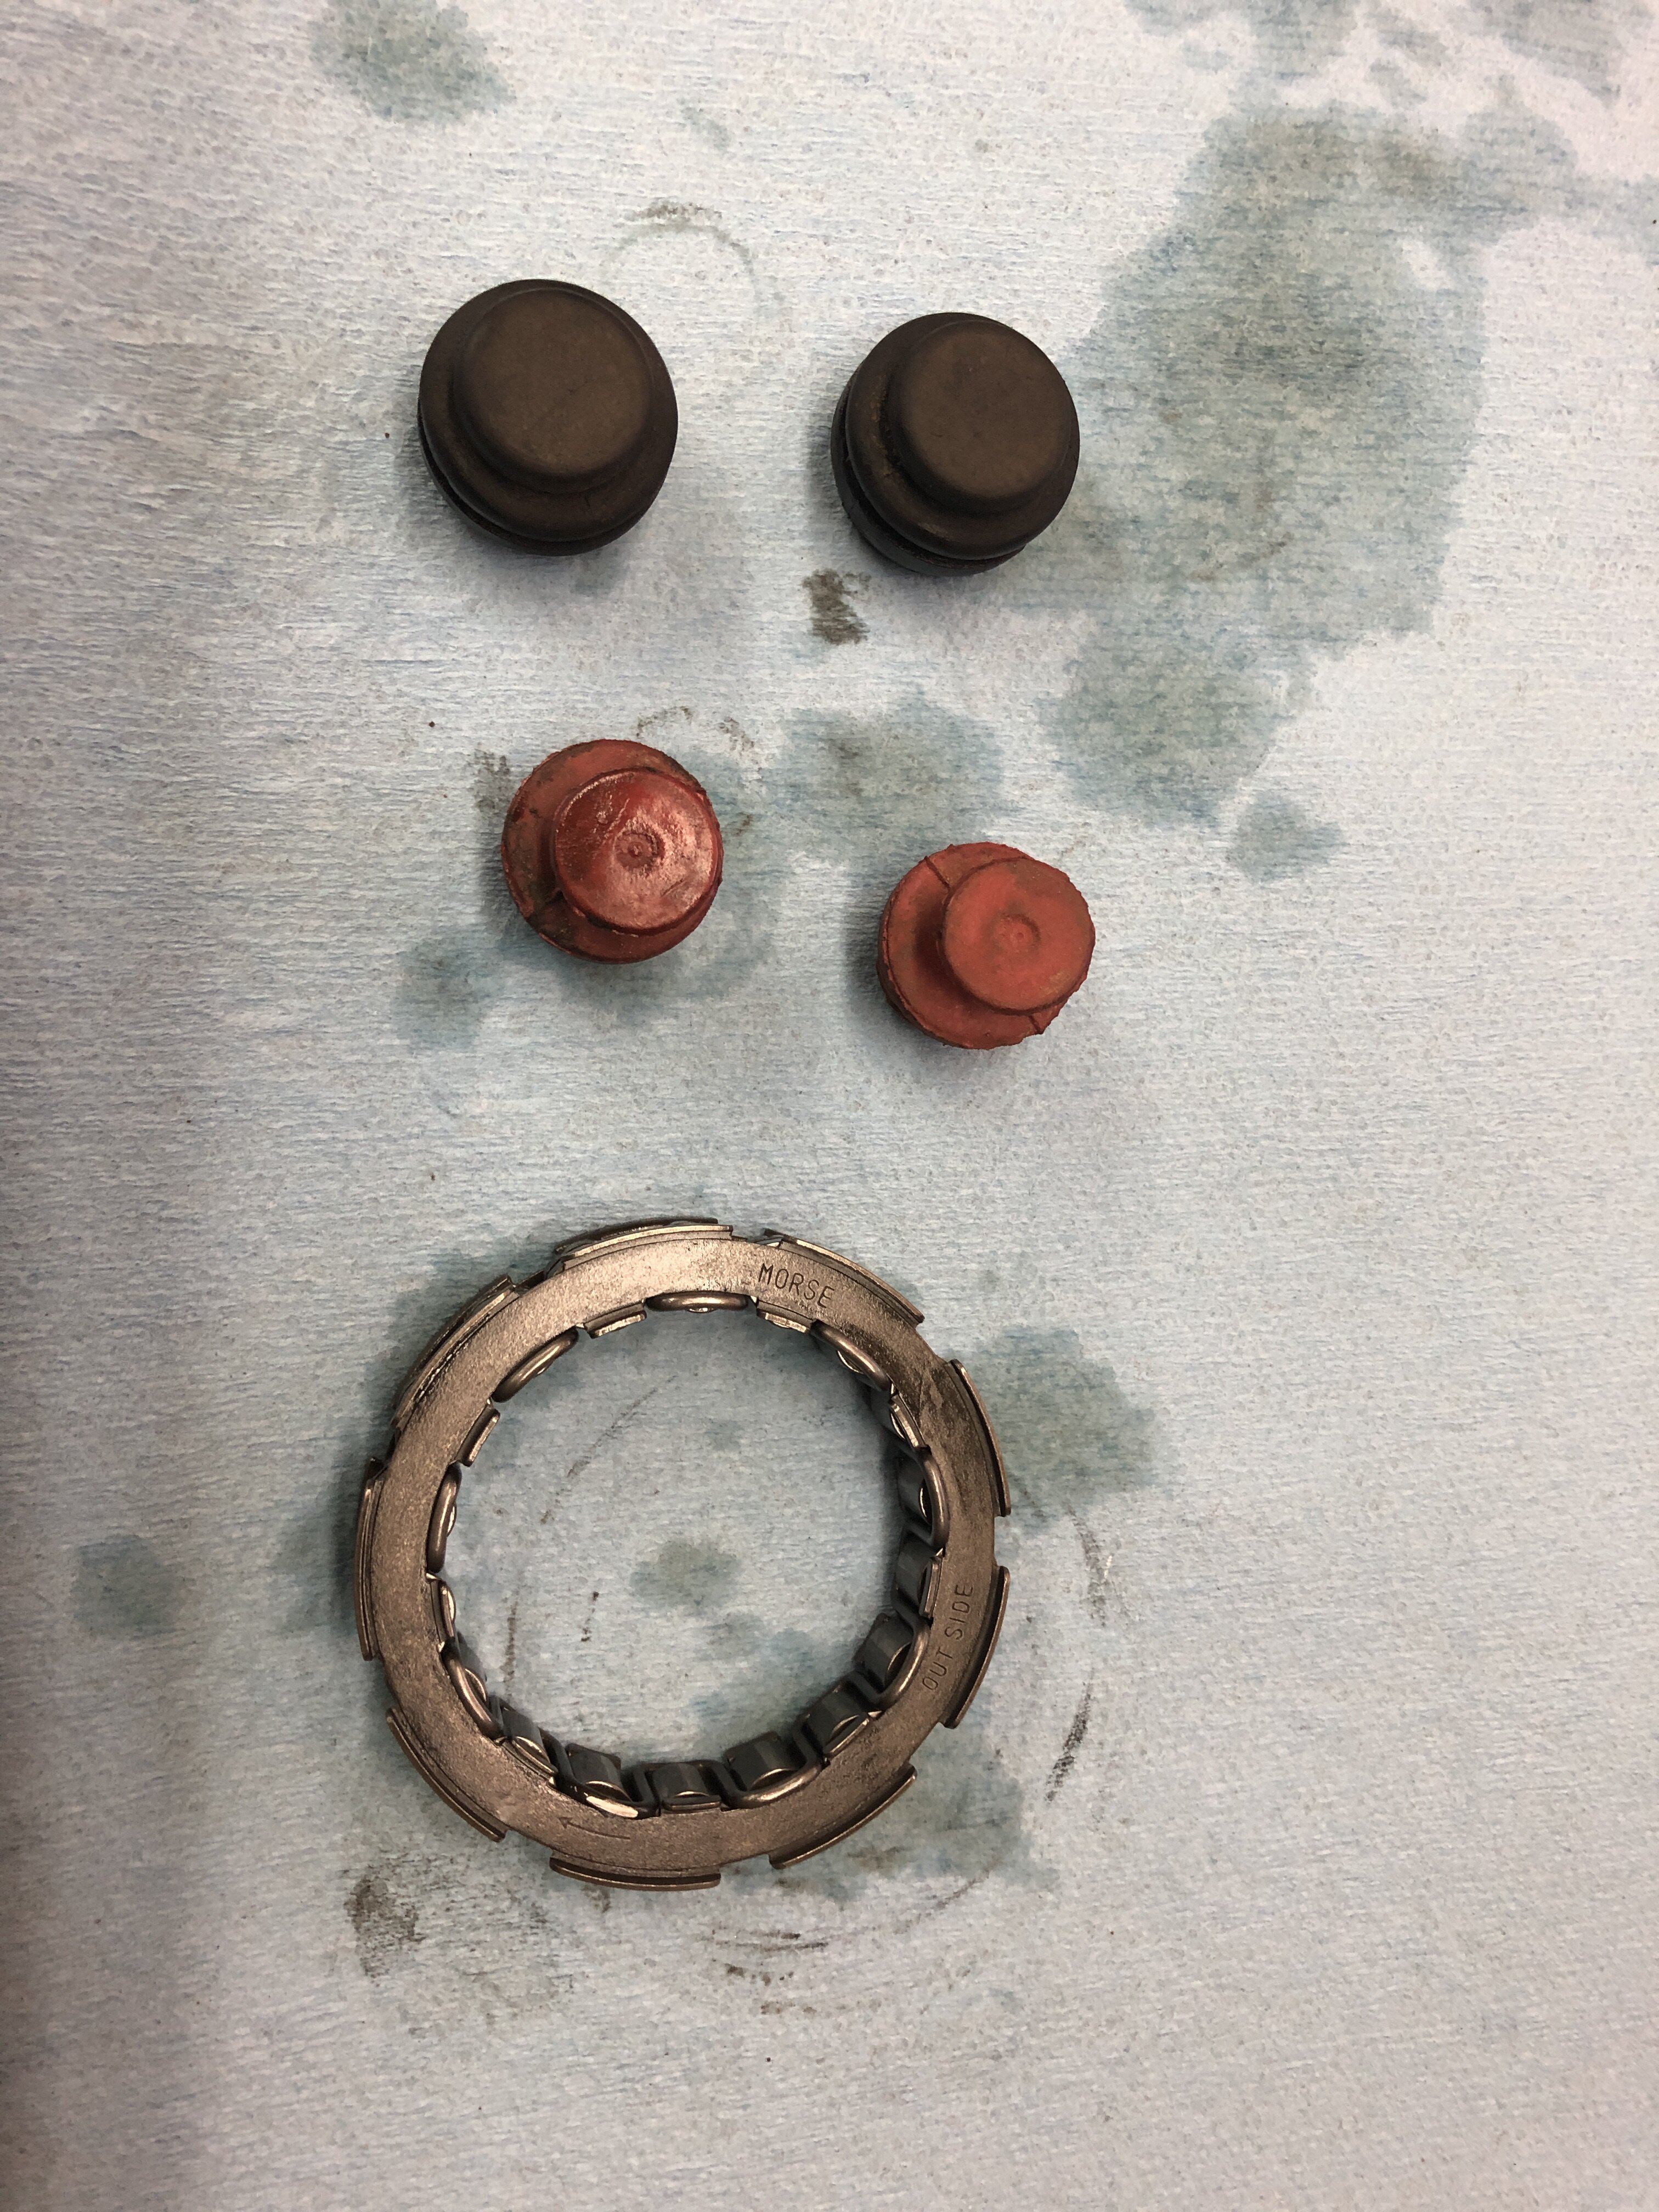
1 hour ago, shadetree said:ok, found them !, i will send both plug sizes just incase i am wrong on the size ? ( hey..even pro's make mistakes !..lol ).
Man you are incredibly generous! Can't thank you enough for this. I've sent you a pm back 🙂
-
2
-
-
Hi all..
So the place I was gonna get the replacement centrifugal clutch one way bearing from has said it's now not possible to just provide me with the bearing. They offered me the whole clutch but for a price of just under £150 ($190) and I don't really have that money to spend on it:( . I'm sure shipping from the States won't even be that much lol.
I'm wondering if anyone on here would be able to help me? I know shade offered to help me out which is amazing!... not sure if that's still available @shadetree? (No problem if not:) ) If anybody has a good working centrifugal clutch bearing could you give me a pm on here?
Thanks ever so much!
Pip
-
18 hours ago, oh400ex said:Make a plug?
It is just silicone after all so you can form your own.
I don't have any pictures on hand but you can use cornstarch to coat your part and hands and just plop a large glob of 100% silicone down on the area. Let it cure slightly and then push it into the gaps and "mushroom" it on the back side by pushing the part that came through the hole flat. Give it overnight to fully cure then take out your new plug and clean any cornstarch residue off. Once you reinstall it oiled, the seal will be like new again.
You can use painter tape coated in corn starch to form really rough mold if you need something to grab onto as well. Or you can embed something in the silicone.
Maybe just easier to partzilla/bikebandit and get the OEM replacement but if you already have some 100% on hand it may be an appropriate fix.
Good luck with it!
oh400ex
Thanks man I might give that a go. Thanks for the suggestion. Have you done this yourself?
-
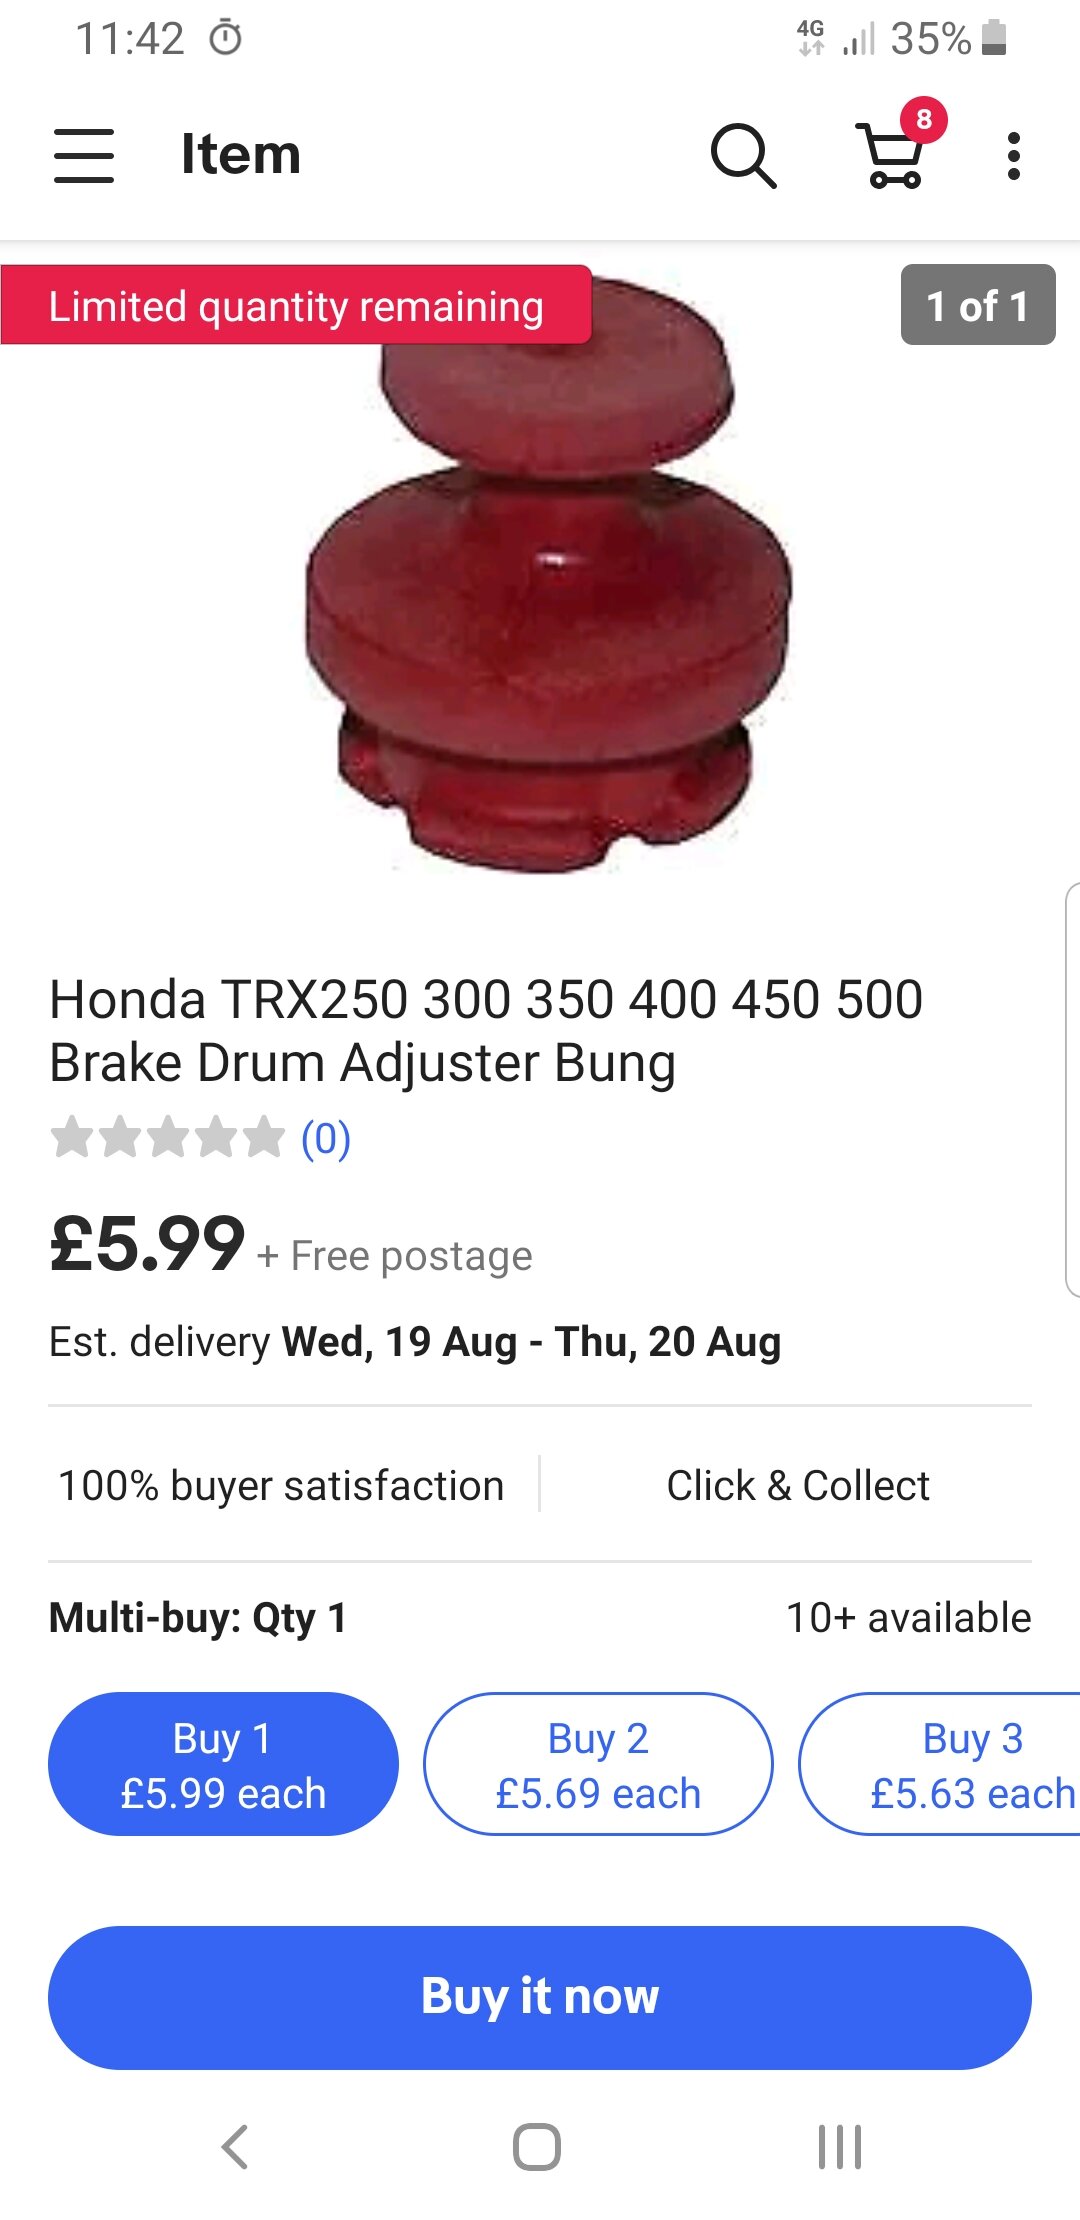
Hi all.
Wondering if anyone knows
if these would would work for 350D front brake drums? Need something to plug up the holes and this is all I can find.
Tia
-
6 hours ago, shadetree said:normally !..you do not need to replace the keepers ?, i do not.
Yeah I wasn't going to replace mine anyway lol... seems a waste of money unless they came with everything else lol
-
2
-
-
8 hours ago, 400exdad said:When I did mine, I didn’t know what condition everything was in. I knew the valves needed to be done, and the seals needed to be replaced. Due to shipping times and not really wanting to be waiting longer for parts. So I just ordered everything. Valves, seals, guides, springs, keepers, the whole nine yards. I also didn’t know how the bike had been treated over the years since we bought it used. I ended up not needing the guides, but I have them for the future. Considering the cost to do it now, or take a chance of having to go back into it again, I opted to do it all at once. As it was, I screwed up and didn’t do the rings at the same time due to what I spent on the valves, and ended up back into it for those a couple of weeks later. Now that we have two of the same machines, if I need to do the second one, I already have some parts for it, and it is an 03 all original.
Ahh okay I get you. Makes sense
-
9 hours ago, Fishfiles said:I would call the retainer , the lock wedges on the valve stem spring cap , to get them off is easy , a hammer and a deep dish socket , putting them back on requires a spring clamp , you need to remove them retainers to get at the valve seals , which are a matter of just pushing them on
Ahhh right yes I know what they are. Yes I've removed and installed them plenty before. Why would they need to be replaced??
Is replacing the the valve seals an easy job?
-
1
-
-
3 hours ago, 400exdad said:I’m using Kibblewhite valves now and they are working great. Springs are a bit stiffer. I did seals, springs, valves and retainers all at once.
Well I've just ordered a set of shindy valves. Be awhile till they get here but still got other bits to be on with.
How hard is it to do seals and retainers? Are the retainers the valve guides?
-
29 minutes ago, Fishfiles said:TRXPIPUK , How would I check the amount of play between the valve stem and guide? Just see if I can feel sideways movement?
stick the valve thru the guide till about 1/4 from all the way seated against the head , grab the valve and try to move it side to side , should have no slop
Righto, thanks. I'll check that when I'm home after the weekend:)
-
5 hours ago, shadetree said:shindy makes some great valves, if you can get them shipped to you ?, get all 4 of them !.
The ex valves that I've got look LOADS better than the in ones. But replacing all 4 is probably best right? Especially since 4 new shindy valves from the states are only £10 more than two new Honda in valves are.
-
1
-
-
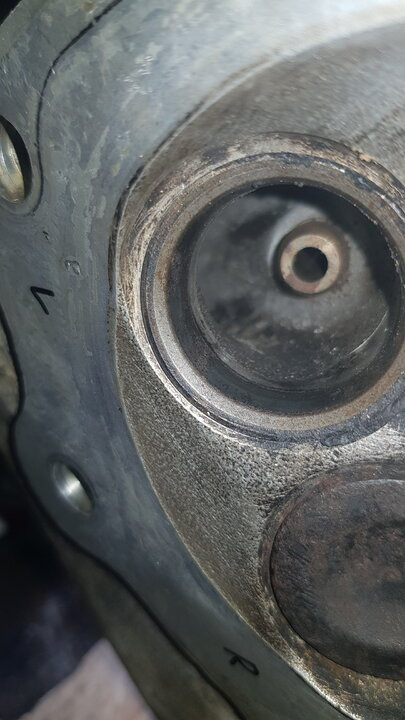
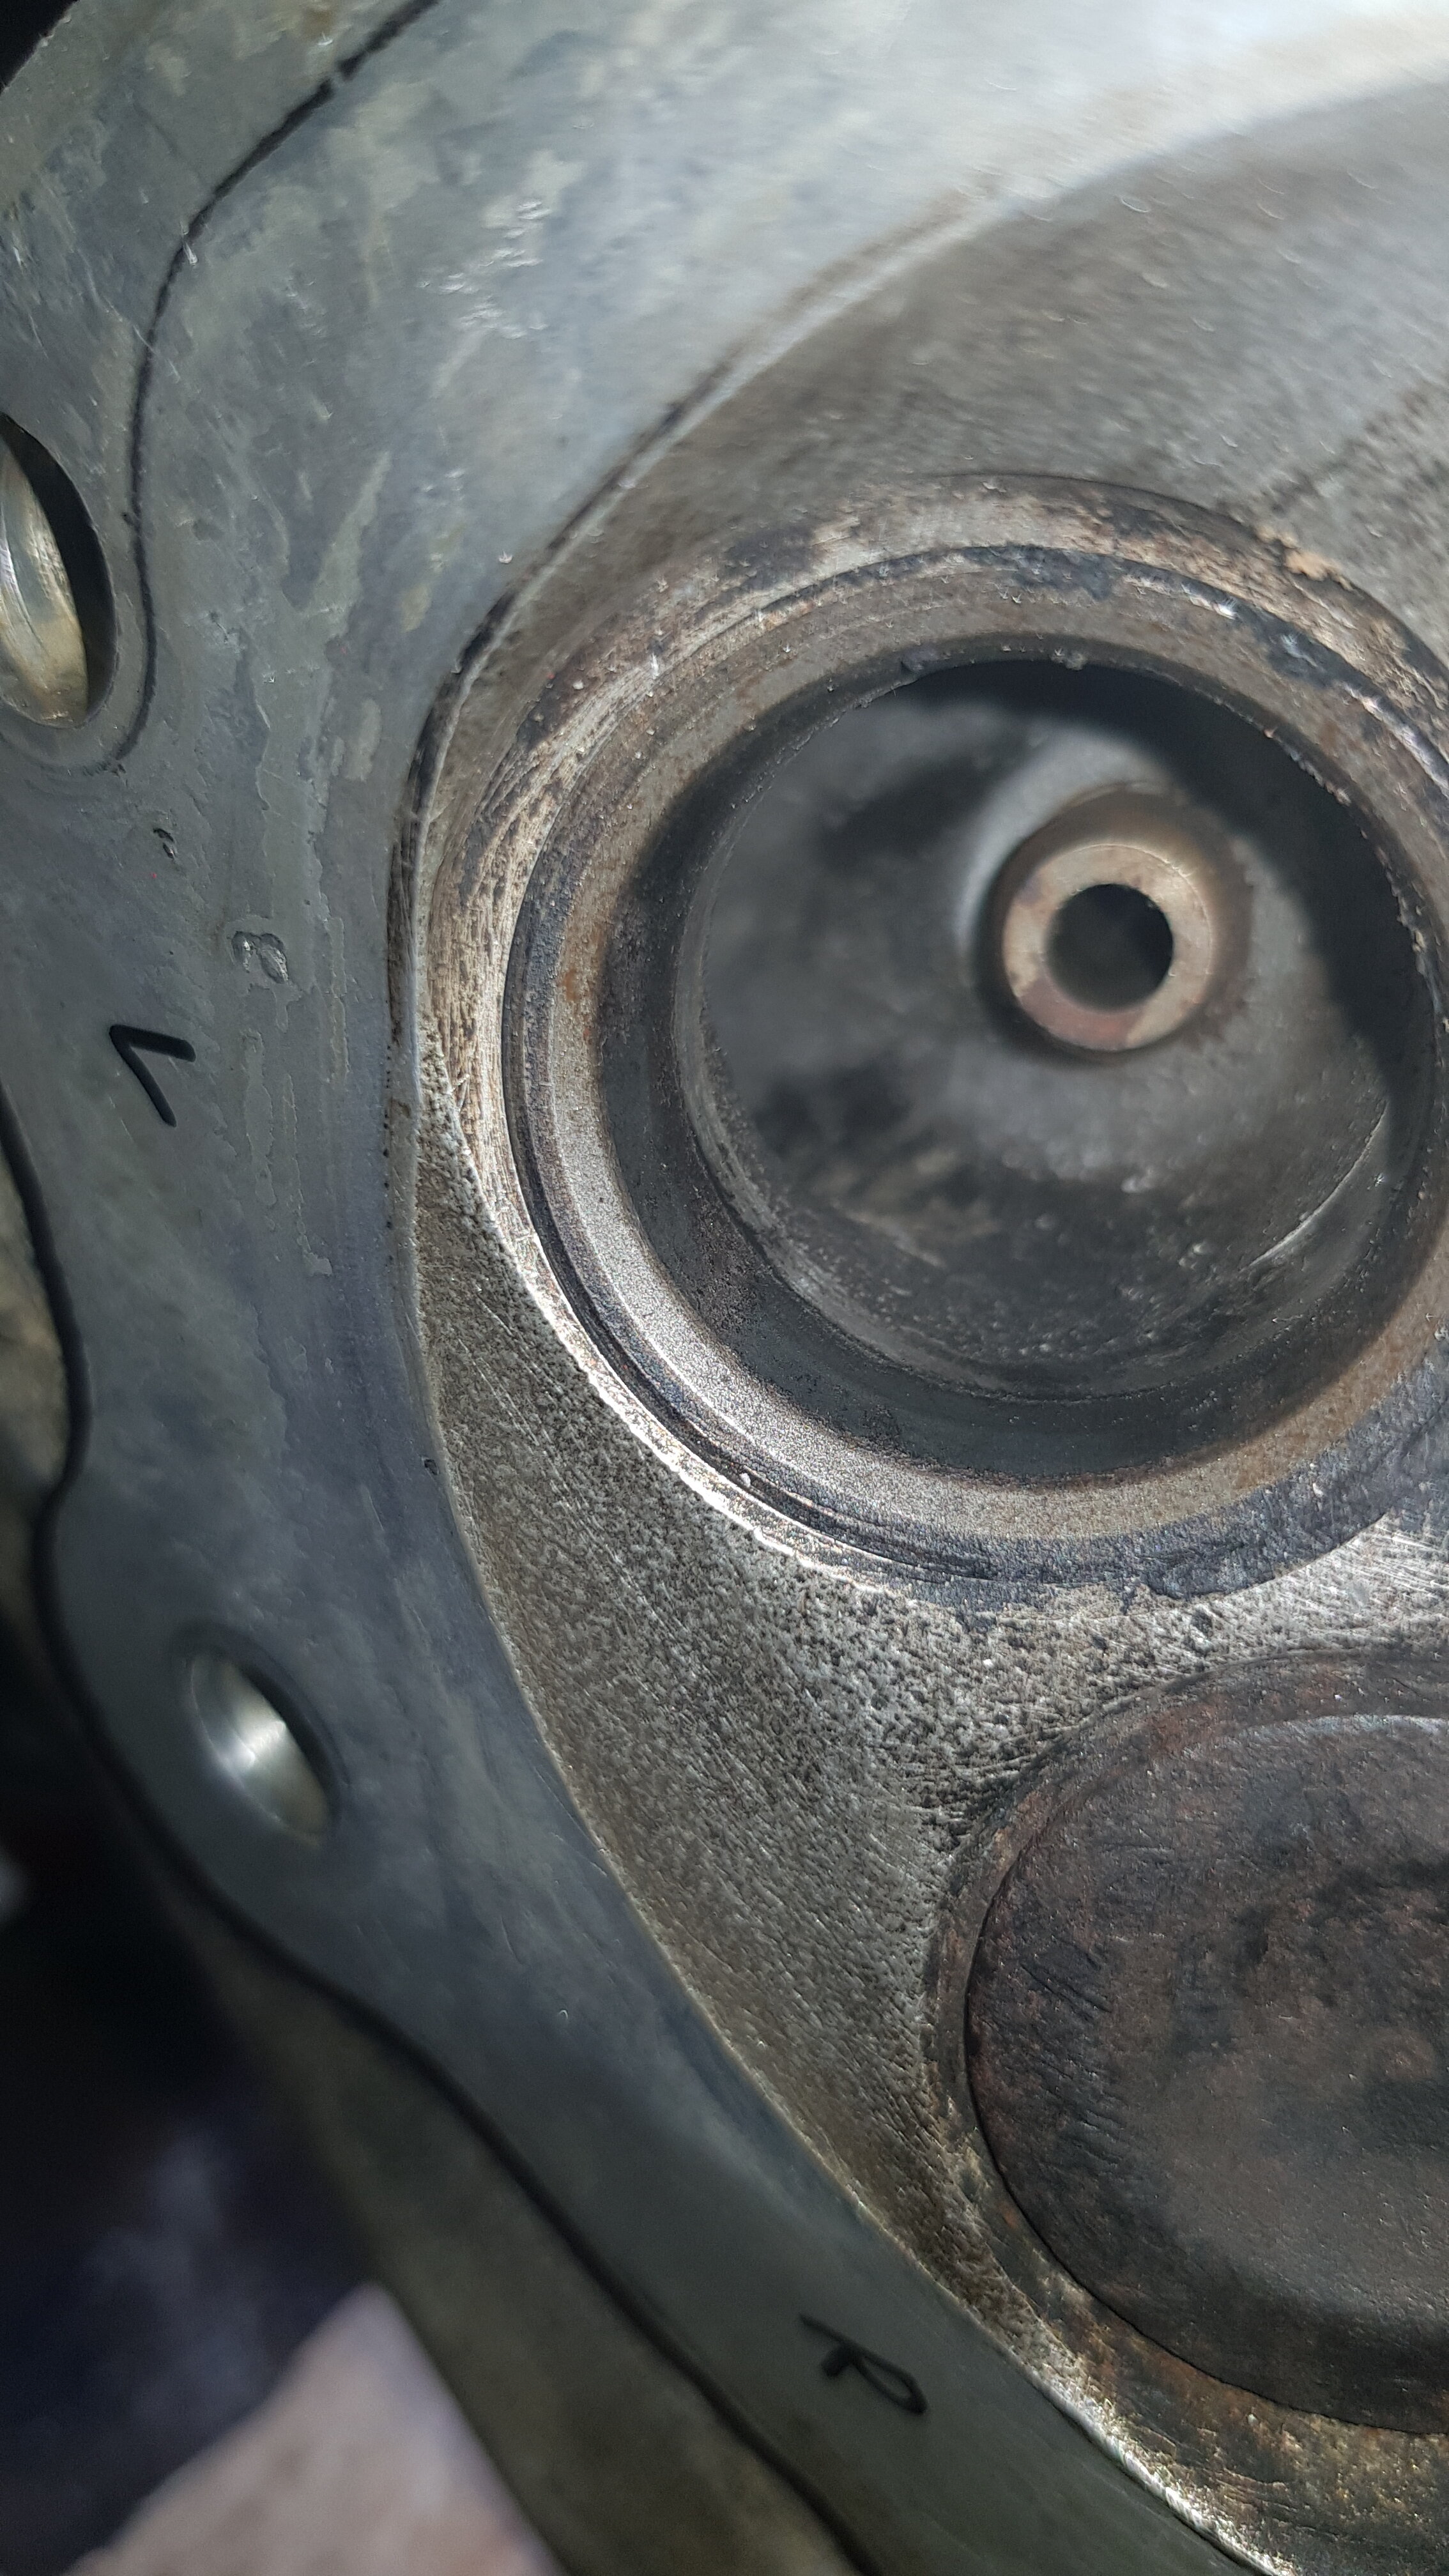
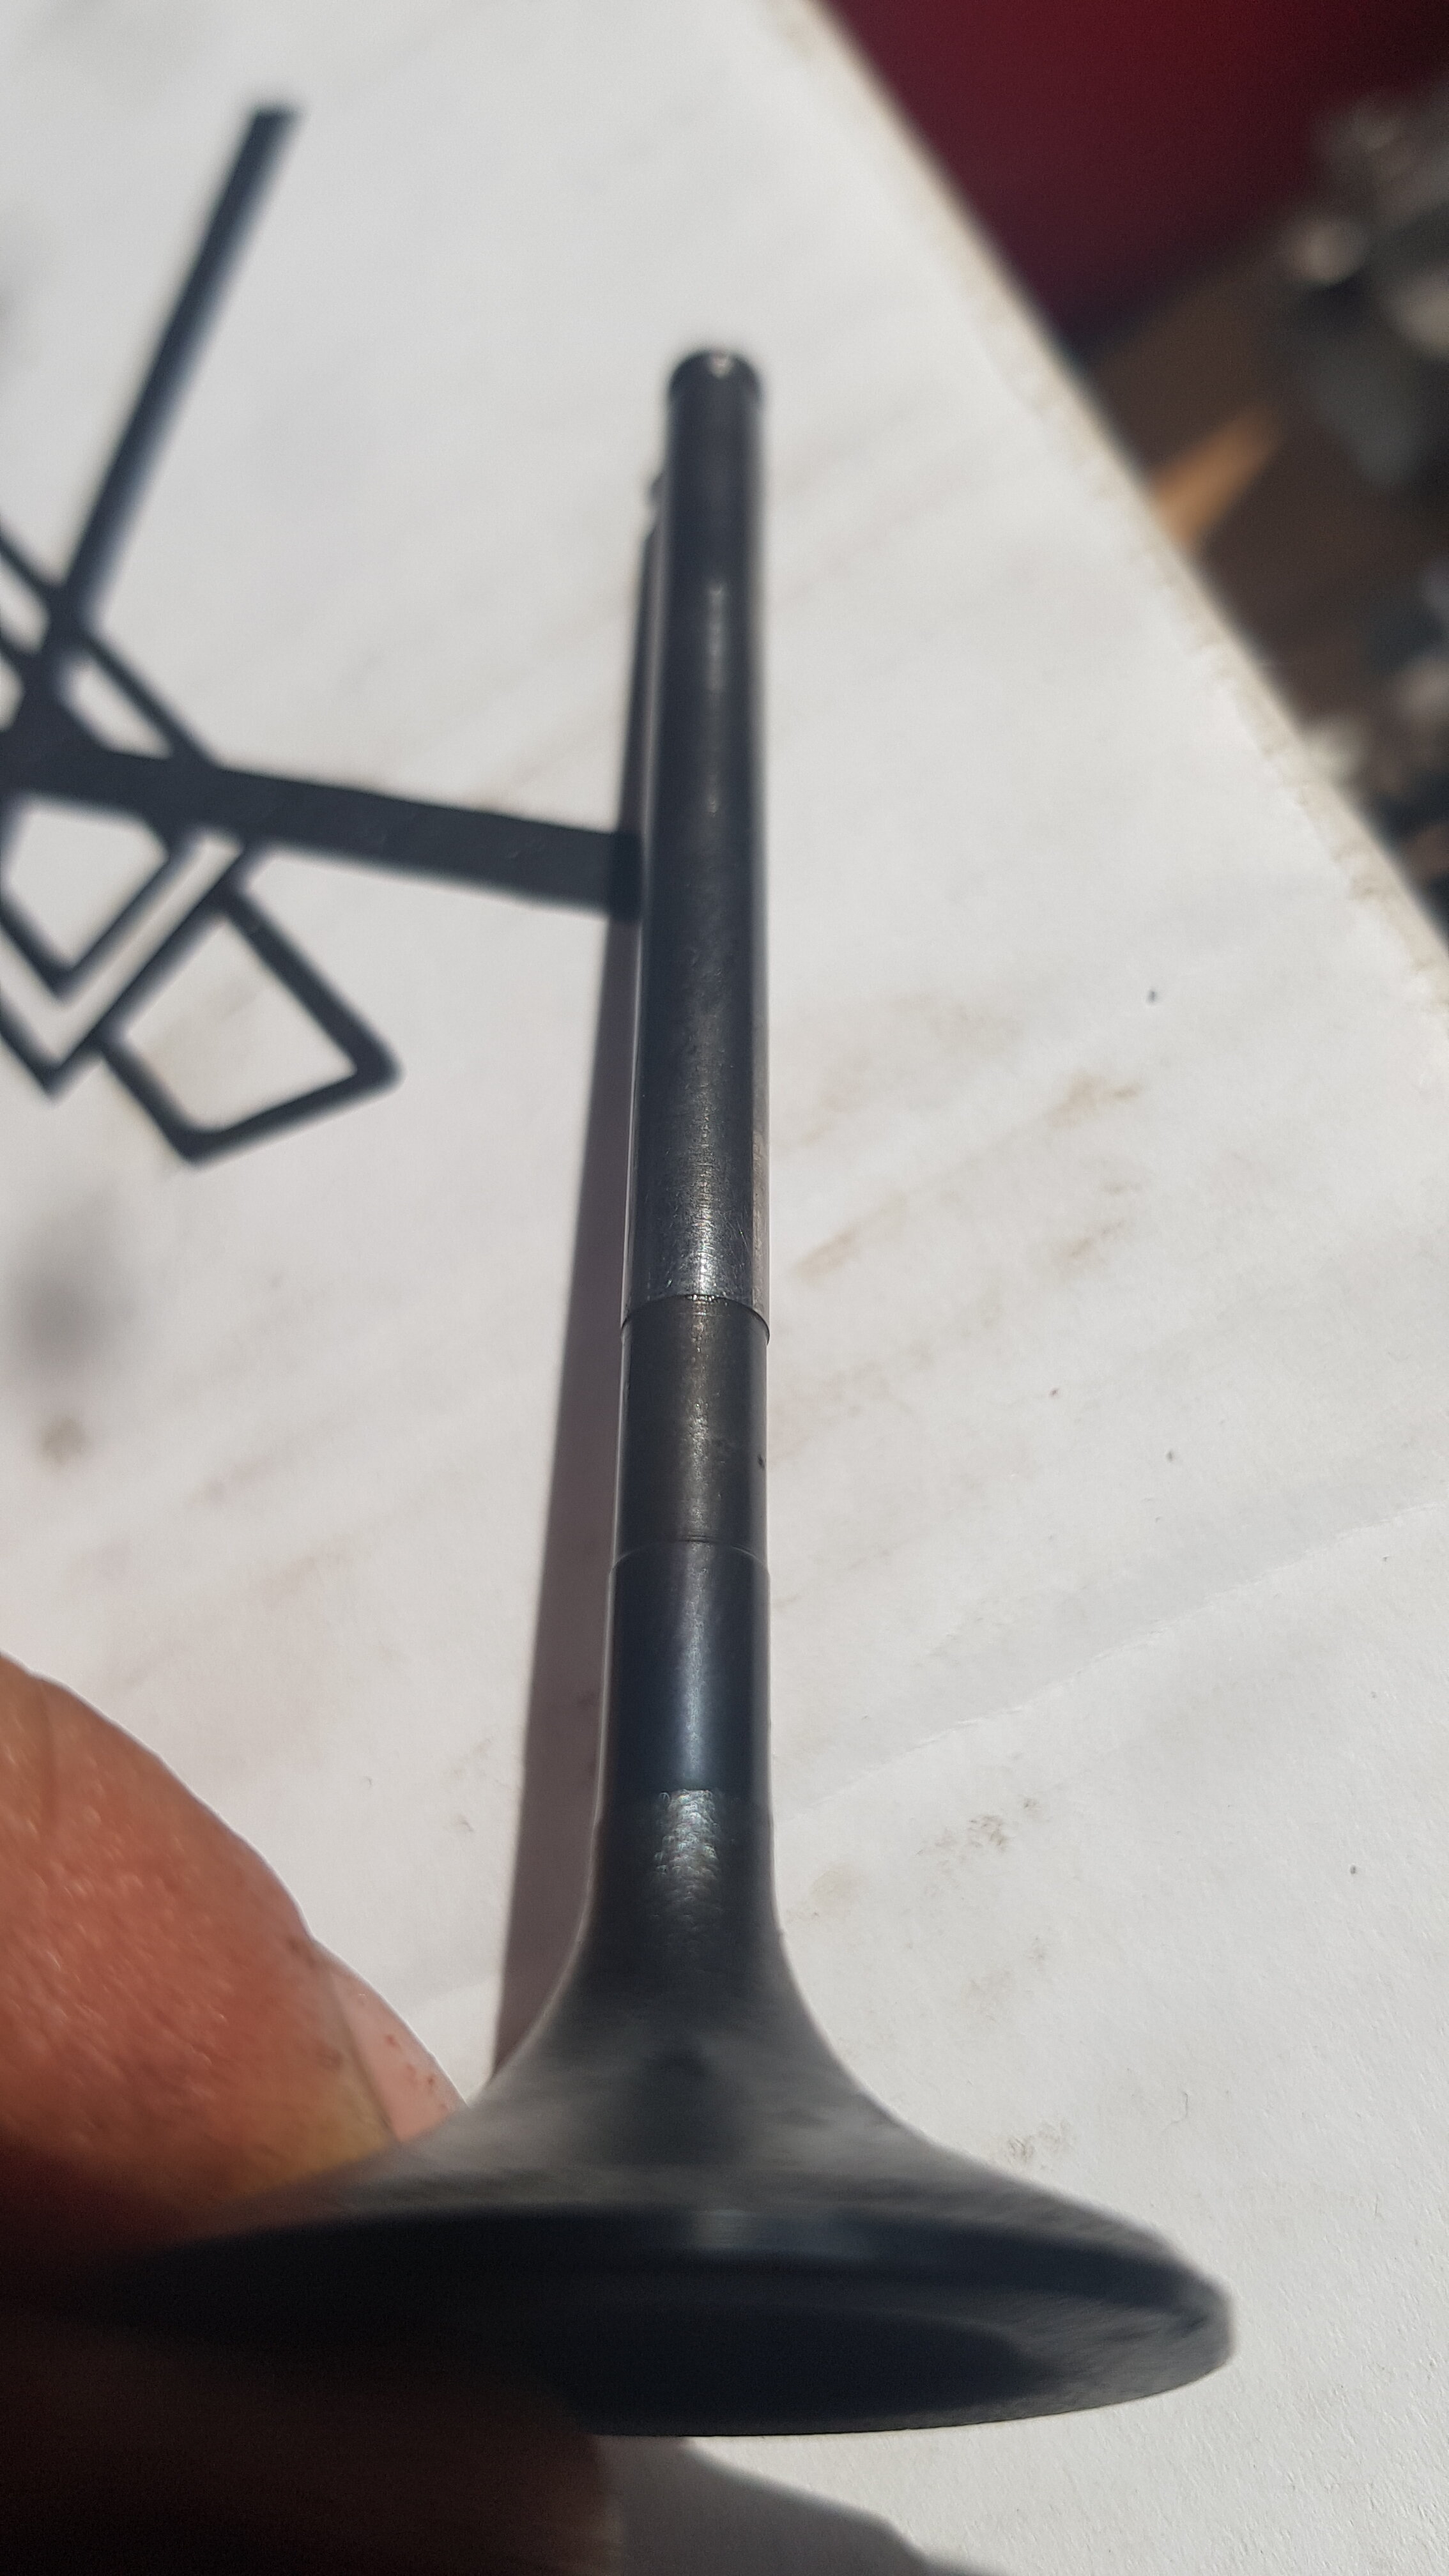
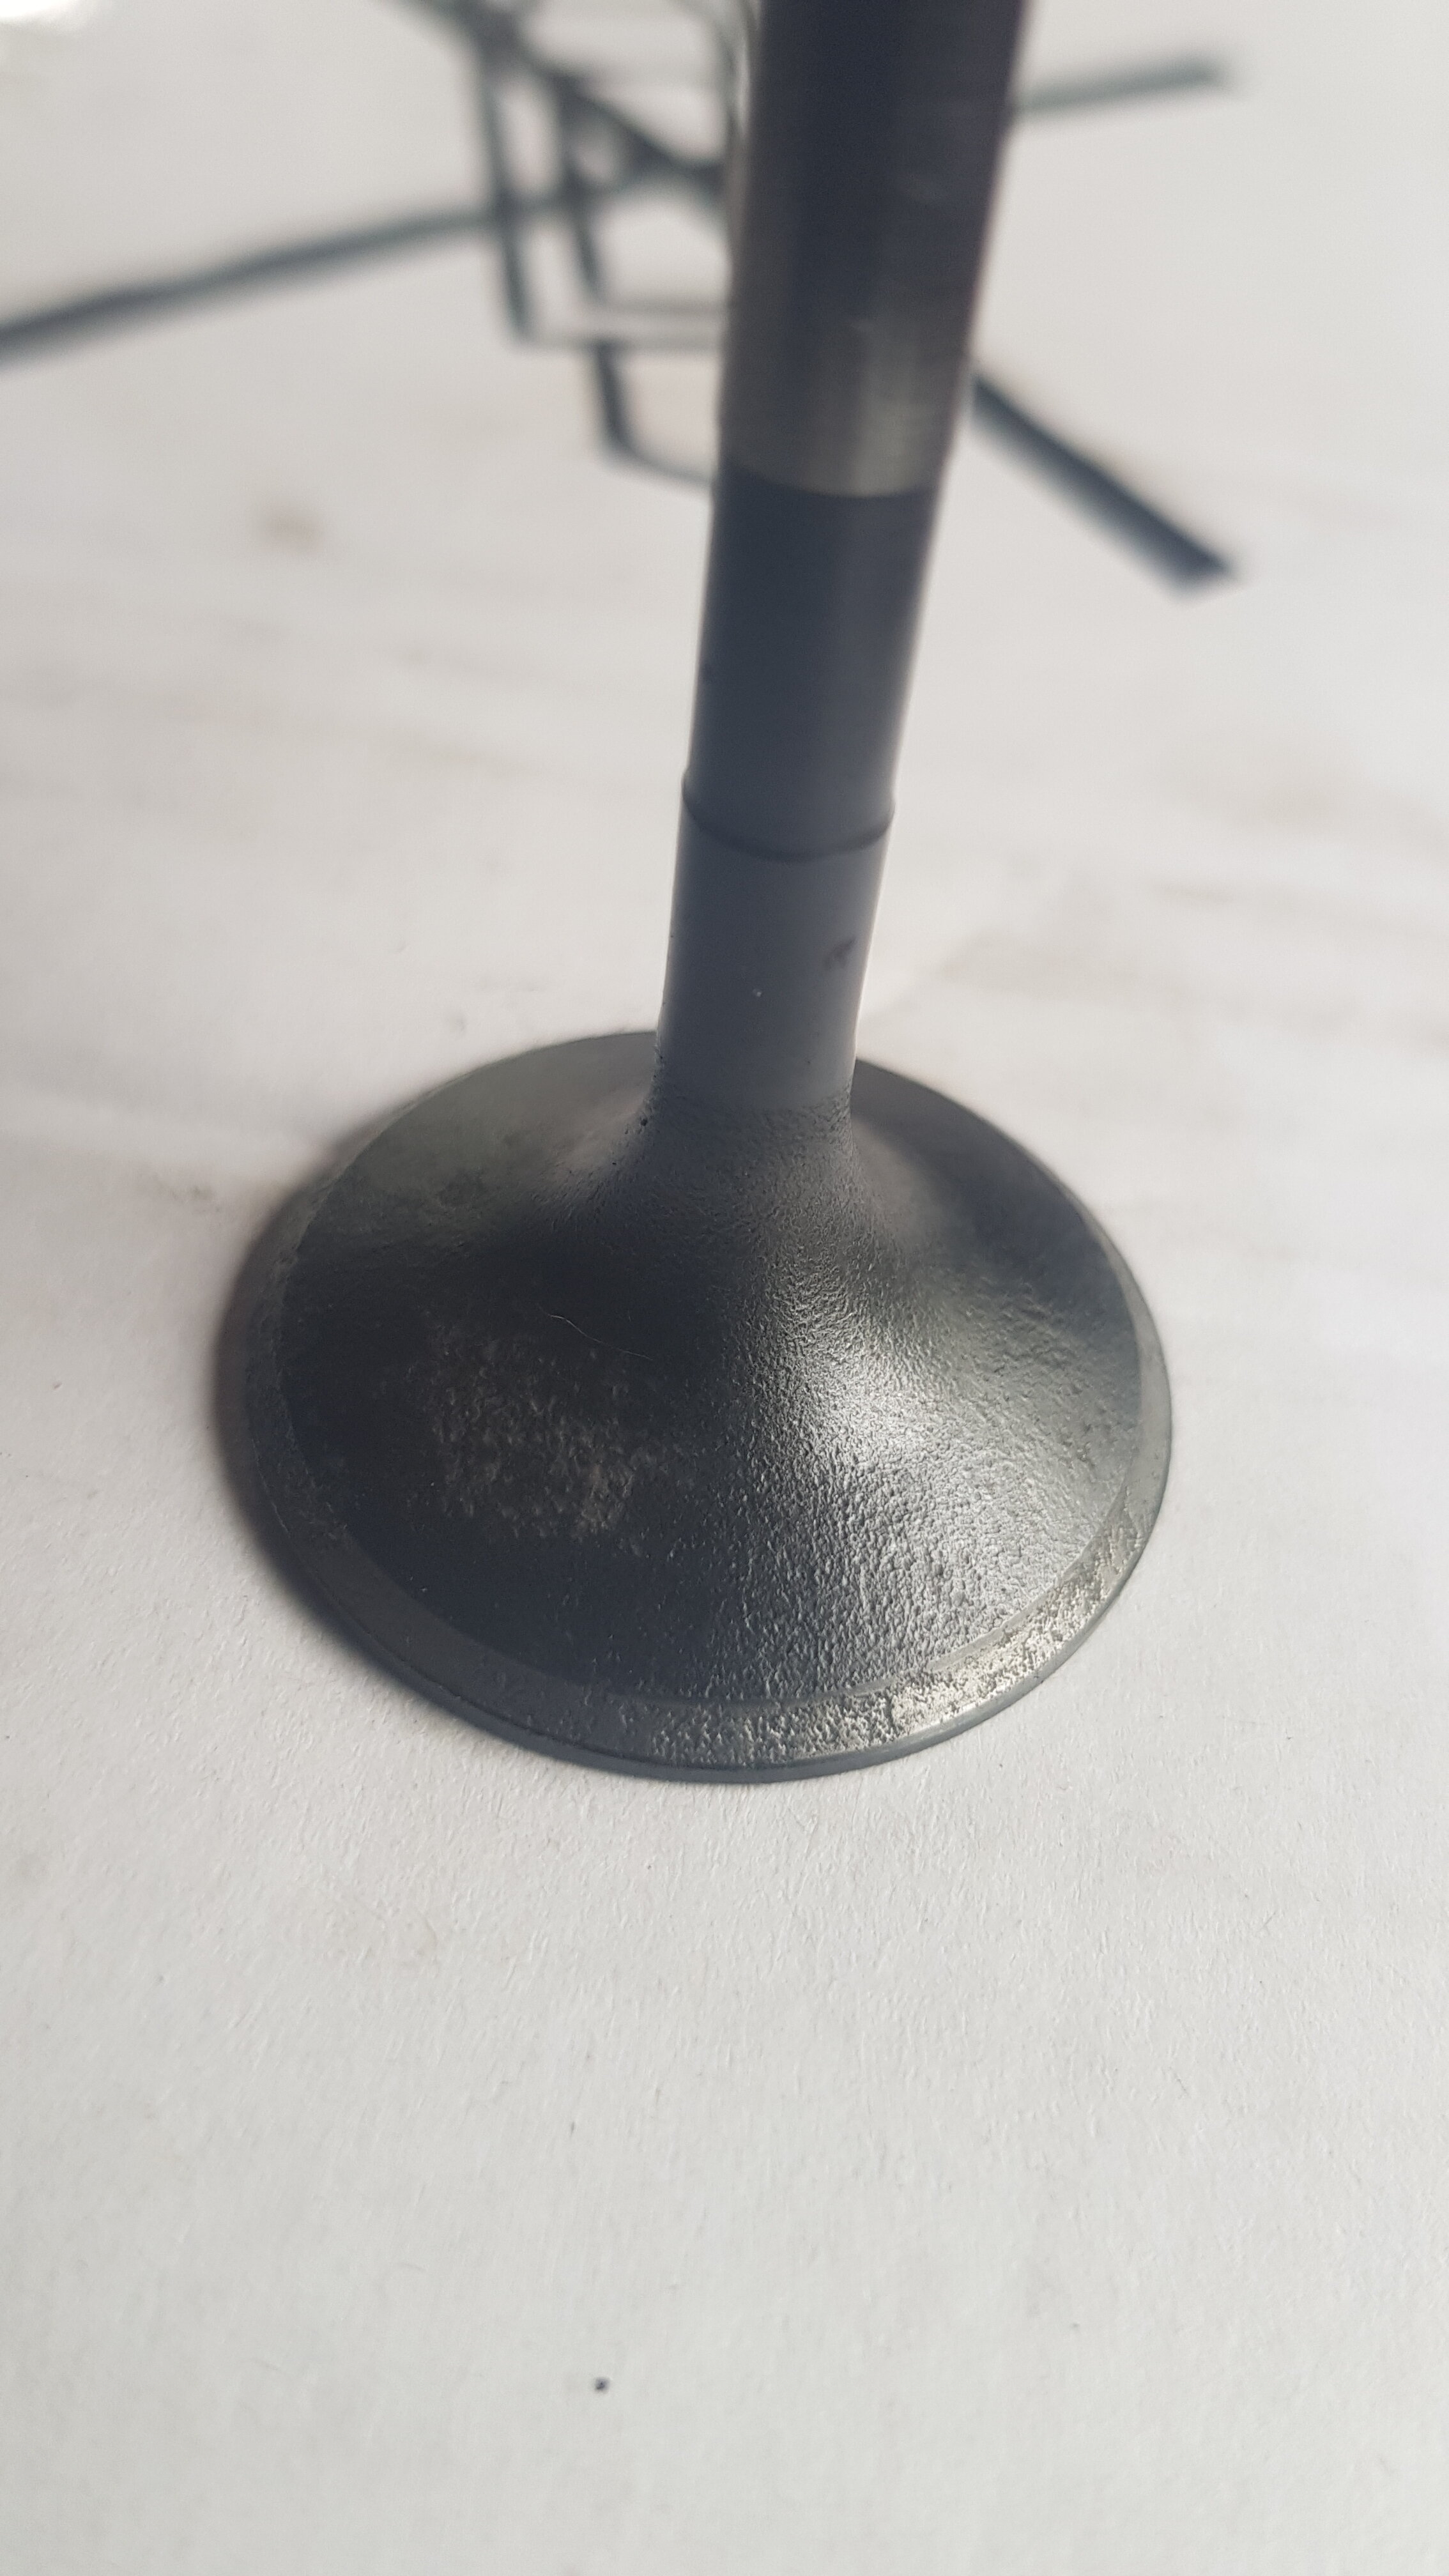
13 hours ago, Fishfiles said:Pip , you mentioned that pic up above of your head with a valve out the hole is after you lapped the valve ( pic below ) , that doesn't look too good to me , I wouldn't roll with it ----- also something to look at , is how much play do you have between the valve guide and the valve stem
Yes I lapped it a little but not much at all, was just to get the muck of really and have a look. Also thought it would be silly to lap it with that old pitted out valve... The head should clean up after a good lapping though right?
How would I check the amount of play between the valve stem and guide? Just see if I can feel sideways movement?
-
2 hours ago, shadetree said:you wont be able to save those valves, pitted way to bad. by the time you get them lapped down to a sealing surface ?, there wont be any metal left to hold up to it running.
Okay new valves it is then 😞 . Any recommendations on what brand to go with? I saw some shindy ones (all 4 valves) on eBay, however I'm not sure if they ship to the UK yet (they're on the other side of the pond)
Thanks for the help and knowledge 🙂
-
1 hour ago, _Wilson_™ said:from the pic it looks to be just one 1/2 side is pitted ...
One part is definitely a lot worse than the other parts. It's got pitting all the around, just some bits worse than others....
-
1
-
-
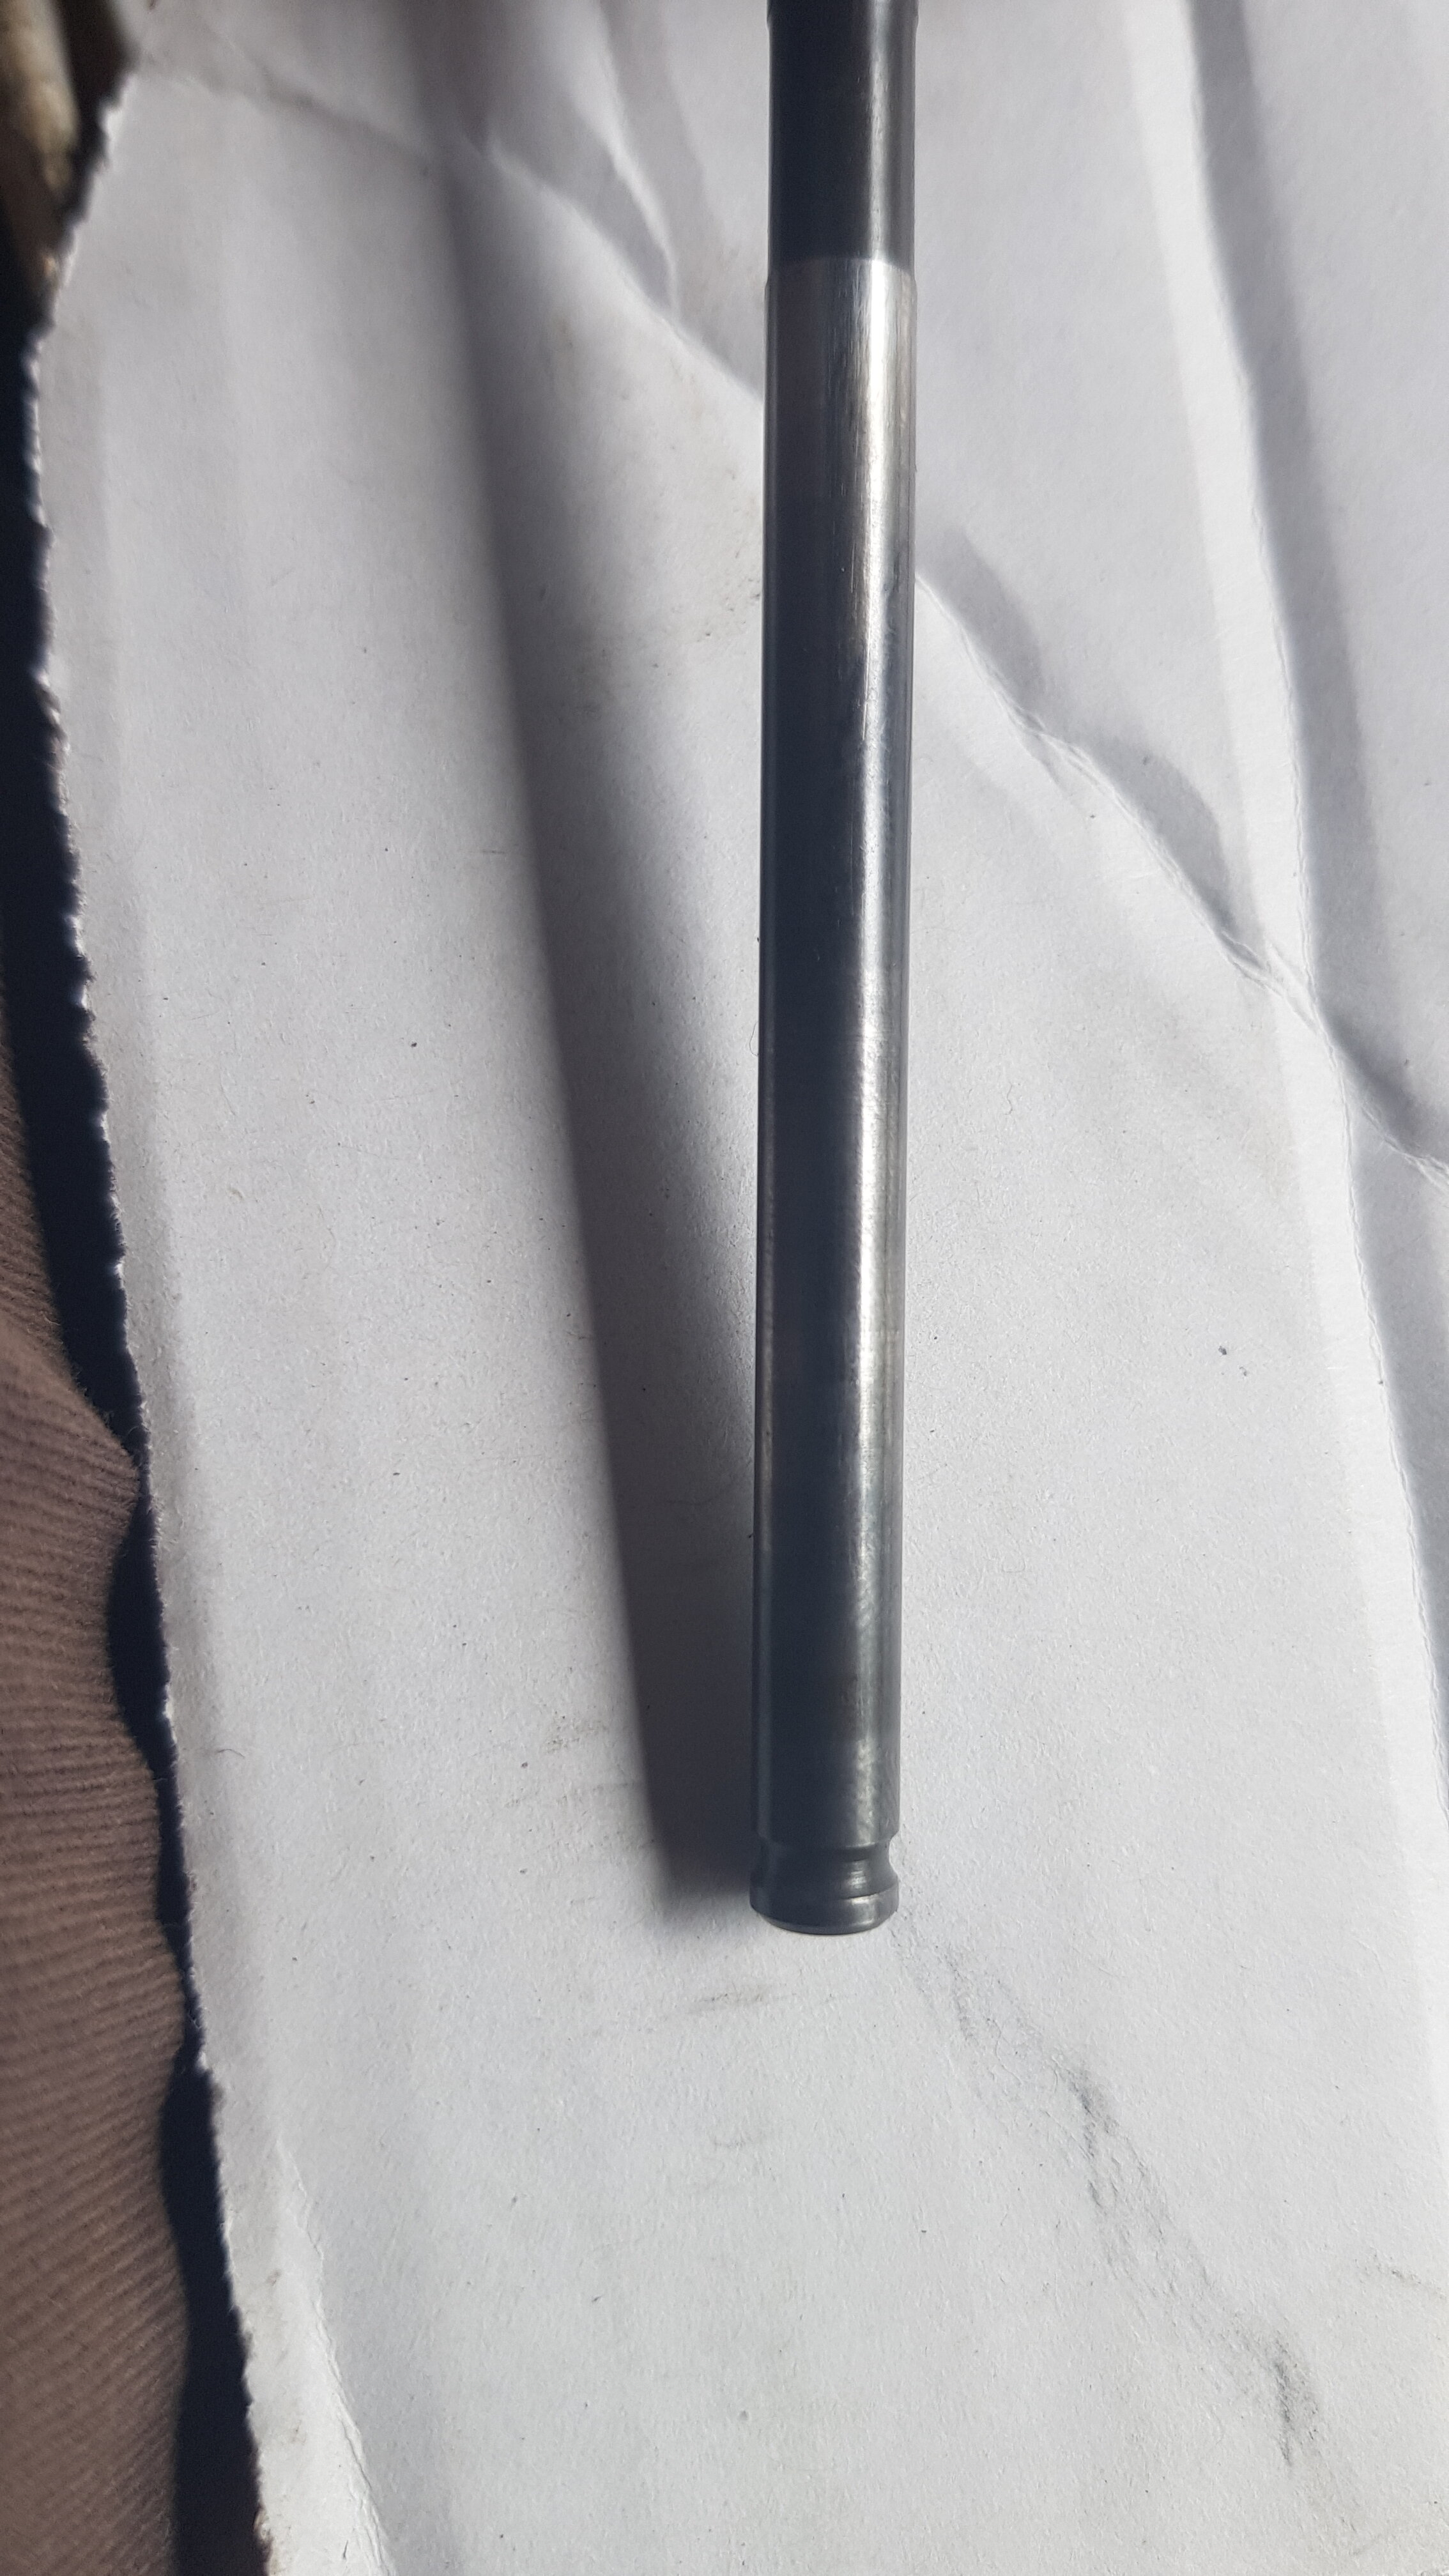
1 hour ago, Fishfiles said:I'd say that looks bad ---- How's about a pic of the head and a pic the valve stem it's self , looks like a lot of wear on it
Yeah I thought it looked bad as well...
Here's some more pics (pics of the head are after I've lapped it)
-
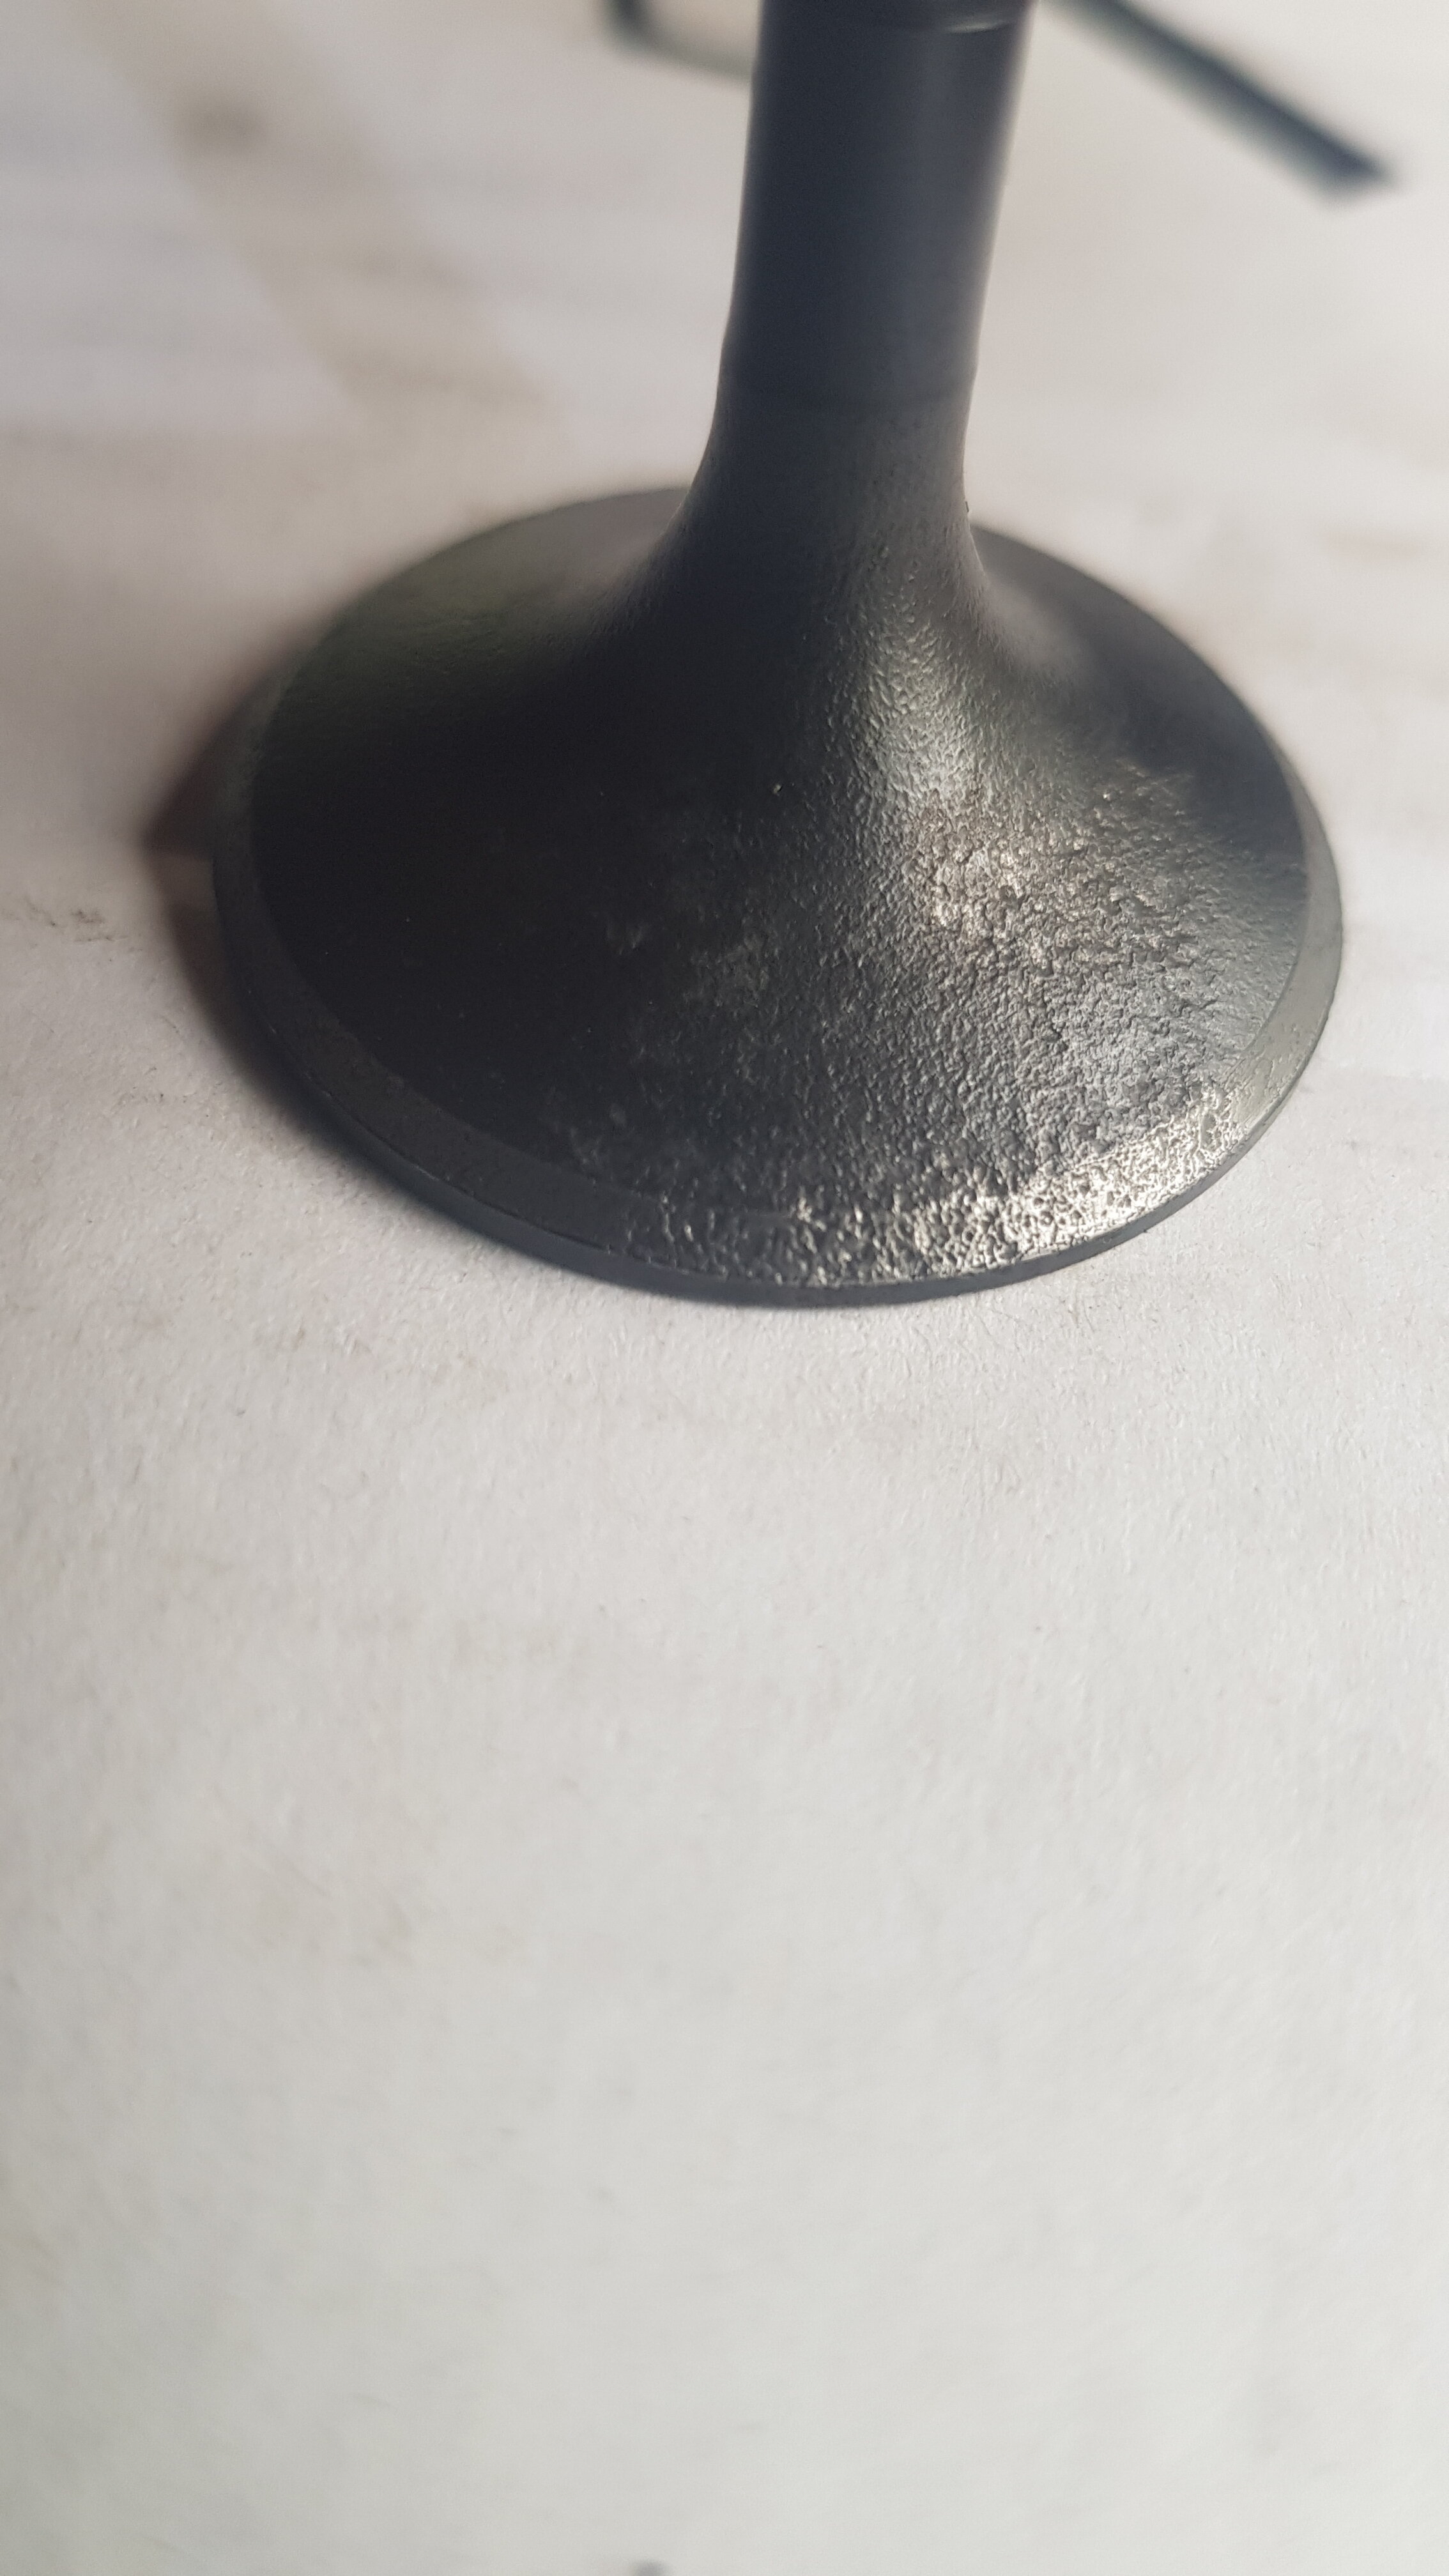
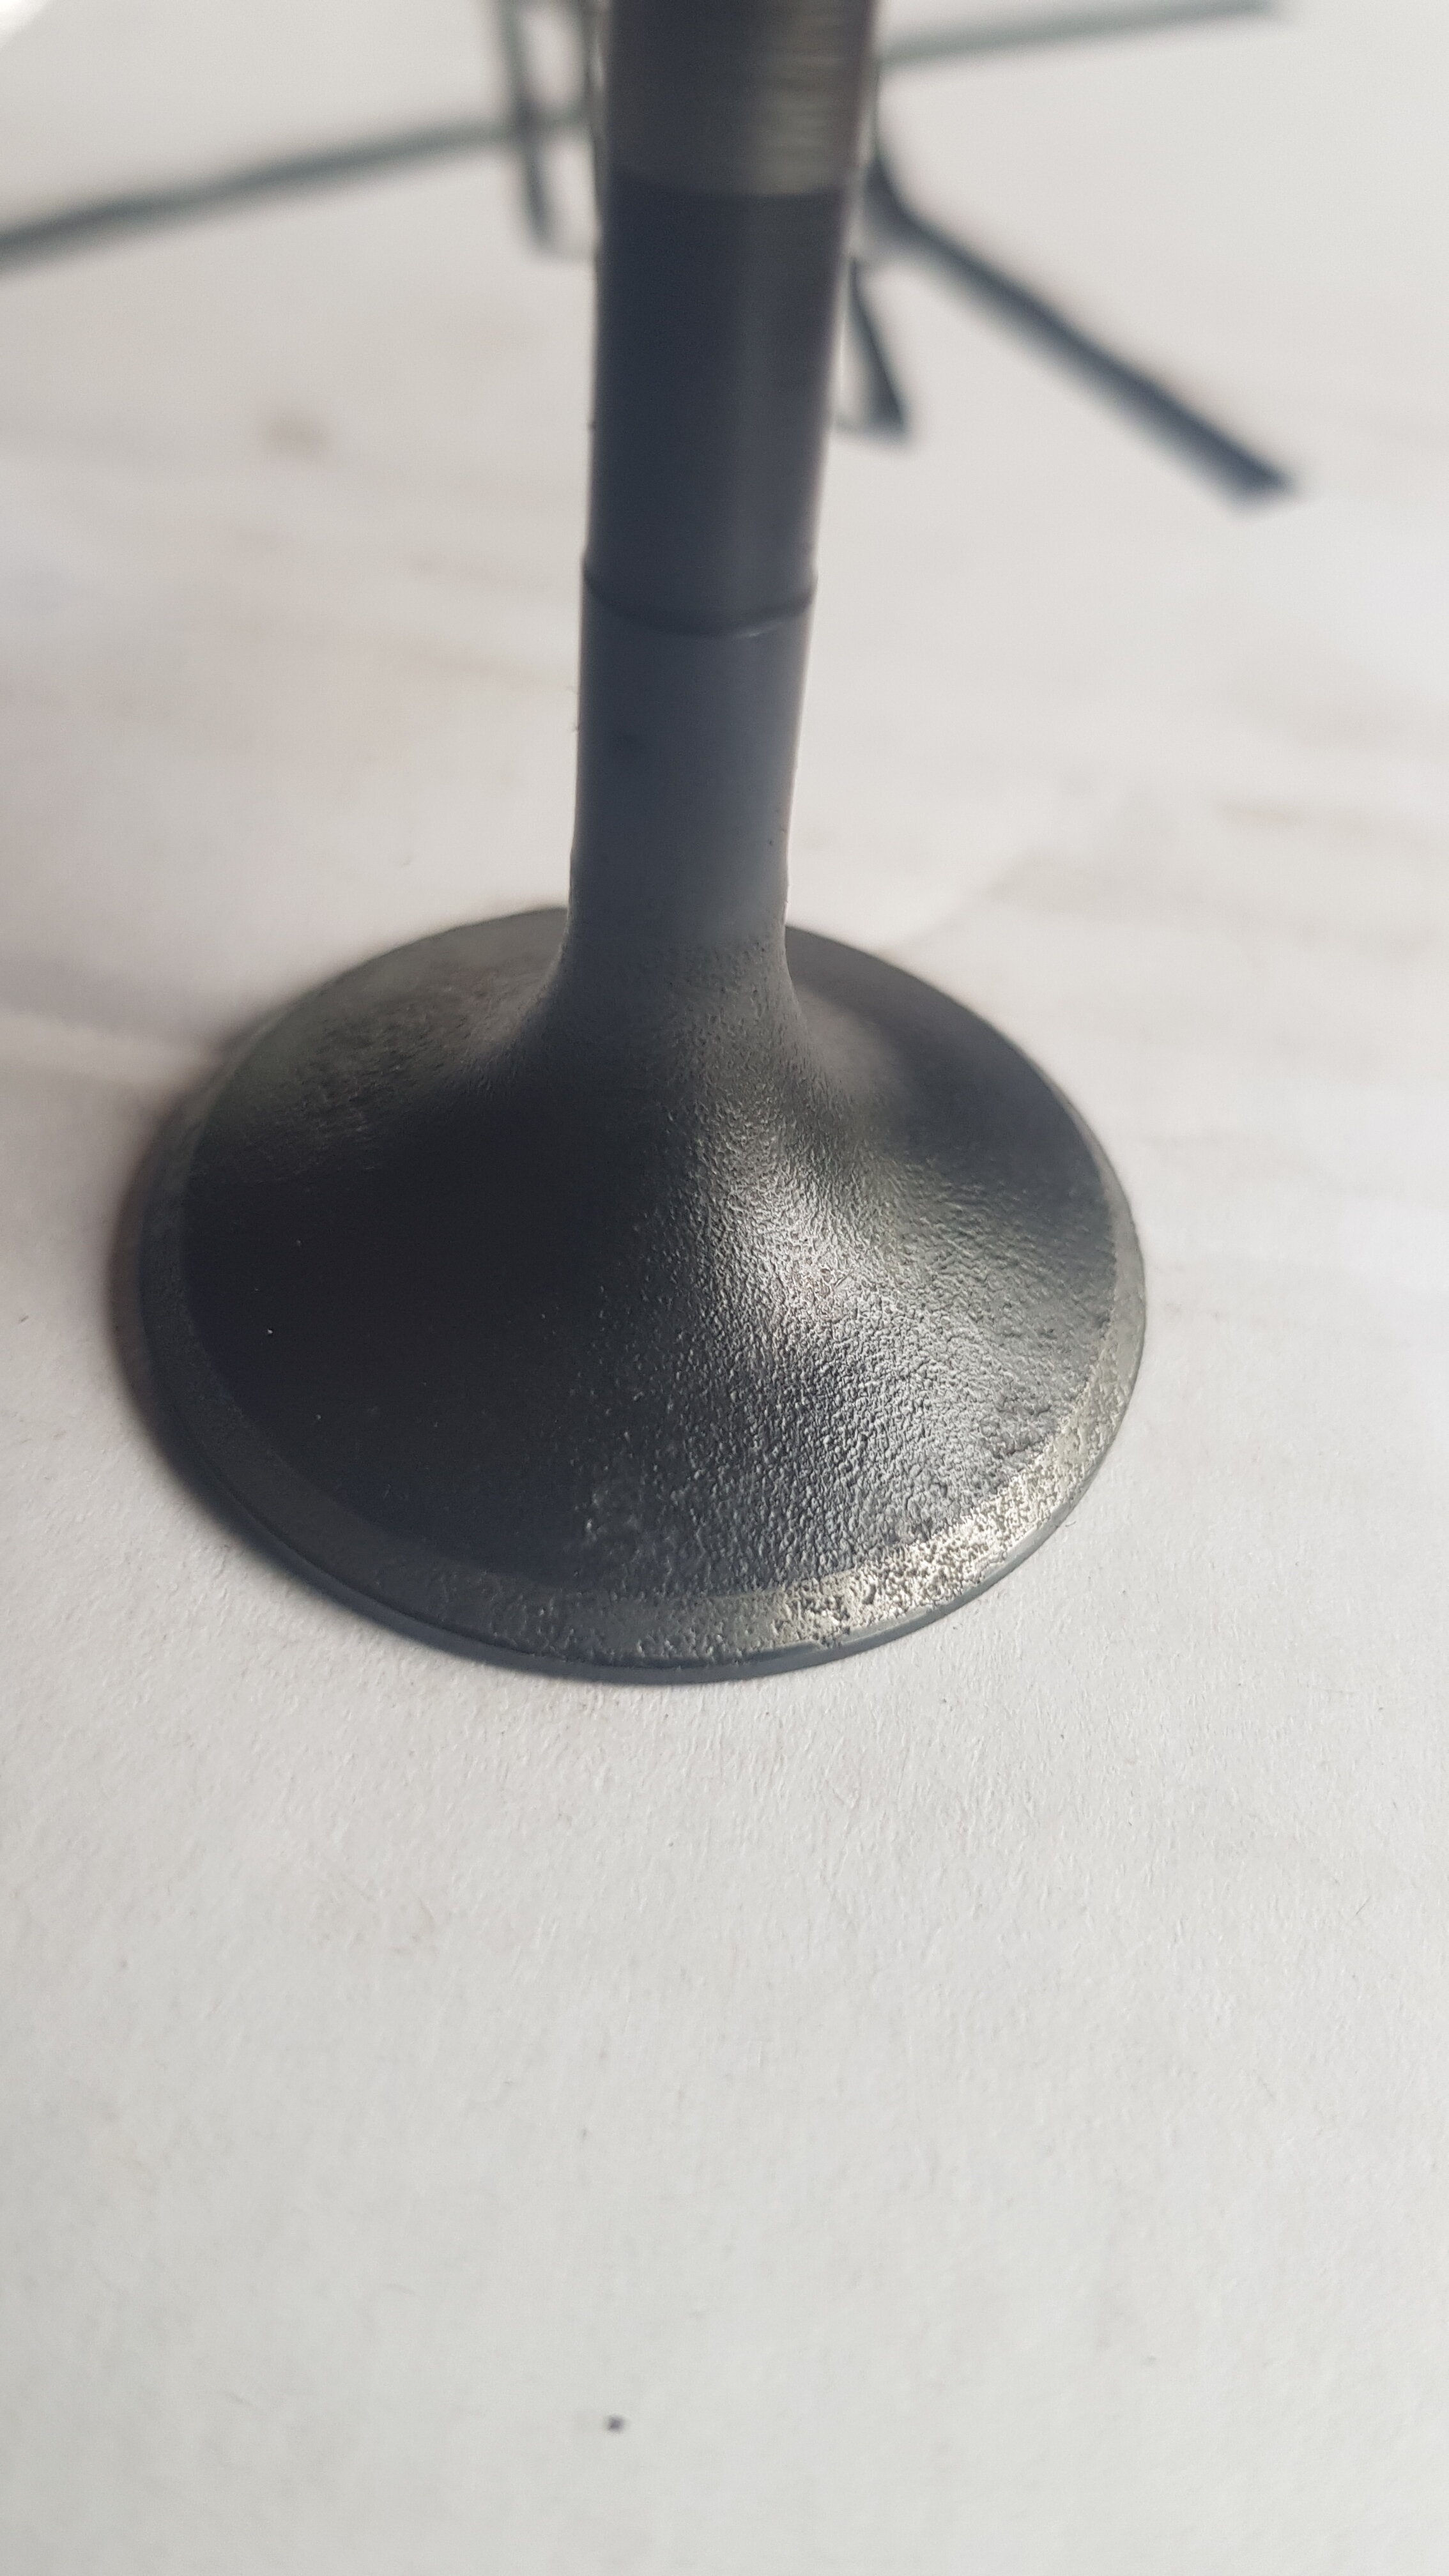
Update: Just took out one of the intake valves from the head and cleaned it up, haven't lapped it yet... and to be honest it doesn't look the best. There is quite a bit of pitting around the edge. Not sure if it would improve a little after being lapped? Would be great to here your thoughts. Thanks
-
Seal came off easier than I thought lol
-
1
-
-
15 minutes ago, _Wilson_™ said:you got me there..... mine are still on, lol! both the 97, and 2000 300 fwd's my old boss at Johnny's cycles (Johnny) said for those who ride in deep water, and muck..... usually don't do what's needed to maintain .... the grease between the drum seal, and backing plate.... and vent lines.... so moisture... (as fish stated) gets in, and over time corrosion sets in, and, without the seals ... the moisture / water can drain / evaporate... and to deal with what muck gets in .... just pull the adjusting plug (rubber plug) and wash the muck out.... the lack of the drum seal allows the mess to drain out, and the inside to dry...... now this would be for those who continuously ride in deep water.(which i don't) .. at least 1/3 of the way high on the front tires...
Ahh okay I get you... Makes sense as I doubt people riding in deep mud/water care much about the brakes anyway lol. However, I'll be using this to pull small logs out the woods and pulling a small trailer round for livestock and fencing... so brakes would be handy lol. Don't wanna end up in the ditch after the trailer pushes me down a hill lol. Thanks buddy
-
1
-
-
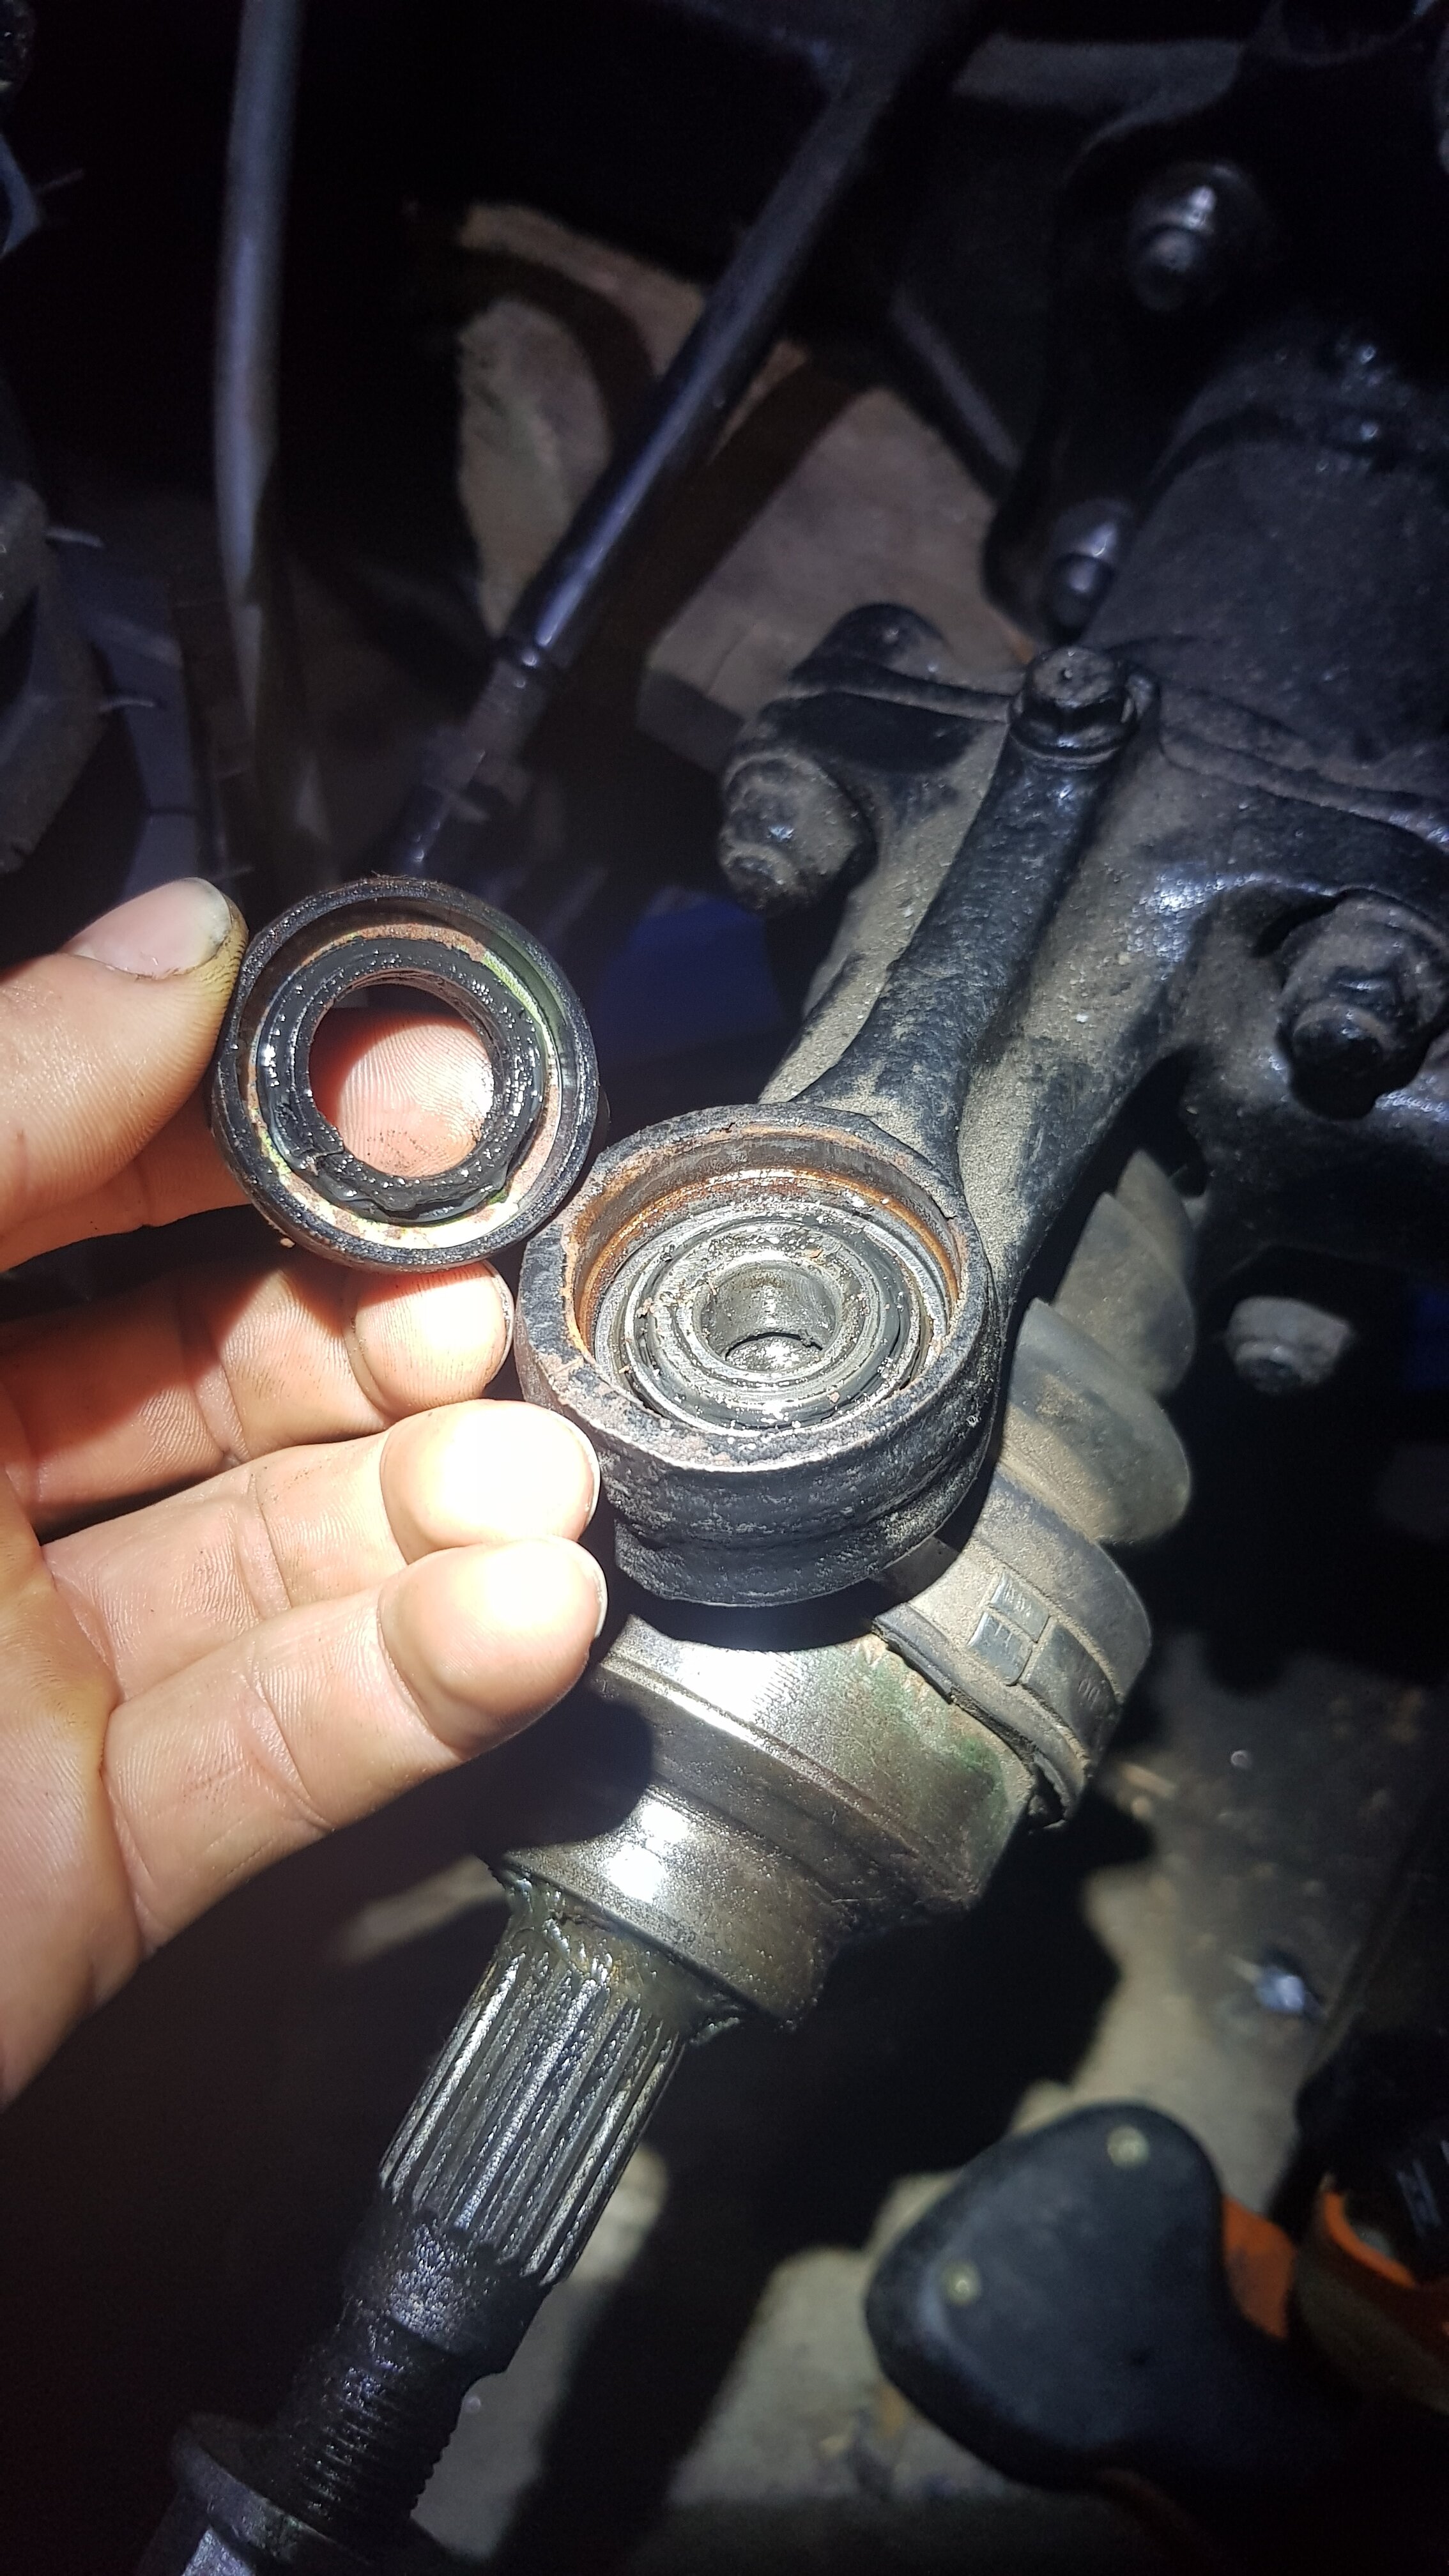
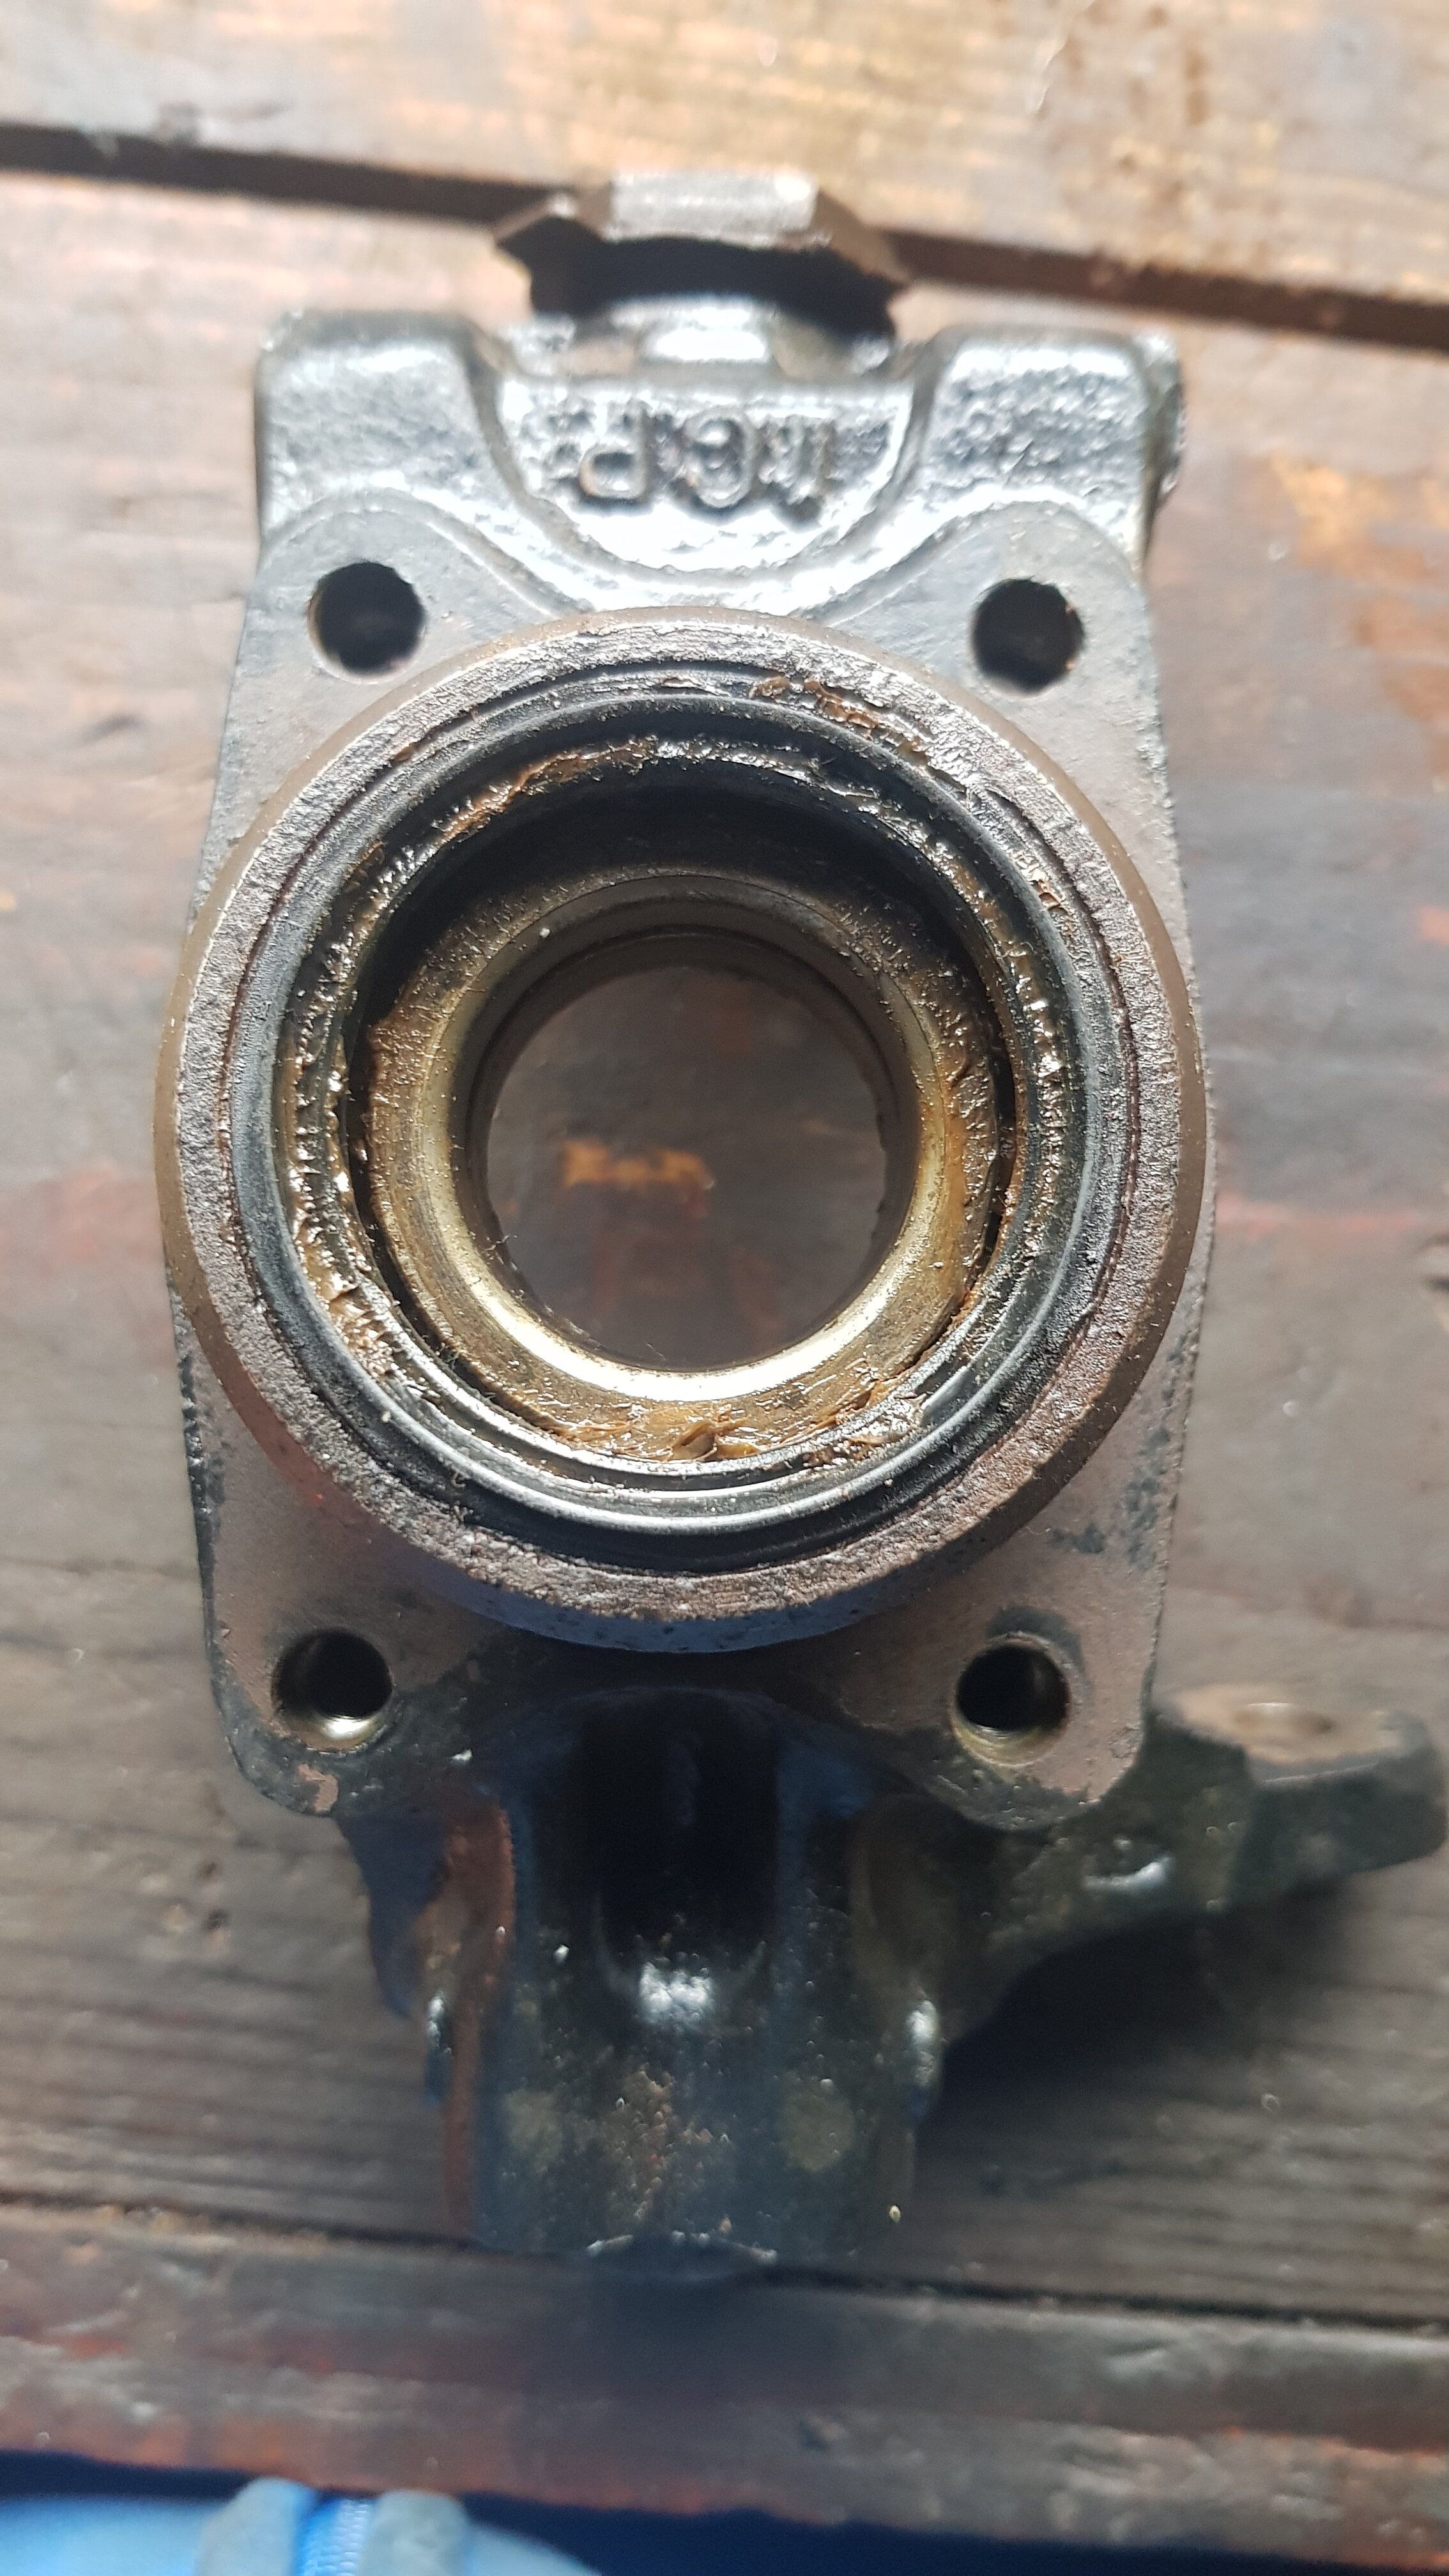
1 hour ago, shadetree said:while you have the outer part of the knuckle off, now is the time to service the tappered bearings that sit down in the top, and bottom of the knuckle. they also have seals in them, they help with the steering. i always pull them out, clean, re-pack with fresh grease when i tear these down.
Thanks man I'll check em out. Was definitely gonna pack some more grease in them .... maybe I'll take them out and clean them properly now though lol . Thanks
-
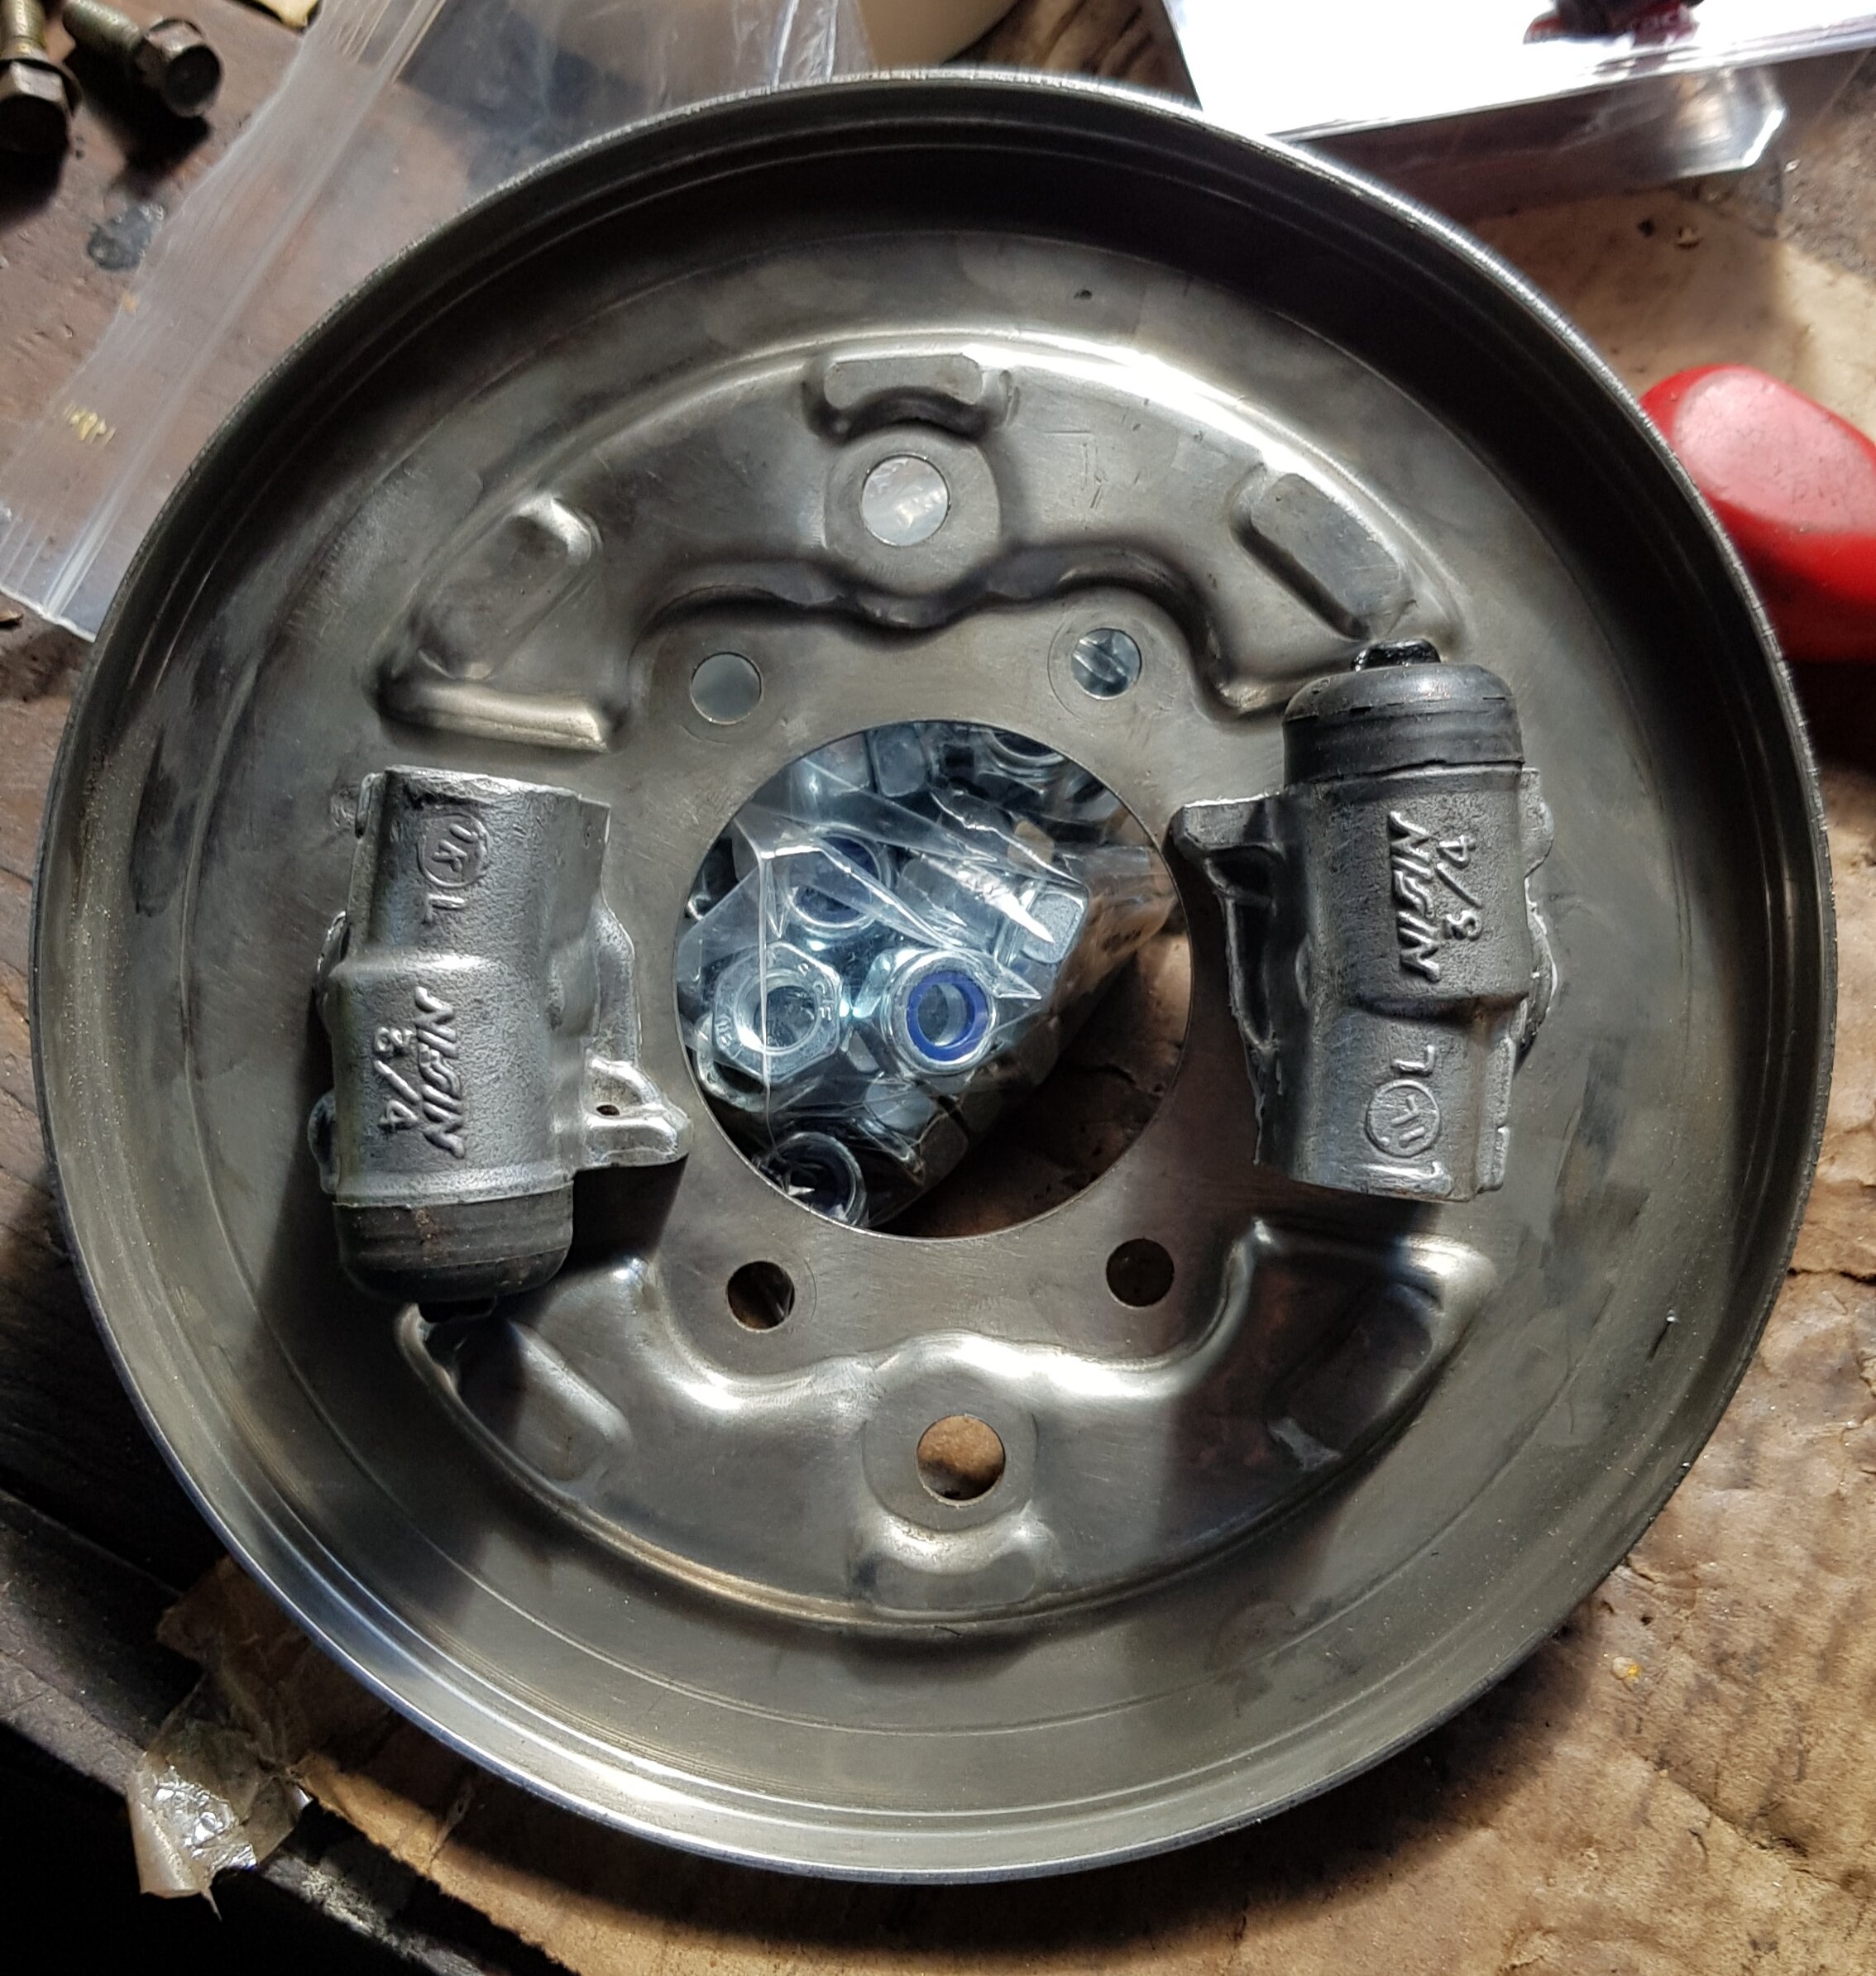
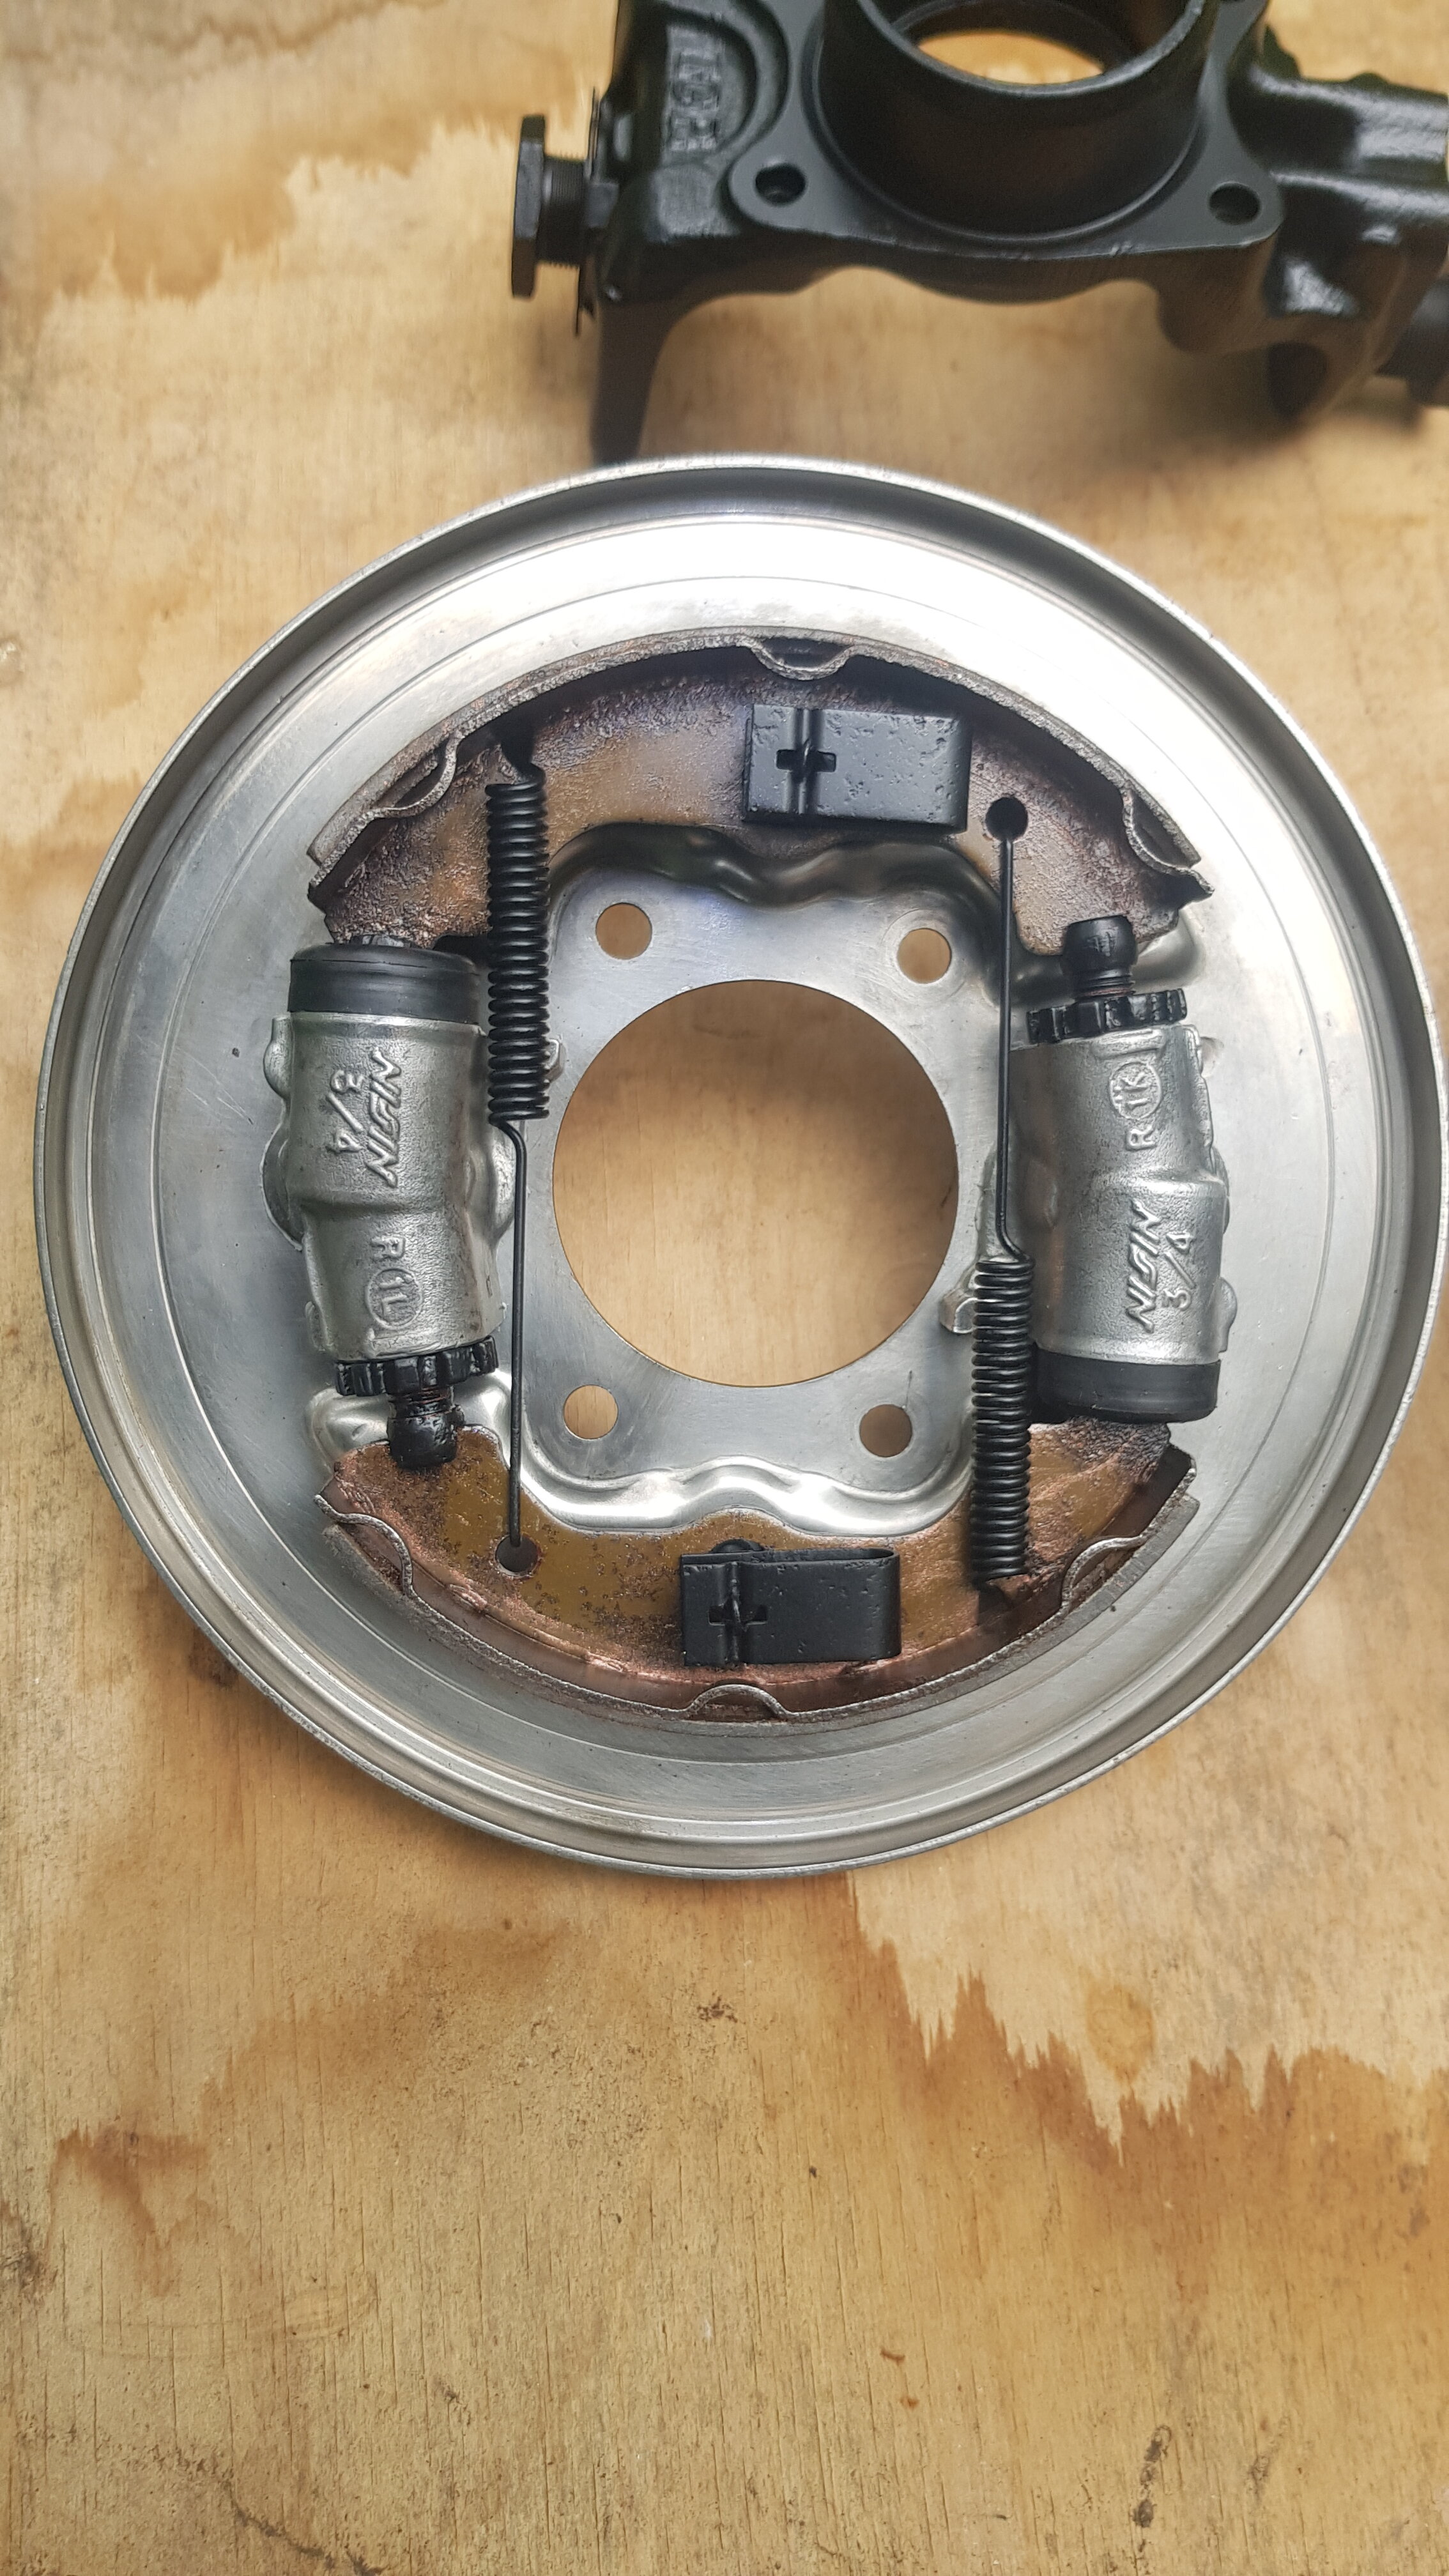
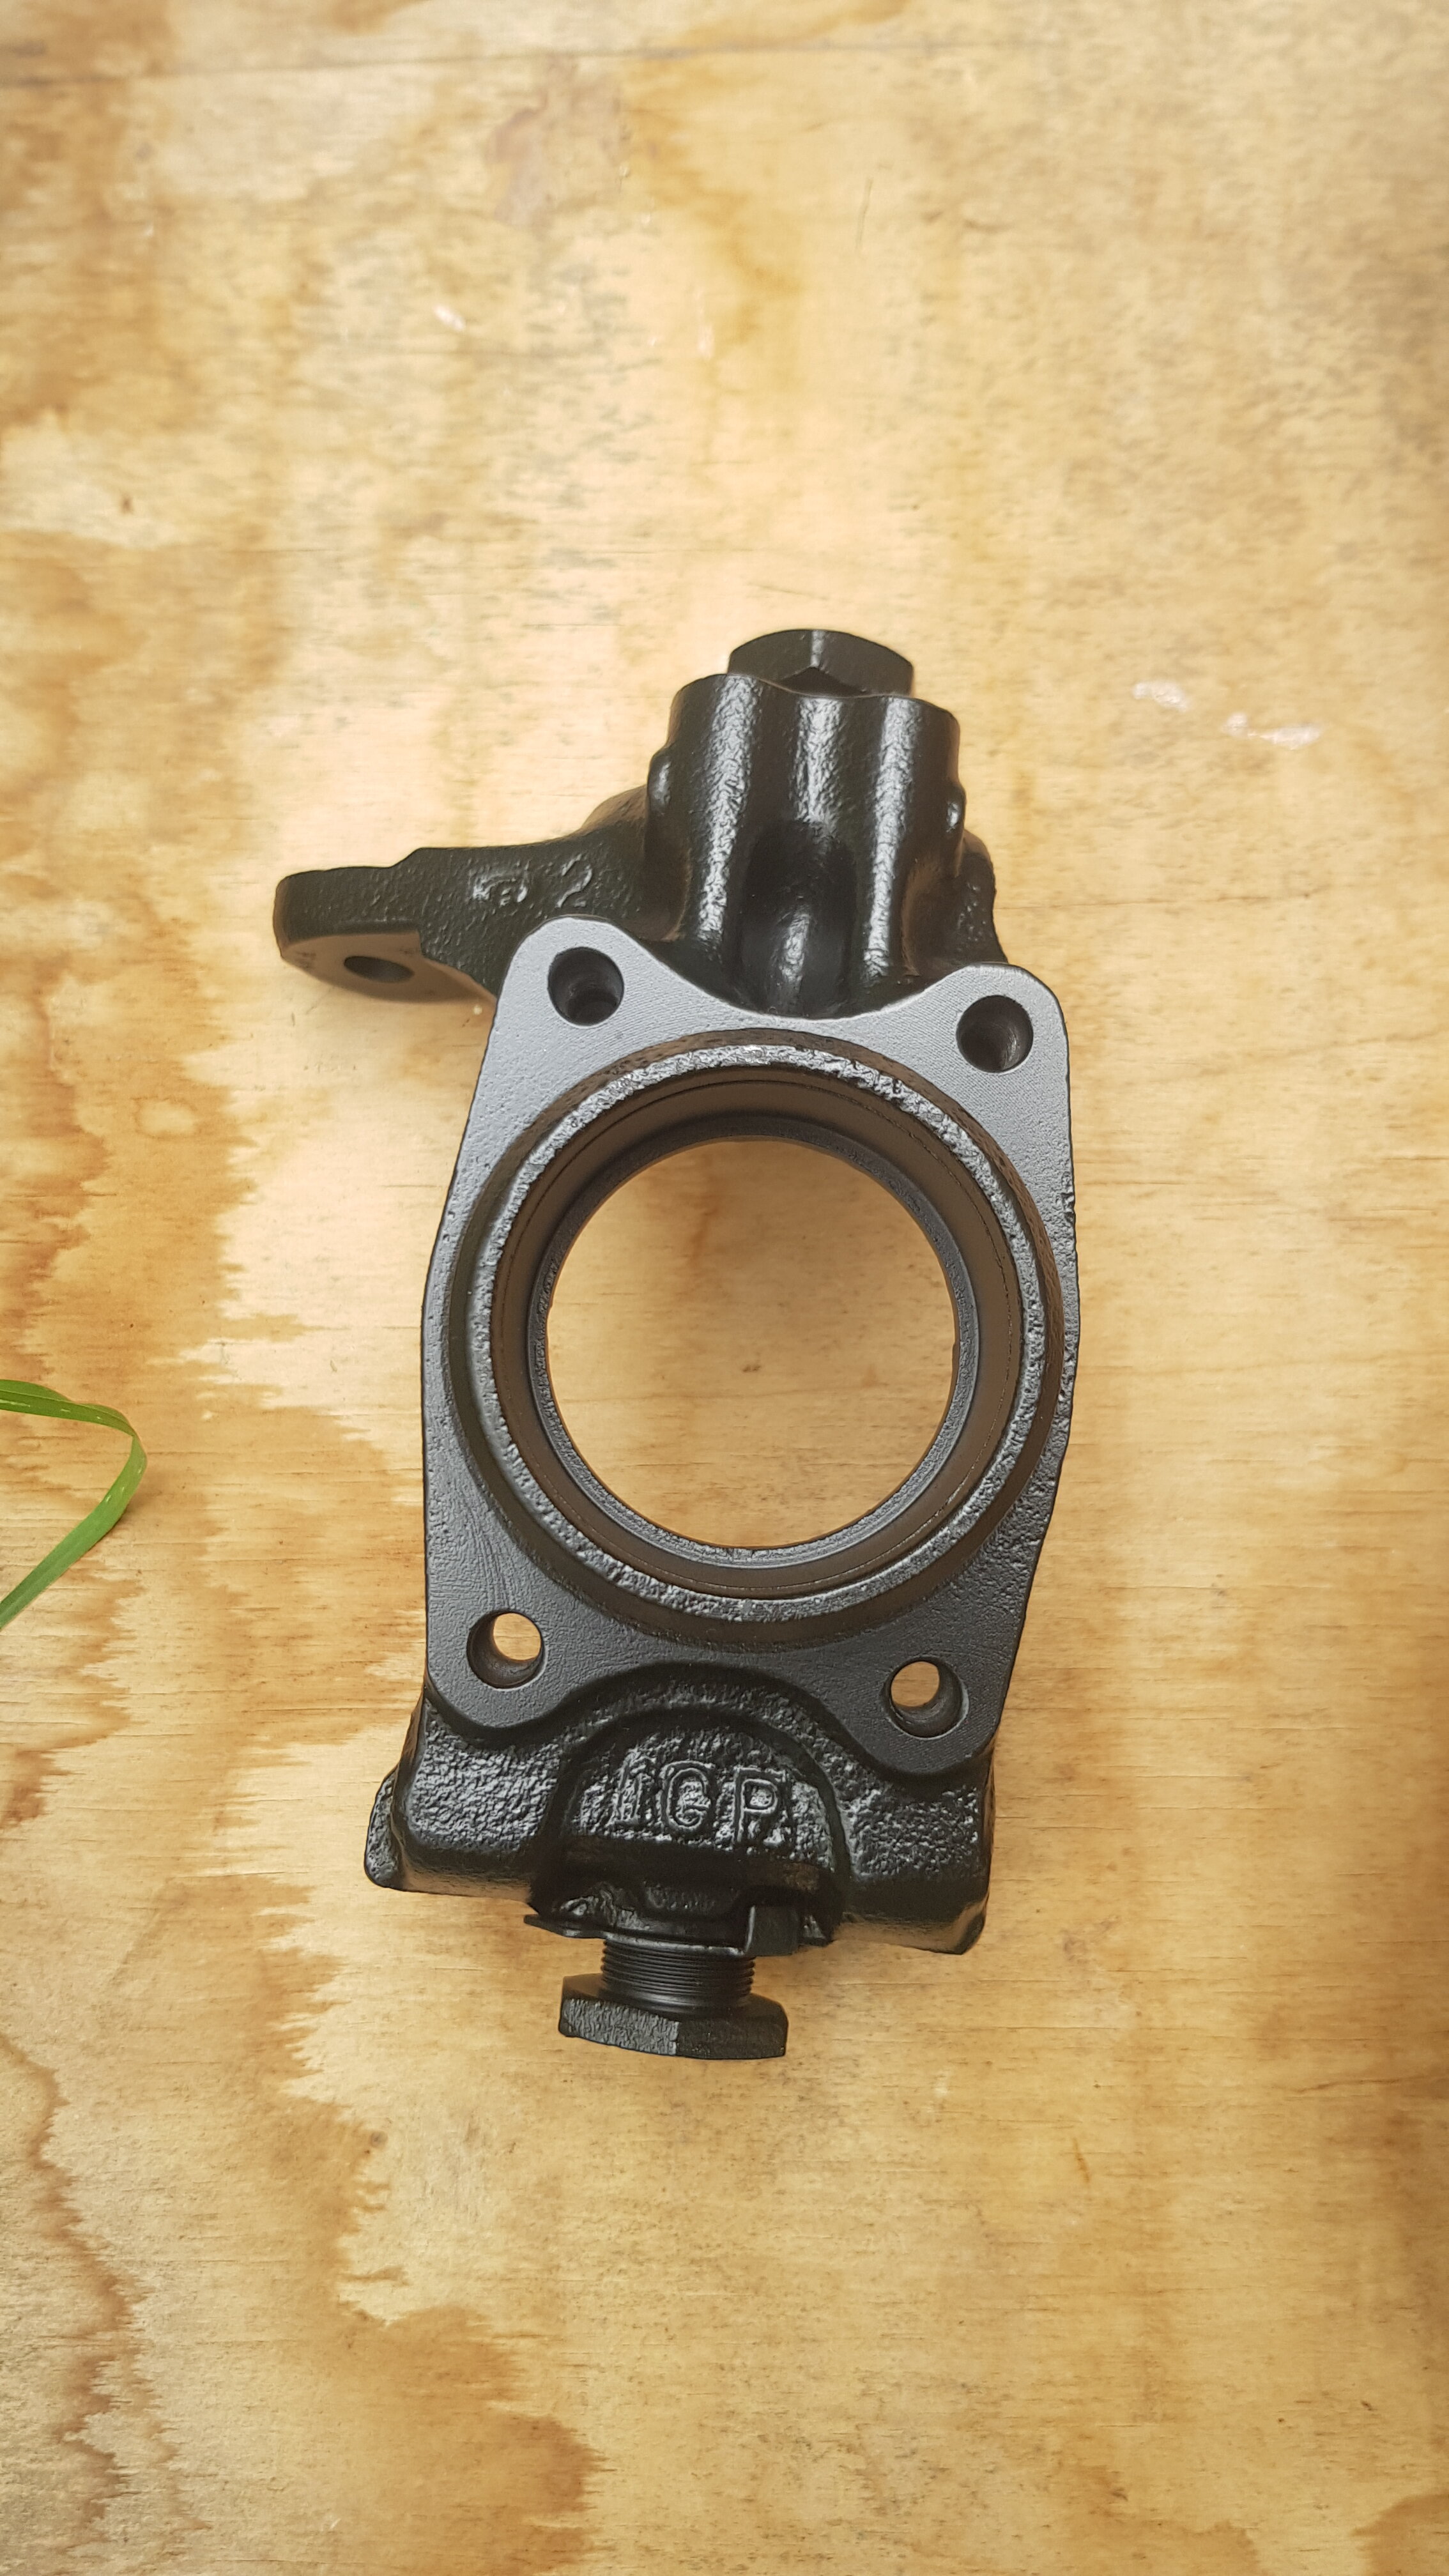
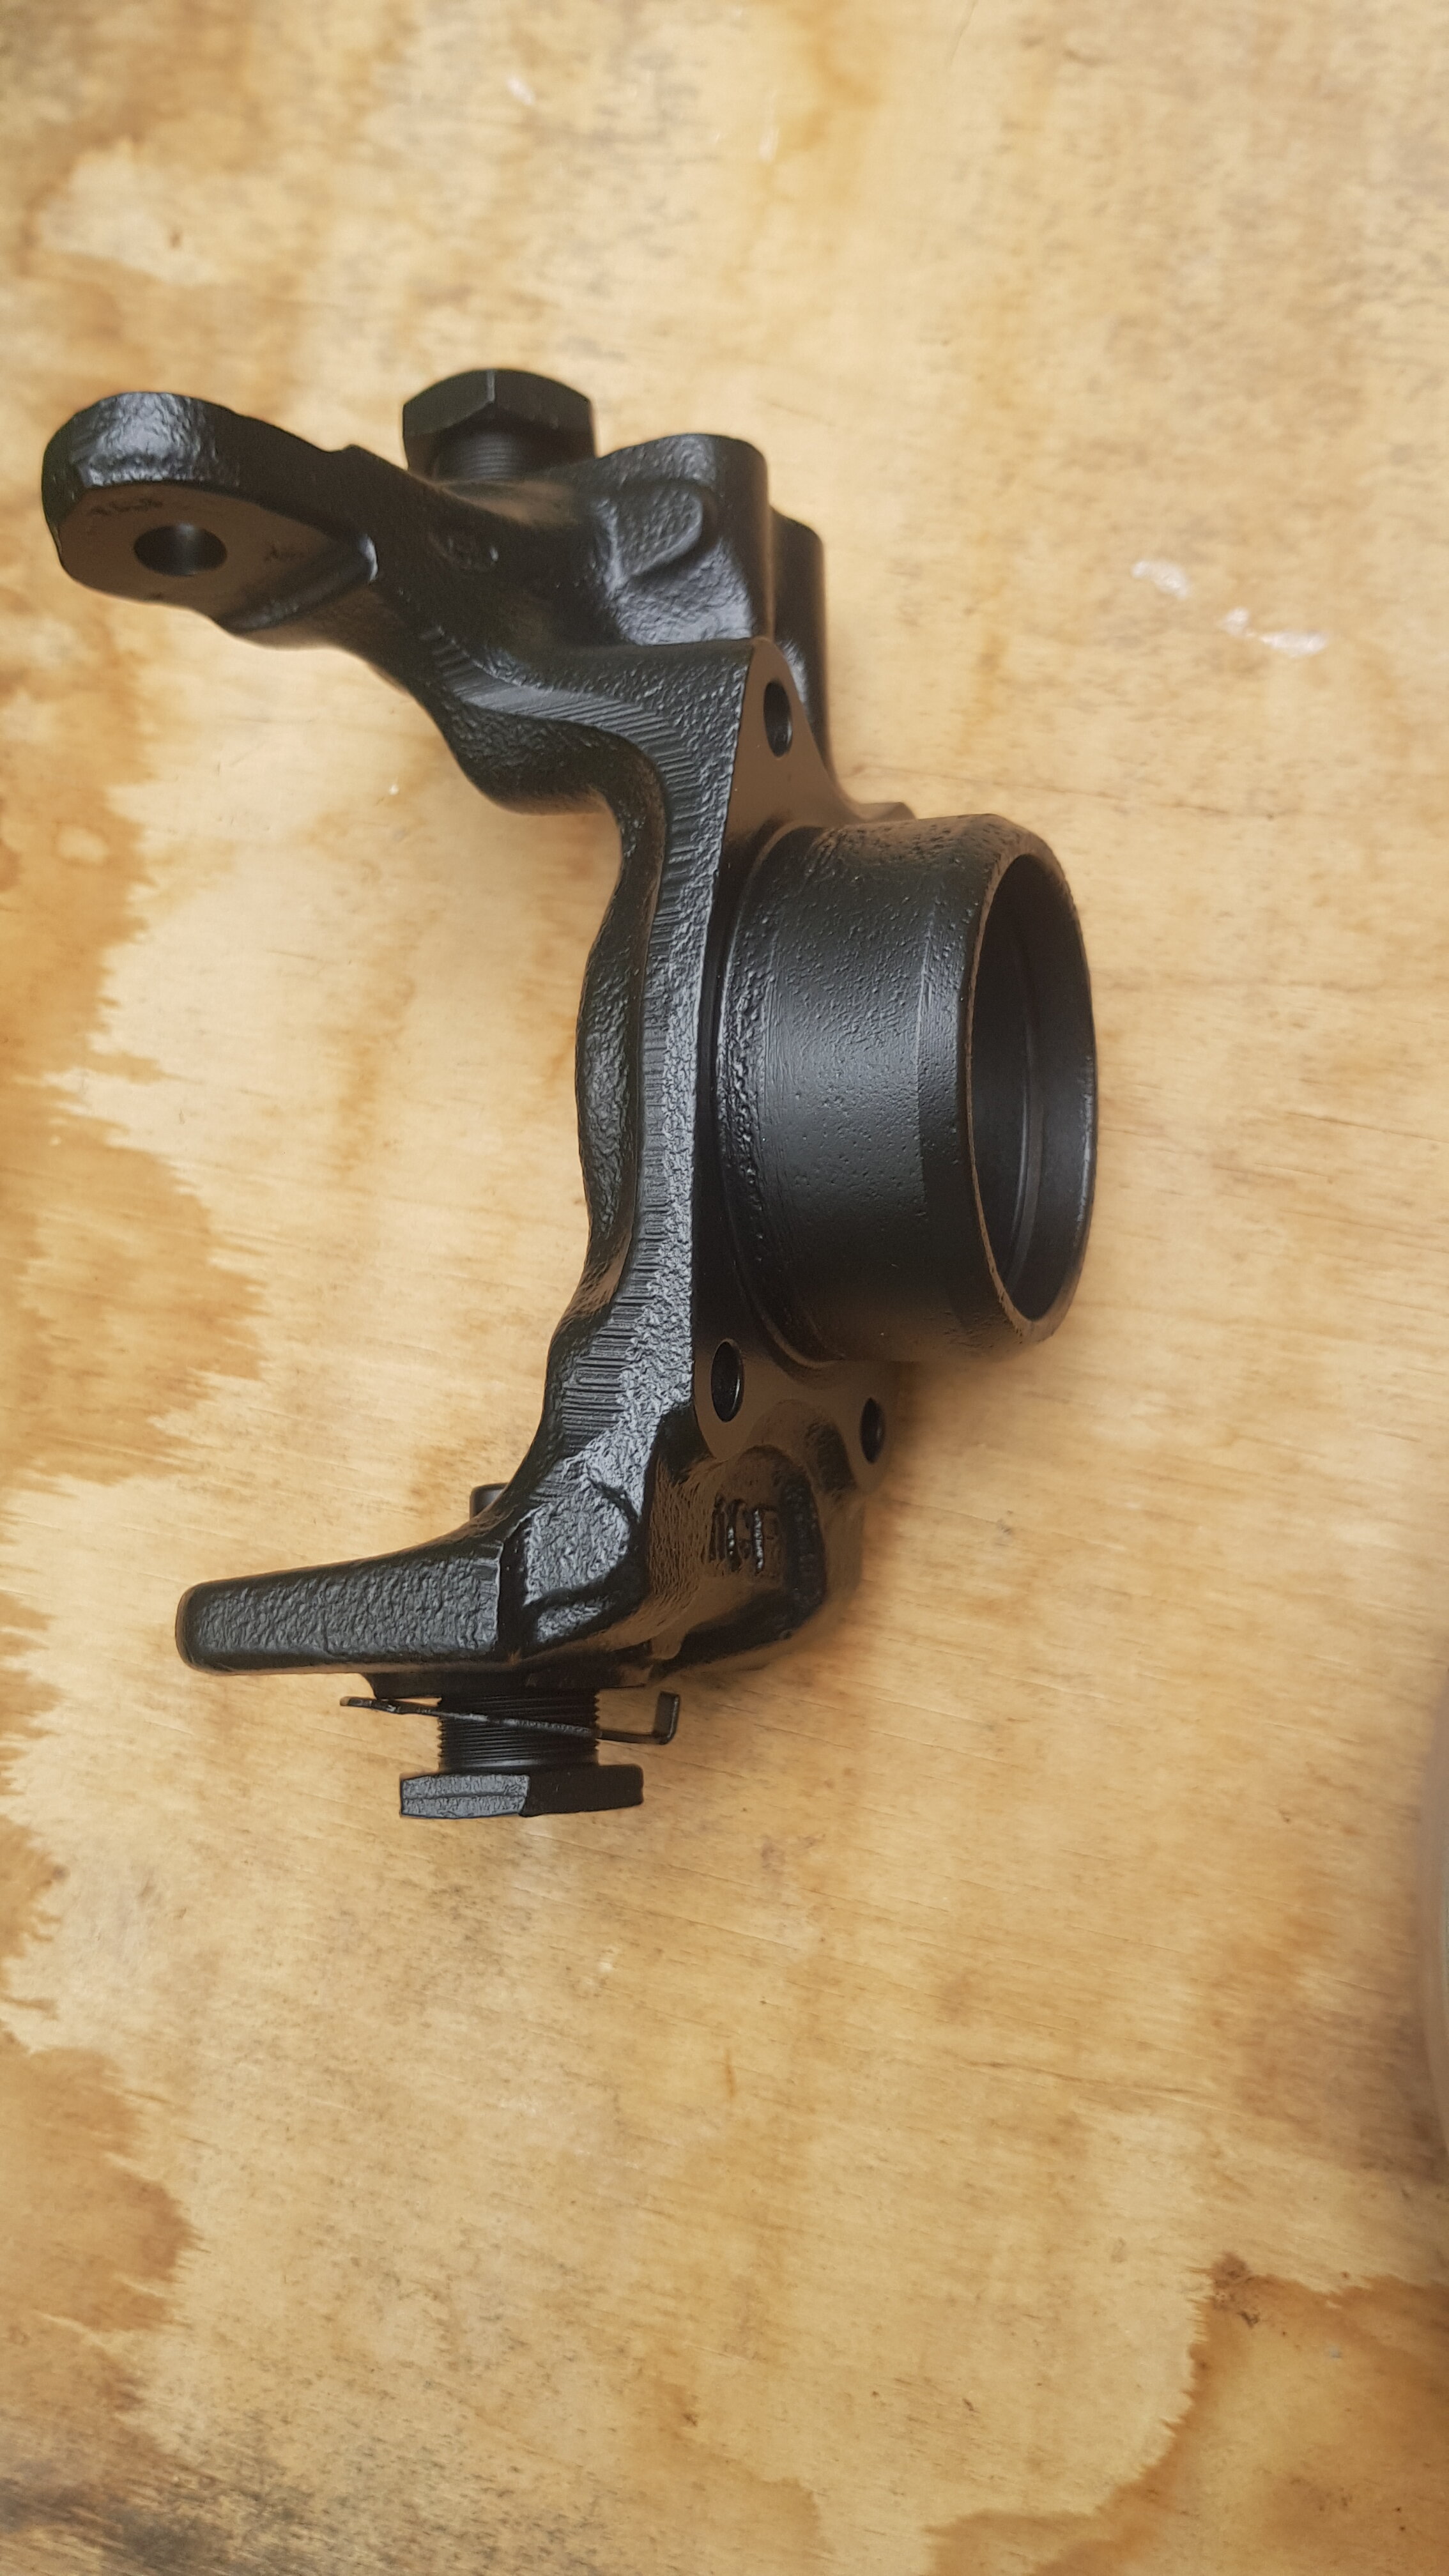
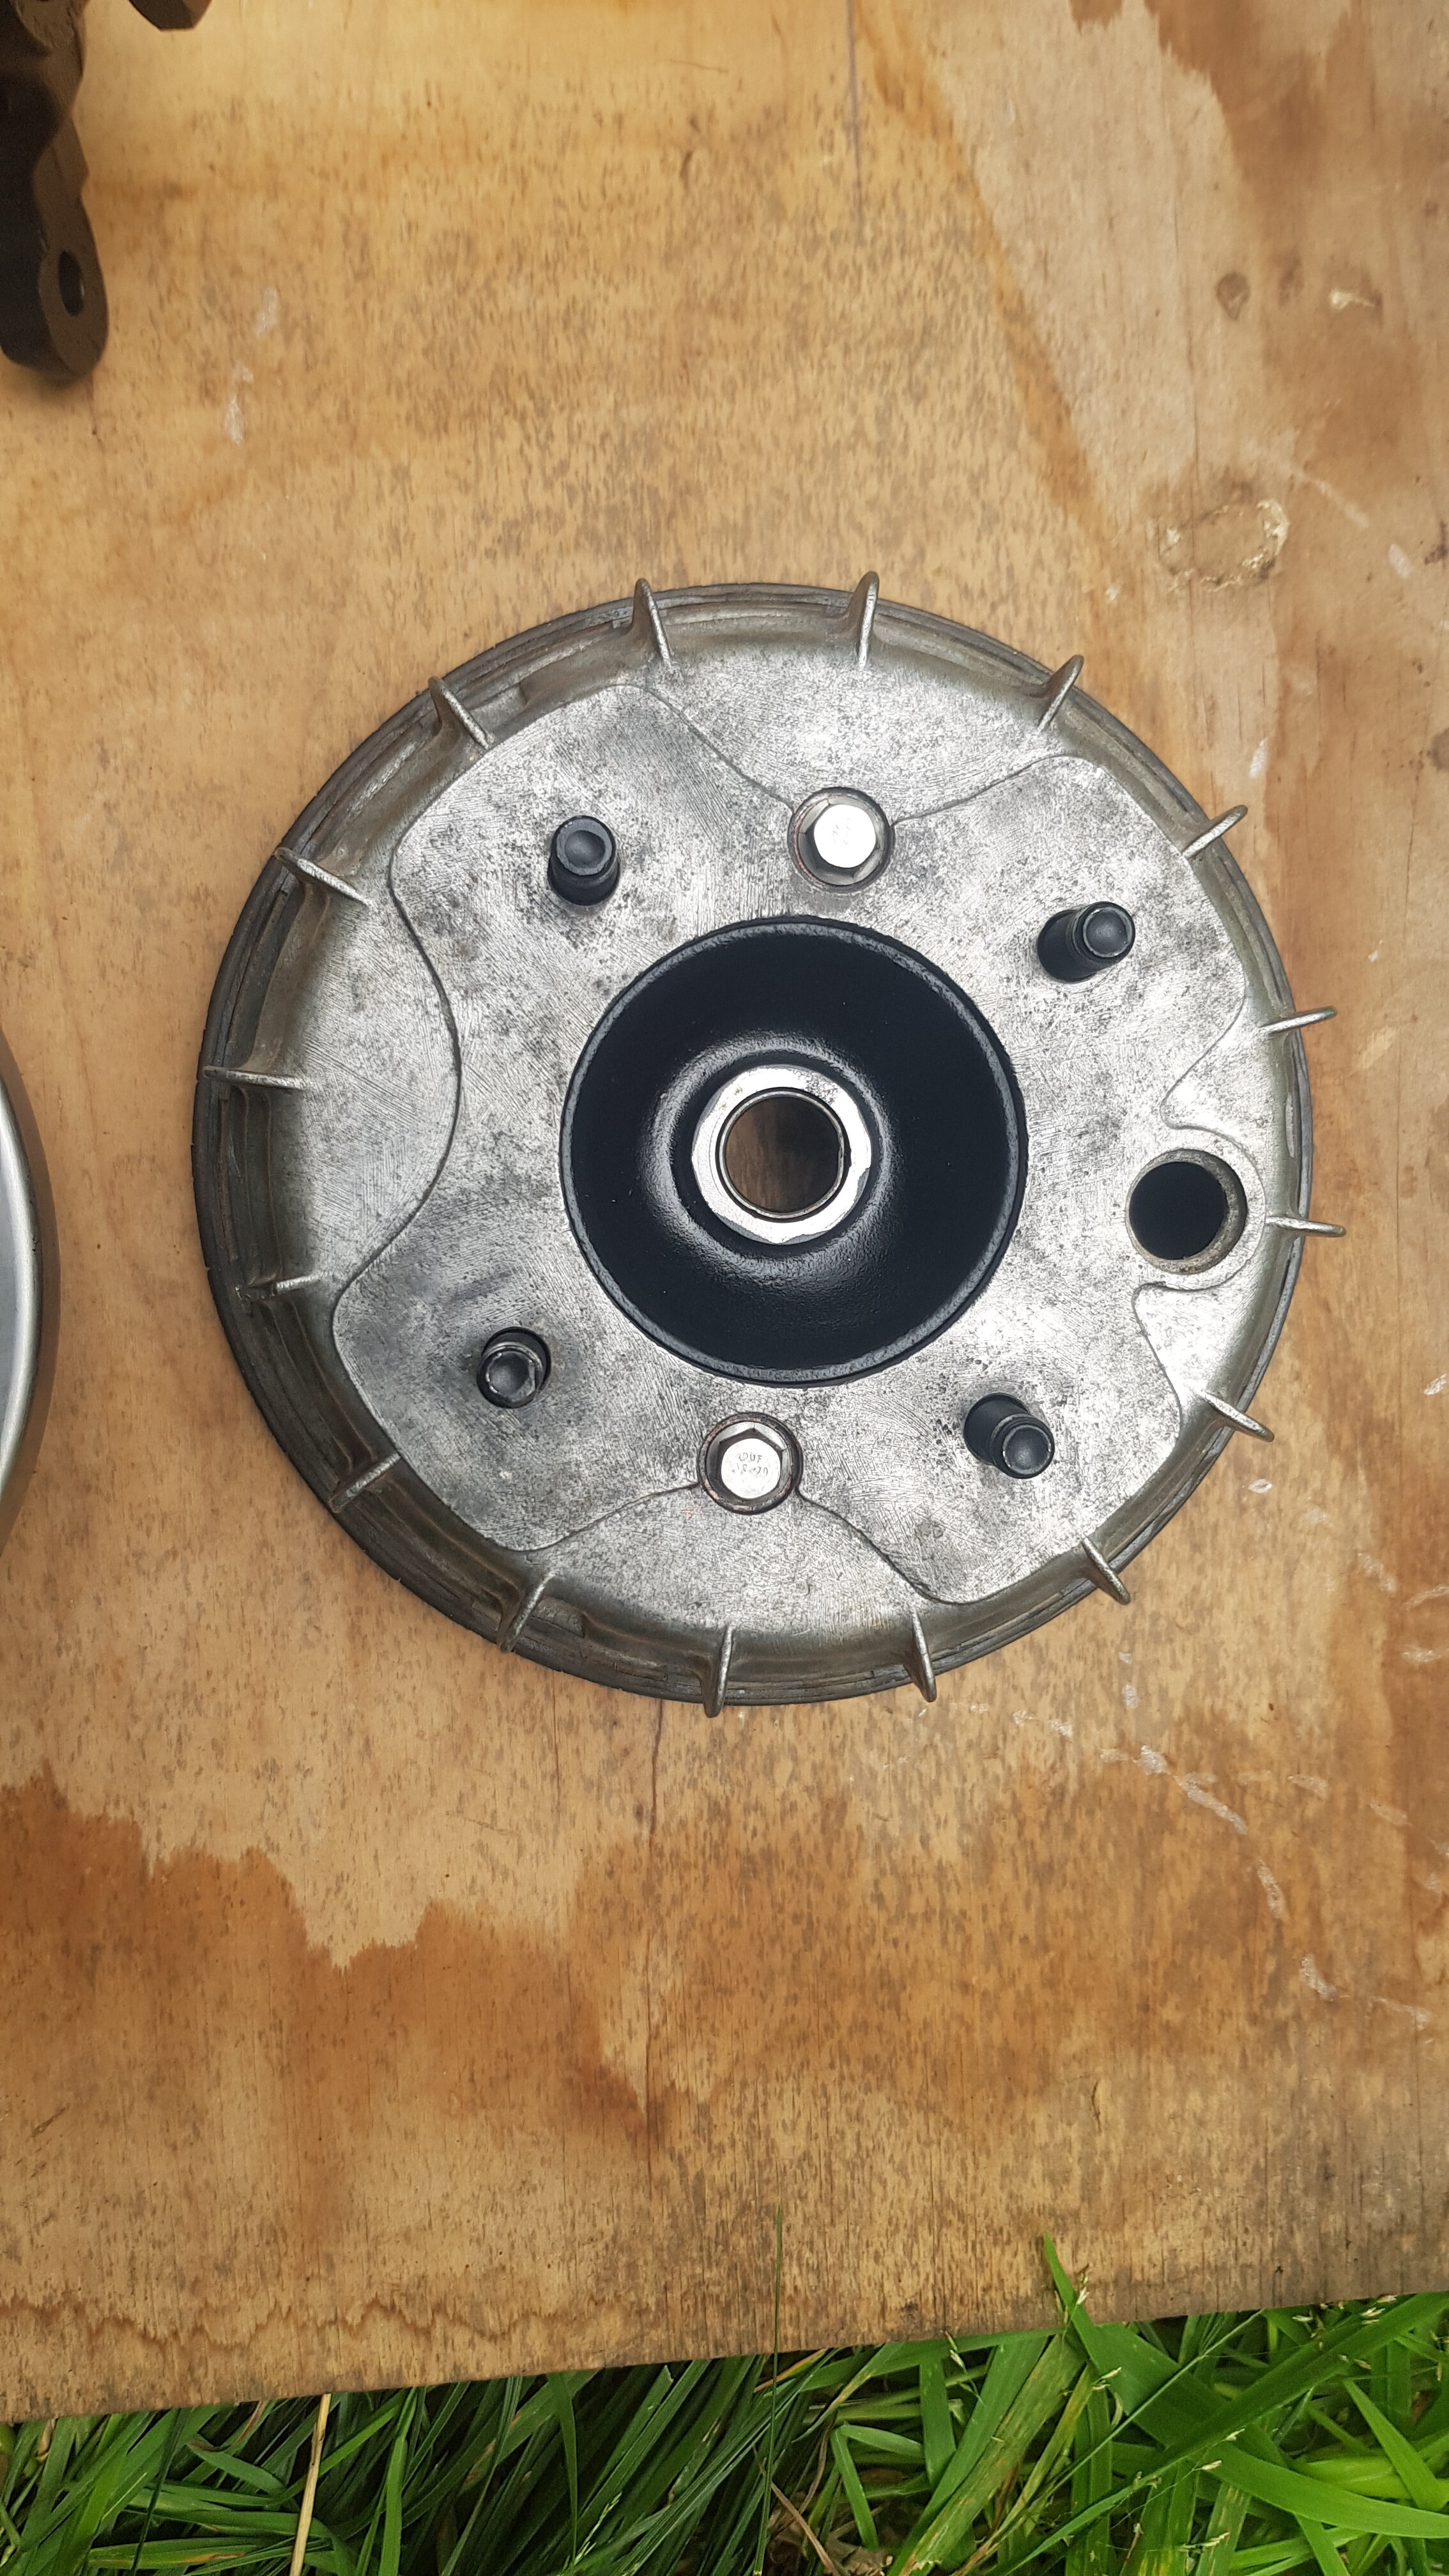
Brake drum, backing plate and right side knuckle (still got the left side to do) all cleaned up and painted nicely.
Here's some shiny pics for you boys lol


1992 350D Starting problems
in Engine - Drivetrain
Posted
Yeah thanks man... Was just unsure of the orientation in which the plate bolted onto the knuckle at . Thanks