Orvis25
-
Content Count
133 -
Joined
-
Last visited
-
Days Won
1
Everything posted by Orvis25
-
OOC, do you know of a fan system that mounts to the sb650 radiator, or would you be doing it via retrofitting? Didn't see anything via google.
-
Why not above a 317 top? any particular reason?
-
Well you can read my signature for my mod list 😛 Not even approaching 10k like yours, but hey, i do some stuff >.<
-
brutal. But as long as your happy right? OOC: what mods do you have on yours? Iv never seen like a list of everything you done to yours.
-
Well I bet its a beast and a ! of a lot "better" than mine. But.... I'm not putting 1/3 of my yearly income (before tax) into my near 30 year old ATV to pull some mulch around and plow in the winter 😛 I might consider the BBK when i need to do top end engine work though since id have to spend money regardless.
-
well, best of luck with the "big boy" build. I saw the cost of doing a BBK build and nearly s,h@,t myself (I got a price for a kit + the boring work at $800 before tax and shipping costs both ways). I would not need the extra HP as all I do is pull mulch and logs, and plow in the winter, so I will stay stock.
-
Fan for the oil cooler, not for the engine (idk if that was misunderstood) I never had overheating issues to begin with, so having an oil cooler already is reducing the chance of a non-existent problem for me, I deemed the fan unnecessary. Pretty much just that.
-
Well hope it helps in the long run. I'm sure your engine would be happy, even if no BBK is installed (like mine). I was considering a fan, but I think its a bit overkill given my engine is stock.
-
Ya i consider going directly from he cooler threads to a barbed fitting to eliminate a lot of conversion and clamps, but even a 3/8" flaired fitting would not screw in properly to the CB650 cooler and mount flushly, so I went with the cut the line method like @Wheeler to preserver the OEM fiaired fitting so I have proper pressure throughout the system with no "whirlpool" points in the line from gaps on the internal parts of the line. I considered the oil cooler plate method, but its a much more expensive method (I got this whole thing done for under $30 us) and would position the oil lines closer to the riders legs (something I did not want). But ya that is a mean looking setup @Fishfiles ! OOC: what is your oil cooler from originally?
-
Don't worry about it @_Wilson_™, If its as @Goober says and this would be a $100+ thing, I will just go with a 12v digital one. I will most likely pick up the RL-HM035L since its basic, less than $30, but has what I wanted (operation hours, 12v hookup, and engine RPM) Appreciate the help.
-
Something when wrong with posting (all the text is gone but pictures stayed). goin back and re-writing it all....... Edit: Took a few attempts and an extra hour, but I got her re-written. IDK why it was giving me such a hard time posting text and photos'.
-
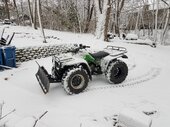
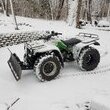
OK guys, Got another write up for you guys! This one is how to do make and install an oil cooler on your trx300fw. Special thanks to @Wheeler for the core idea of this mod. OK, here we go __________________________________________________________ Tools: Hack saw Flathead screwdriver Pipe reamer Metal file Items: CB650 Oil cooler w/ hoses (other coolers should work similarly) OEM oil line from filter to rocker box Hose clamps/clips (2) sections of 3/8" oil cooler hose (2) sections of 1/4" hose (I used fuel injector) (2) 3/8" to 1/4" barbed adapter __________________________________________________________ Step 1) Cut the oil cooler hoses and the oil line. Be sure to ream the inside smooth, and file the outside. Flush any metal shaving out of the lines. Step 2) Attach the 3/8" hose to the metal lines of the oil cooler. Insert the 3/8" to 1/4" barb adapter into the 3/8" hose. Insert the 1/4" hose on to the 1/4" barb. Secure everything with hose clips/clamps. Step 3) Insist the OEM oil line into the 1/4" hose ends. Secure in place with hose clamps. * the 1/4" will be a loose fit so I used multiple clamps to be safe. Using 3/16" oil cooler hose would be a better option, but I could not find any locally, so I used fuel injector hosing in 1/4 as my next best option * Step 4) Install the feed line part of the radiator to the engine (above the filter housing), leave the return (on rocker box) un-bolted for now. Start engine and let it idle to pump oil into the radiator and flow out the return hose, then cut engine. (This should only take 15-20 seconds from starting the engine) ! Make sure to ensure oil is flowing out the return line before reinstalling onto the rocker box, else you risk blowing the engine from no oil flow ! One oil has filled the radiator, and you verify the pump is pushing it out the return hose, bolt the return line on to the rocker box. * Another option is if you have the tools, inject oil into the radiator system before hand * Step 5) Mount the radiator to the frame. I used plastics zips for test fitting (as seen in photo's), but for long term use and reliability I recommend doing metal wire or metal zip ties. @Wheeler produced his own bracket using U-bolts and L bracket metal. this would be another option. Run the engine again, and listen for any abnormal sounds (since we messed with oil feed systems). As it warms up, check the radiators temperature to ensure its warming up (signaling oil is flowing). Check all connections for leaks, especially around where the metal OEM line fits into the 1/4" hose held on my clamps (as that's the weakest link in the system) Step 6) Reinstall all external components __________________________________________________________ And that's it! Other than sourcing some of the parts (specifically for me the hose and barb adapter) this is an easy mod to do. I recommend buying a spare metal OEM oil line just in case something ever goes wrong, or you want to convert it back. Best use case for this mod would be BBK users (like @Wheeler) or for people who live in hot climates and what to keep their engine cooler. The mod does not do a a lot for making the riders comfort better (does not reduce hot leg syndrome) by much, but it will make your engine happier. If you do this mod, let me know how it goes for you and what you did differently! Hope it helps guys! ______________ Disclaimer: I am not responsible for any damages to your equipment or vehicle, nor for injuries to yourself or others. This mod write up is for educational purposes, do it at your own risk.
-
Thanks for the clarification. Was looking at them last night when you mentioned you had 3. Looking at the RL-HM035L model. Seems to be the only one they offer now that operate of 12v with a battery for memory backup.
-
 Went back and edited the OP to clarify crediting you and elaborate on a few things, Including additional pictures. Thanks again for the help!
 -
Rebuilding my 2000 Honda TRX 250 Recon. Need some help!
Orvis25 replied to Viktor_AZ's topic in Engine - Drivetrain
Personally, as long as the part of the lobes that come in contact with the valve lifters are smooth and not damaged, id say its fine. I don't own a Trx250, so just check that it (the chipped part) does not directly rub on anything, and if not, id leave it and re-use it if the rest is fine. -
Forgot to mention the reinstallation thing, thanks (put in the OP) I didn't think fishing it out through the top hole (where it fell through) was really possible due to the clearance of the gears and the casing. I know it IS, but that its one h3ll of a process. I am pretty confidant I got 95%+ of the savings out with the cut toward me method, but ya, nothing is perfect. The filter/screen should get it eventually, I'm not worried, the point was to reduce it as much as possible.
-
Welp, made a rookie mistake, but I'm a share the experience and how I fixed it. While replacing my timing chain and both primary and secondary clutch pads, I make the mistake (that I was warned about) of not holding the kick starter shaft firmly enough in there when pulling the right side crank case cover off, and dropped the rear washer into the center part of the engine. After a chat with @shadetree, he told me I would have to pull the engine and split the case (as fishing it out from above through the gears is nil impossible), but I proposed the idea of fishing it through an oil flow hole / inspection port, before going to the pull the engine step. On the engine there is a hole on the bottom left of the right crank case (next to the reverse shifter) that lets you see into the center part of the engine. If you take a file (or a hack saw blade, idea from shade) and cut/file a gap the size of a quarter into it, you can then fish the washer out with a piece of wire (or one of those magnets on a retractable rod). !!! BE SURE TO ONLY CUT / FILE GOING OUTWARD (toward you) SO THAT YOU DRAG THE ALUMINIUM SHAVINGS OUT OF THE ENGNE !!! Here is a quick video I made explaining how I did it for those visual learners: Hope it help! Pic of the engine after mod, and where my washer was: PS: Tip for reinstallation: Put some geese (I used lithium geese, great idea from shade) to hold the washer on. Then, to Install the shaft, put the bike standing on its 4 wheels. "pre-load" the spring by slotting the spring into the engine housing, but not insirting the back of the kick start shaft into the retaining hole. Then, start turning the shaft with the kick start lever (put it back on, does not need to be bolted) with the punch mark from about 10oclock to 3 o'clock or more, you are trying to get the "thumb" of the kick start shaft to where it fits between that metal bracket (with the 2 bolts). Once there, then press the shaft into the retaining hole. You will know it's correct if the 2 teeth parts of the shaft are apart.
-
Rebuilding my 2000 Honda TRX 250 Recon. Need some help!
Orvis25 replied to Viktor_AZ's topic in Engine - Drivetrain
Welcome to the forums! @shadetree and @jeepwm69 will steer you the right way for any major engine work you need. Follow their directions TO THE T! (learned that the hard way with my engine work). Hope to see you get her working again. Worst case, you can always try converting it to take a predator (harbor freight) engine. I know a lot of people do that when they have blown engines and don't want to spend a lot. -
You would need to buy a heat stable magnet. Thatsbwhybi just bought a tusk magnetic engine bolt. It had a heat stable magnet.
-
Id still prefer the filler cap method over the magnet on the bolt. More direct pulling power to filter it out. With how that stuff is epoxied and RTV'd in there.... i don't think its ever coming out unless sim digging it out with a screw driver and a hammer.... The magnet on the external side of the bolt might be a good addition though.
-
Deffenetly a different method.
-
I think hes more referring to being skeptical on the home made aspect of the magnetic filler cap, compared to company produced magnetic drain bolts for other types of vehicles
-
The TRX 300 cannot accommodate a magnetic drain bolt so the only option you have is to do something with the filler cap. I'm not worried about the magnet coming loose given how overkill I went with both the a poxy and doubling it up with RTV green. If it's gonna come out it's coming out only because I trashed the differential somehow with direct impact, and even then I think it (the diff housing) would crack first.
-
Yep, agree. Ment to help catch normal wear fragments, not to replace you having teeth on your gears 😛 Thats what happens when you (the PO) runs it without more than like.... 3oz of oil in the diff. I was just younger, a novice to ATV's and my dad really didnt teach me ! about mechanics, so i bought it without checking the diffs, I just make sure it started, had oil, and drove around (shifted properly. The only thing propelling Scar at that point was the front diff. That rear rebuild was a pain...
-
That rear diff still looks better than Scar's when I got her. Whole thing was pure metal shavings form the teeth grinding against each other from no oil in there. Was a silver paste basically. but ya... PO did not treat Scar well.