

KoolBreeze
-
Content Count
106 -
Joined
-
Last visited
Posts posted by KoolBreeze
-
-
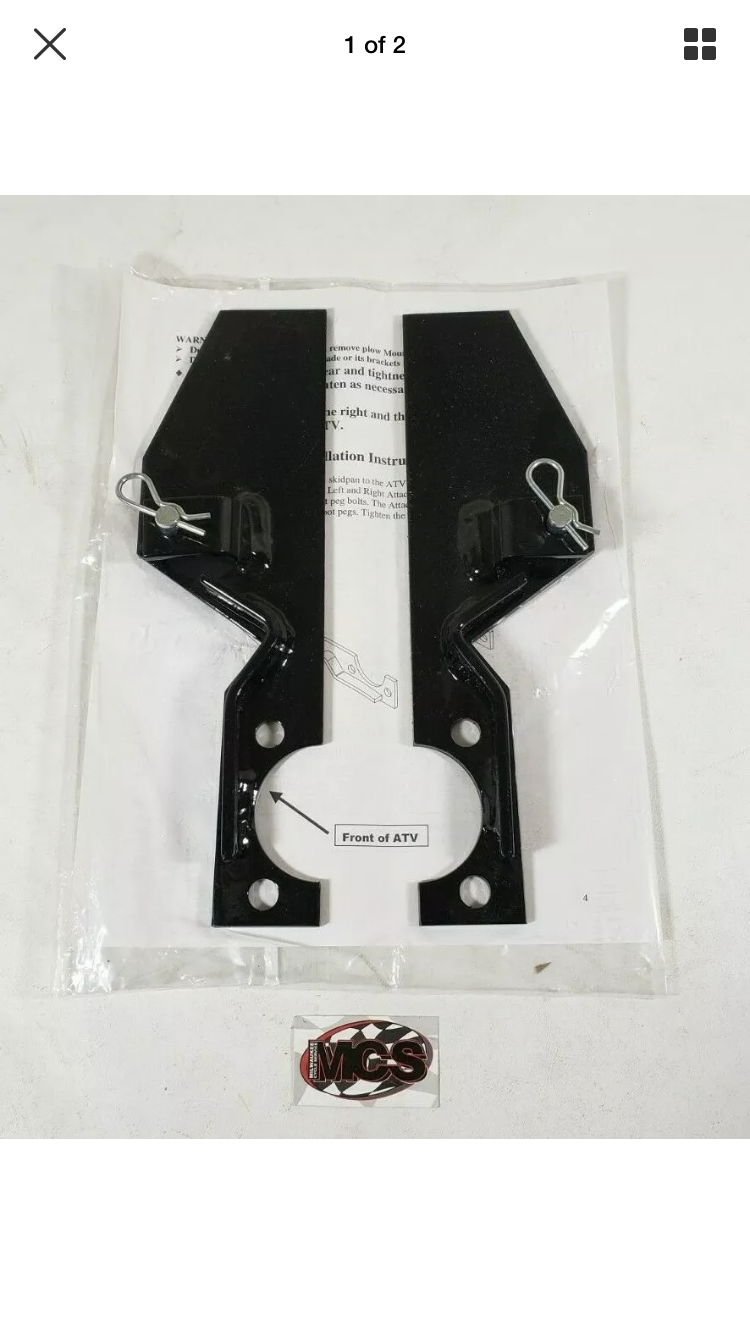
5 hours ago, Goober said:86-89 and probably the Canadian model TRX350 plow mounts
i would buy them but already have a pair.
https://rover.ebay.com/rover/0/0/0?mpre=https%3A%2F%2Fwww.ebay.com%2Fulk%2Fitm%2F333605741280

Nice find but I can't think of anything I might use them for.
-
Thank you shadetree. I saw the bit in the manual about grooving the pins with a grinder. Good to know that no workie to good. The shaft isn't leaking bad, so maybe I'll leave that be for now.
-
Just an update, rebuilding the carb seems to have solved this problem as well! I ride her for a while this afternoon and not a hint of exhaust/gas smell in me.
-
 3
3
-
-
I'm sure the answer is here somewhere if I look long enough, but can the cam cap on the TRX350Ds be replaced be replaced/resealed without removing the cam? I was cleaning up the top of the head cover on mine this morning and noticed a slight leak there, as well as on the other side around one of the rocker shafts. Looks like there is an o-ring on the rocker shafts.
-
1 hour ago, Goober said:The main jet sucks fuel from the bottom of the bowl, creating a cone of depression. That baffle probably minimizes fuel sloshing around the end of the main jet As to maintain a good cone. If you’re riding pretty hard and notice some choppy throttle response it could be related to lack of a baffle.
Ah! Thanks for the explanation. Probably never affect me then, as I'm usually just putting along. haha!
-
11 hours ago, shadetree said:one cold brew to go please !..lol.
Sounds like a plan to me! -
41 minutes ago, shadetree said:this mean the check is in the mail ?..lol. glad ya got it !.
Haha! You bet, what's the damage?
-
1 hour ago, shadetree said:correct, then i bet you will need to move the clip !..lol.
y’all nailed it! That fixed it. I had to tweak it twice but it runs great from idle all the way to WOT now with no choke, no hesitation or stumbling. Awesome!
I did not move the needle clip, still in the 2nd slot from the bottom so I’m sure it could stand a bit more but I’m going to
leave it be for now since it runs so good.
Next up is valve adjustment and gasket replacement, as they are leaking a tad. Probably another adventure. Haha!
thanks again guys!
-
24 minutes ago, shadetree said:in other words, i set mine to open at the same time, prob the slide raises a tad before the butter fly, thats how i do them.
Ok, think I'm clear on that. That may be the problem at 1/8 -1/4 throttle, butterfly open = air, but needle closed = no fuel = lean. Adding choke corrects it, makes perfect sense to me now. Thanks. Thanks, I'll adjust that and try her again. Gonna be a pro at removing this carb for nightfall.
-
17 minutes ago, shadetree said:2nd from bottom is guess what ?..THE MIDDLE GROOVE !..LOL. as for throttle cable slack ?, dont matter much, what matters is that tang i spoke of ^^^^, that must be correct !. reason : it lets the slide rise BEFORE the butter fly opens, catch my drift ?.
Mine isn't in the middle, it's 1 below the middle one. Mine has 5 slots.
Anyway, I got back on it again and I'm still not satisfied. It runs better at about half choke when the throttle is 1/8th to 1/4 open, even when warm. All other throttle positions it doesn't need the choke. So I'm thinking the needle is still to high? I may move it to the bottom slot and try that.
I took the carb back off to measure the lash on that tang you're talking about. There is 0.006 of an inch clearance with the throttle valve and butterfly closed. If I'm understanding you correctly, it sounds like I need to adjust that lash out of it so that the butterfly doesn't open before needle rises. Right?
-
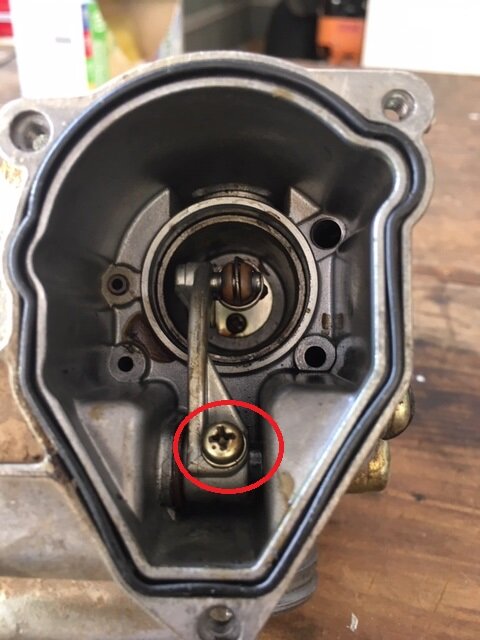
5 hours ago, Goober said:Check the Port for the tip of the air/fuel mix screw. Make sure the tip of the old screw isn’t brokeoff in the port.
run your fingernail across the port—i find generally if you can see the tip if the screw in the port but you can barely hang your fingernail on it—you’re in the neighborhood
also your synchronization may be off.
and your choke valve may also be worn
sorry I promised my spare baffle to @wampuscat just gotta get it in the mail
Thanks, Goober. I looked down in the mixture screw port as best I could with a light and magnifying glass, it seemed clear. I also compared the old screw with the new and the seem the same, so I don't think the tip was broken off. But yeah, I thought was screwy there for sure.
I replaced the choke valve with a new one from Honda. I thinking the old one was worn although it looked ok to my untrained eye.
If you come across another baffle you don't parting with, I'd love to take it off your hands. Not sure what it does though.
-
1
-
-
5 hours ago, shadetree said:first, set that dang manual off to the side, its causing you trouble !..lol. second, lets take this step by step, cuz..your all messed up on what part is what. lets start with the main jet needle, c-clip: middle groove, nothing else goes on it, then put it back down in the carb. pilot jet needle ( air/fuel mixture jet ) : o-ring on the end where the slot is, then spring, then tiny silver washer, then tiny o-ring. MAKE SURE YOU GOT THE OLD TINY WASHER OUT OF THE HOLE !!, install the pilot jet into the carb, turn it all the way down in until it lightly seats, now watch ONE end of the slot, back it out in 1/2 turns at a time, in other words, when watching that end of the screw, you count the turns as your watching it go around in 1/2 turns. most times this setting is 2-3/4 turns out ?, i forget, and dont have my service manual in front of me ?. inside the float bowl area, small jet screws into the side of the body where a rubber plug sits down inside the very bottom. next tube over from it: this is your idle jet, large tube over is your main jet holder, unscrew it, hold it up to a light, see if you can look through the small holes in the side of it ?. they need to be clear. next: on the throttle cable side of carb where you attach the throttle cable, the cam is connected to a rod, rod goes to the top, operates the slide. on top of that rod is a tang, you want the slide all the way down, and the butter fly to be closed at this point, pry the tang up a tad, by doing this, this lets the main jet needle slide rise BEFORE the butter fly opens, its critical that this part is done right ?, or it wont run right. last but not least ?, you must have the passages in the carb clean !.
Thank you! I checked all of those boxes except I didn't mess with the tang setting throttle valve. As best I can tell the throttle valve is all of the way down, with the butterfly closed and that tang just touching the stop. I think that's how the manual and you are saying it should be, no?
Anyway, fast forward a few hours before I read your latest posts. I started fresh this morning, first thing I did was pull the plug and to my surprise it looked brand new. What the heck? Last time I had it out it was covered in soot up pretty good. Granted that has been a while but it has been run very little. Strange, I thought. Ran the bore down in the cylinder and had a look around. Looks pretty good, not much carbon on the piston and can still see cross hatching in the cylinder wall.
So I proceeded to take the carb back off. Tore back down and started soaking the parts. Took extra care to clean everything real good this time. Rodded the emulsion tube with small pieces of Berryman’s soak cotton cloth and a plastic tube. It was still dirty in the tube but the holes were open. Made sure I could see daylight in all of the jets and holes. Checked all of the markings to make sure they were correct. Compared the parts to the old parts again. Blowed everything out with air and put it back together.
This time I didn’t install the shim/washer under the needle e-clip or the oring that was on it. Still not sure why that was there, guess whoever put it together last was confused which confused me and caused me to do the same. Got her back on, let it idle to warm up a bit and proceeded to adjust the mixture screw. This time the engine died when turned in too far. Progress! Or so I thought. I connected a tach and set it to where I thought it should be (high point of RPMs) and everything seemed good until I gave it little throttle. Stumbled terribly, in fact it wouldn’t even pull itself, which was worse than last night. Could hold the brake, give it throttle and would it just set there stumbling without moving. So I’m thinking, that’s lean not rich. Plug agrees that it’s lean, so it must be lean.
Decided to take the carb off again and move the needle clip down another slot, it’s now in the 2nd slot from the bottom. It was originally in the top slot before I rebuilt the carb. Put it back together and guess what? Success, she runs like it’s supposed too now! It seems to need a little choke a bit longer than it did originally but once it’s warmed it, it runs great. Maybe I’ll tweak a bit more on that.
Anyway, I’m thinking the carb was dirty and the starter/choke valve was leaking causing it to run rich originally. Someone leaned the needle out as much it would go in an effort to compensate but it was still a tad rich. Replacing the starter/choke valve and rebuilding the carb swung it lean by a large amount. 4 slots on the needle.
One other thing though, is there supposed to be a good bit of play in the needle once it's installed in the throttle valve?
-
It may be something in an orifice but what puzzles me is that the reason I rebuilt the carb was that it was running rich with a sooty spark plug. It didn't hesitate though and had plenty of power. Take the carb apart and the needle is adjusted all of the way down, meaning as lean as it will go, which seems odd but I think well, maybe someone did that to compensate for a higher altitude (dad took it to the Rockies a few times many years ago) or maybe to compensate for a dirty carb/jets that were over fueling. But in the back of my mind I'm thinking moving the needle back to the stock setting is likely going to make it richer than it already was, but I do it anyway.
I put the thing back together with the stock needle setting, and the result is you can't lean out the mixture screw enough to kill the engine at idle, yet it stumbles/sputters when you stab the throttle. If memory serves me right a stumble when the throttle is stabbed generally means a lean condition, no? I guess grit in a passage could cause that but why doesn't it die when with the screw turned all of the way in? It does idle a little rough as you approach fully seated on the mixture screw, but it recovers and continues to run. I know they are different circuits but still seems odd to me. Been many many years since I tuned a carb though.
Also I checked the main jet and had a #142 jet, which is stock I think.
-
I did spray Berryman's through all of the ports and such, plus gave them a shot of compressed air. I did not run wire through the holes though. Could be some grit stuck in one though. I used all of the Shindy jets but it did not come with an emulsion tube for the main jet, so I reused the old one.
I'll take it back apart tomorrow, go over it again, and reassemble the needle without the washer and oring.
I'm wandering if it needs different pilot jet since it continues to run with the screw turned all of the in. Could be some grit underneath it also though.
-
1 hour ago, shadetree said:there is no washer on the main jet needle ( long one inside the slide ), just the c-clip, middle groove.
o-ring ( tiny one ) goes on main pilot jet , like i said, spring, tiny washer, then tiny o-ring, it then has an o-ring that goes on the bottom, or end when facing down installed, then you have a o-ring that goes on the drain screw.
Ok, there was one underneath the eclip (e.g. between the eclip and the throttle valve) when I took it off. There was also an oring above the e-clip, between it and the plate with the 2 screws in it you said were trouble in your earlier post. I put both back that way before I saw your posts. So guess I'll have to take it back apart.
1 hour ago, shadetree said:o-ring ( tiny one ) goes on main pilot jet , like i said, spring, tiny washer, then tiny o-ring, it then has an o-ring that goes on the bottom, or end when facing down installed, then you have a o-ring that goes on the drain screw.
spring-washer-tiny oring and then bigger oring on the bottom where slot in the screw head is how I put the pilot jet back together, so think I have that part correct.
I did not take the drain screw, could have missed that in the manual, so guess that is where the other one goes.
At any rate, I put it back together with the eclip in the 3rd slot as shown in the manual (it was in the top slot when I took it apart). Maybe that's where I went wrong because it doesn't run right. Runs worse than it did before I took it apart. It idles fine but stumbles when you stab the throttle. If you ease into the throttle it's better but still stumbles somewhat. I tried adjusting the pilot screw (what a pain that is!) per the instructions in the manual but that didn't help. In fact it will not stop running with the pilot screw turned all of the in until it stops, not sure what's up with that.
I used all of the new parts from the Shindy kit and installed a brand new OE Honda starter valve.
-
Next question. The shindy kit has 2 orings that are the same size. I assumed one of them goes on the pilot screw and installed it there. What about the other one, is it used somewhere? The needle on my bike had an oring of that size installed on it but I don't see said oring in the manual, so I'm wandering if it should be there? Also is there supposed to be a washer on the needle? Mine had one, but again, it's not shown in the manual.
-
1 hour ago, shadetree said:yes, install spring, washer, then o-ring. that plastic part that's missing should be there ?, but it will run without it. if you think that one screw was bad ?, wait until you have to remove those two tiny screws from the bottom of the slide to change out the main jet needle !..lol.
Thank you! I will install the washer from the kit then. But it looks like it was just installed in the wrong place. There was a washer that size on the end of the needle below the e-Clip. Pretty sure it shouldn't be there!
The plastic piece (baffle, manual calls it) is missing and looks to be discontinued (who would have thunk it?).
Also the E clip on the needle was installed in the top slot where the default is the 3rd one down according to the manual. Dad took it out west into the Rockies hunting a few times. I'm wandering if someone adjusted it for the altitude difference. Anyway, someone has had it apart before obviously.
Yeah, all the screws were a pain, including those you're referring too. Dang phillips screws should be banned. Hate the things.
-
Ok, another missing item. There was no flat washer above the pilot screw oring. Just the spring and oring. Shindy kit appears to have one, do I install it?
-
9 minutes ago, KoolBreeze said:Ok guys, here is another one for you 350D experts. My carb doesn't have the needle jet holder shown in the manual and exploded parts view. It's part #19 in this link:
https://www.partzilla.com/catalog/honda/atv/1988/trx350d-a-fourtrax-forman-4x4/carburetor
Is that something that should be there but missing or did some models not have it?
Recap of the history on this bike, my dad bought it new and the only people to ever work on by myself is the Honda dealership he bought it from. They could have rebuilt the carb at some point but nobody else.
I'm sorry, I'm confused. I'm talking about the plastic piece on top of the needle jet holder. Not the brass part.
-
Ok guys, here is another one for you 350D experts. My carb doesn't have the needle jet holder shown in the manual and exploded parts view. It's part #19 in this link:
https://www.partzilla.com/catalog/honda/atv/1988/trx350d-a-fourtrax-forman-4x4/carburetor
Is that something that should be there but missing or did some models not have it?
Recap of the history on this bike, my dad bought it new and the only people to ever work on by myself is the Honda dealership he bought it from. They could have rebuilt the carb at some point but nobody else.
-
I got it loose with needle nose vise grips. Dang it was tight.
-
I have taken the carburator off my '88 to rebuild it this morning and have ran into a snag. I cannot get the throttle arm set screw loose. It's a phillips head and is tight as all get out. I could try to clip vise grips on the end but I'm afraid I'll shear the screw off then have a real mess on my hands. I also have a impact screw driver but the bits are too big for it, plus I'm not sure I want to be whacking on it. Any tips for getting it out?

-
On 4/28/2020 at 7:26 PM, Goober said:When it’s running put your hand near the header/muffler joint—occasionally the pipe shim leaks.
also, the starter gear cover gasket sometimes breaks and you’ll get crankcase gasses puffing thru the hole. They call that “gap-osis” of the gear cover.😂
Thank you! I will check that out.
-
Back in the day, I dabbled a bit in etching a few PCBs for devices I needed for various projects. At that time there were companies that would take your plans and build the device for you, sometimes cheaper than you could do it yourself. If there was enough interest in these gizmos, something like that might be worthwhile. Could sell them with the proceeds to help fund this message board. But I don't know how much interest there is or what the minimum order would be.
I like to have one myself. The OE fan controller on my '88 350D is on its last leg.
-
3
-
Forum Hunters?
in General Chat
Posted
I vacationed in Montana and Wyoming last year with the family. Beautiful country to say the least, truly one of the greatest creations. I would love to live out there someday, maybe when the kids are all grown and gone.
I got a 6x6 elk back in the late 80s on a hunt out of Rifle, CO. We were camped in the mountains for 2 weeks that trip, wonderful experience that I'll never forget.