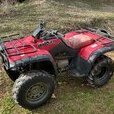
bigcountry78 93 Posted January 18 Placed an Amazon order last night for the recoil starter cover, some new grips, and an air filter. Sold some tires today so now I have enough cash to order a muffler shield from partzilla. They run about $75 plus shipping, but what’s the purpose of the shield? I’ll probably still order one just because it’s a factory piece thats missing, and because I’m picky about that stuff. But what does it do? The brakes are still making that noise, but only when I push the thing around. It’s fine if I’m just riding, so it’s probably going to get ignored for a while. Share this post Link to post Share on other sites
bigcountry78 93 Posted January 23 Got the grips, and air filter installed today. The starter cover won’t be here until February. I also ordered a new toolkit, since mine was missing. Currently trying to work out a deal on a used muffler shield, and then I think I’ll have it where I want it. It needs some new vent lines and the the alignment tweaked, but the expensive stuff is just about done. This one is strange, with the fender stay and exhaust shield missing, it seems like they never got installed in the first place. Share this post Link to post Share on other sites
bigcountry78 93 Posted January 25 Closed the deal on the muffler shield, it’s been paid for and is on the way. I thought $60 shipped was good for the shield and all the attachment screws. I’m going to order the 4x4 sticker that goes in front of the handlebars next I think. 1 Share this post Link to post Share on other sites
bigcountry78 93 Posted January 28 Got the shield on today. I only mention it because I wanted to give a shoutout to the guy that sold it to me. He definitely put the bolts in his old weed bag and shipped it to me. I pictured him smoking it while he unbolted it from the muffler, looking around, and saying screw it and throwing the bolts in the bag haha. It reeked of weed when I opened it. 2 Share this post Link to post Share on other sites
bigcountry78 93 Posted February 10 Been thinking back to the rear end disassembly, do I need to pack the rear wheel bearings like I do on a truck or car? I ask because the one side was a bit gritty so I sprayed it with some carb cleaner and it smoothed out, then I put it all back together. Should I take it back out and throw some bearing grease in? Share this post Link to post Share on other sites
jeepwm69 7,611 Posted February 10 35 minutes ago, bigcountry78 said: Been thinking back to the rear end disassembly, do I need to pack the rear wheel bearings like I do on a truck or car? I ask because the one side was a bit gritty so I sprayed it with some carb cleaner and it smoothed out, then I put it all back together. Should I take it back out and throw some bearing grease in? I definitely grease the bearings of the ends of the axle tubes. I take it a step further with the left side and drill a hole in the tube, add a zerk, and pump about 50 shots of grease in there. The bearings in the diff are lubed by the gear oil in the diff. That zerk and pumping a bunch of grease in the axle tube helps keep water out of the diff 1 Share this post Link to post Share on other sites
shadetree 5,869 Posted February 11 brake noise is drum or brake shoes out of round. 1 Share this post Link to post Share on other sites
bigcountry78 93 Posted March 13 (edited) Well, started breaking down tires again today. I said I wouldn’t do it again, but here I am. As I posted in the tire section, I found a set of 25x8x12 and 25x10x12 Bridgestone dirt hooks, in like new condition. Of course I now have stock rims, 12 in front and 11 in rear. I broke down the front 2 wheels and got one tire mounted, but of course I’m having trouble getting the bead to seat yet again. I got the other side broke down and pulled the tube out, but I have to put a new valve stem in before I can mount that tire. For the rear, I’ve got a set of 12” rims but they’re at my dad’s house in SC, so it’ll be Saturday before I can get them. I’ll have to break down the Titan 589’s on them and then mount the dirt hooks. The rims I’m getting are painted black, and I would like to paint them the factory silver to match the front wheels I have now. Does anyone know what color that is exactly? Silver? Grey? While I’ve got the rear wheels off, I’ll pull the axle apart and pack the bearings. Hopefully that’s the last time I’ll have to take the rear apart for a while. Edited March 13 by bigcountry78 Share this post Link to post Share on other sites
jeepwm69 7,611 Posted March 13 14 hours ago, bigcountry78 said: Well, started breaking down tires again today. I said I wouldn’t do it again, but here I am. As I posted in the tire section, I found a set of 25x8x12 and 25x10x12 Bridgestone dirt hooks, in like new condition. Of course I now have stock rims, 12 in front and 11 in rear. I broke down the front 2 wheels and got one tire mounted, but of course I’m having trouble getting the bead to seat yet again. I got the other side broke down and pulled the tube out, but I have to put a new valve stem in before I can mount that tire. For the rear, I’ve got a set of 12” rims but they’re at my dad’s house in SC, so it’ll be Saturday before I can get them. I’ll have to break down the Titan 589’s on them and then mount the dirt hooks. The rims I’m getting are painted black, and I would like to paint them the factory silver to match the front wheels I have now. Does anyone know what color that is exactly? Silver? Grey? While I’ve got the rear wheels off, I’ll pull the axle apart and pack the bearings. Hopefully that’s the last time I’ll have to take the rear apart for a while. I think maybe @_Wilson_™ or @Wheeler painted wheels silver and found the right color? I don't envy you having to break down some 589's. Those tires have some STIFF sidewall/beads. I found @shadetree's method of smearing grease on the beads to work well for most bead leaks. I rub the beads down good with steel wool, then smear a thick gob of grease all the way around. 1 1 Share this post Link to post Share on other sites
Wheeler 2,525 Posted March 13 I personally have only ever used bed liner on my rims to date. 2 Share this post Link to post Share on other sites
bigcountry78 93 Posted March 13 21 minutes ago, jeepwm69 said: I think maybe @_Wilson_™ or @Wheeler painted wheels silver and found the right color? I don't envy you having to break down some 589's. Those tires have some STIFF sidewall/beads. I found @shadetree's method of smearing grease on the beads to work well for most bead leaks. I rub the beads down good with steel wool, then smear a thick gob of grease all the way around. Thanks, I’ll try the grease trick. Two of my mud lites have tubes, and I’d like to avoid that with these tires. I don’t like tubes at all. I’m not looking forward to breaking them down either. That’s one reason I went ahead and started on these yesterday instead of breaking down all four 589’s. I figured out last time that the mud lite beads are really easy to break loose compared to the maxxis tires I messed with last time. 2 Share this post Link to post Share on other sites
jeepwm69 7,611 Posted March 13 1 hour ago, Wheeler said: I personally have only ever used bed liner on my rims to date. Well we all know my number of working brain cells is getting pretty low in number 1 2 Share this post Link to post Share on other sites
_Wilson_™ 6,567 Posted March 13 Import magisium i think ? Is the right color ... @toodeep ? Do you know how many years that paint color was used ? And on what models ? All i was told was the 300 wheels and engine is where that color was used... i never researched it, but from my own testing... plasti-dip bright aluminum is about as close as one can get.... i looked high and low for the longest time for import magnesium paint.. even hit a few custom paint dealers... no one could help me out.. and the few times i was able to locate it online... the cost was astronomical ... trick to dipping with PD.... many many many thin coats... and the longer it stays the tougher it gets .... this is the end result... i think a purdy good match to the color of the crank case (stock color)... i only clean these with viniger... nothing else.. and they do shed muck and slop better then stock paint... the catch is do not use anything with petroleum products on plast-dip for any reason but one... and thats to deslove the little patches left over (after peeling if any) before completely re shooting.... dw-40 is an instant PD desolver. 2 Share this post Link to post Share on other sites
_Wilson_™ 6,567 Posted March 13 Bedliner like wheeler is talking about is much more robust and durable then PD (just adding that fact) 2 Share this post Link to post Share on other sites
bigcountry78 93 Posted March 13 5 hours ago, _Wilson_™ said: Import magisium i think ? Is the right color ... @toodeep ? Do you know how many years that paint color was used ? And on what models ? All i was told was the 300 wheels and engine is where that color was used... i never researched it, but from my own testing... plasti-dip bright aluminum is about as close as one can get.... i looked high and low for the longest time for import magnesium paint.. even hit a few custom paint dealers... no one could help me out.. and the few times i was able to locate it online... the cost was astronomical ... trick to dipping with PD.... many many many thin coats... and the longer it stays the tougher it gets .... this is the end result... i think a purdy good match to the color of the crank case (stock color)... i only clean these with viniger... nothing else.. and they do shed muck and slop better then stock paint... the catch is do not use anything with petroleum products on plast-dip for any reason but one... and thats to deslove the little patches left over (after peeling if any) before completely re shooting.... dw-40 is an instant PD desolver. I hadn’t even thought about plastidip. That looks like a dead match from what I can see. 1 1 Share this post Link to post Share on other sites
_Wilson_™ 6,567 Posted March 14 Thank you... ill tell ya another fellah that could give ya some advise on dipping and thats @m_quick i believe he did some sport wheels in black.... see if he shows up, he should.. nascar season is up and running and hes one for going to Bristol ... which is coming up 3-17-24 (this coming sunday) ... anyways ... i do believe if you do a search type in plasti or plasti-dip also elasti or kote or wrap .... some info in those post that should pop up....trick that ive tried... is shooting it close (tip to surface) 5-6 inches away.. with very quick passes.. and and for me ive found best 8-10 mins between semi wet coats.. or much more time between cured coats.... im sure the way i do it is probably wrong according to the guys at Link 2 Share this post Link to post Share on other sites
bigcountry78 93 Posted March 17 Got the 12” rims home yesterday. Got both front tires on the rim, one seated and bolted back on. The other front tire is fighting me on seating the bead. Started to break down the 589’s from the rear rims, and this is not going to be fun. They are 26x12’s so they are already tight against the beads, so I’m going to have to get creative to break them down. Got a radiator to swap out in my Toyota today so there probably won’t be any progress on the tires. 1 Share this post Link to post Share on other sites
_Wilson_™ 6,567 Posted March 17 (edited) Creative at breaking down tires ? More ideas then in this thread? Id like to hear them...lol!. i used the truck on a on ramp on the sidewall / bead. but shades idea (no ramp) works better. Edited: credit goes to @sled_22 for the thread starter... and a big thanks to all those who contributed. Edited March 17 by _Wilson_™ 1 Share this post Link to post Share on other sites
bigcountry78 93 Posted March 17 Got the Toyota radiator swapped out today so I figured I’d mess with the tires some. The tire thread post above gave me some more tricks to try. Currently have my Titan with the 5.6 v8 parked on the tires with a 2x6. No luck yet. 1 Share this post Link to post Share on other sites
bigcountry78 93 Posted March 17 I did manage to get the other front tire seated. Had to take the valve core out and take the chuck off the air hose and just shove the fitting on the stem. It worked, so at least the front tires are ready to go. Definitely liking the look of the 25’s so far. Share this post Link to post Share on other sites
_Wilson_™ 6,567 Posted March 17 1 hour ago, bigcountry78 said: Got the Toyota radiator swapped out today so I figured I’d mess with the tires some. The tire thread post above gave me some more tricks to try. Currently have my Titan with the 5.6 v8 parked on the tires with a 2x6. No luck yet. Did mine just like that..... grabbed a couple beers sat on the corner of the hood... and waited...took about 15 mins but now i left out something... i was breaking down those stock h-track tires the 86 trx350 came out with... paper thin....didnt hold my my truck up like that one your dealing with....you do know about using starter fluid... i know what happened to me the 1st time i tried that.... does the word q-ball ring a bell ? Haha ......yup i blowed myself up over that one..... went to the girl friends for supper.... when i walked she looked at me... i laughted and said dont ask...this is another reason tire discussion is NOT on my list of favorite things to talk about.... several times ive ended up blad for some stupid reason or another....... 1 Share this post Link to post Share on other sites
_Wilson_™ 6,567 Posted March 17 On 3/13/2024 at 11:40 AM, jeepwm69 said: Well we all know my number of working brain cells is getting pretty low in number Ur not alone in that department...lol! Share this post Link to post Share on other sites
bigcountry78 93 Posted March 17 Yea I’ve lost my fair share of hair to starting fluid lol. Got the rear tires and wheels off while I was waiting on that bead to break. It’s been 2 hours and I’m still waiting. Gonna leave it there over night and see what happens. 1 Share this post Link to post Share on other sites
bigcountry78 93 Posted March 18 (edited) One down, one to go. The tire came off the rim pretty easily after I finally got the beads busted loose. Got the truck parked on the other one now, gonna give it a bit and go fight it some more. This one will need some attention from a wire wheel. I’m sure the other one will too, these tires have been mounted a long time. Edited March 18 by bigcountry78 2 Share this post Link to post Share on other sites
bigcountry78 93 Posted March 19 (edited) Success boys and girls. After parking my truck on this tire for another 24 hours, I was able to get the beads busted. These 589’s are no joke, and jeez they’re heavy. Got the second one broken down and spent some time on both rims with a drill and wire wheel. Managed to get my shirt wrapped up in the wire wheel. Sorry, no pictures of that, I was too busy cleaning my shorts out. Anyway, after the wire wheel I hit both beads with some emory cloth to smooth them out. I’m hoping my effort pays off and the beads don’t leak. The front tires seem to be holding air so far so we’ll see. In my opinion Bridgestone is an upper tier tire so I hope these will hold up well. My only real complaint with the mud lites is that I couldn’t get the dang things to hold air. While I had it up I took the axle housing off and greased the bearing in the tube. Now I just gotta get some plasti dip and get the rims all one color. But at least it’s down on all 4 paws. And on a positive note, I’m getting pretty dang handy with a set of tire irons lol. Edited March 19 by bigcountry78 2 Share this post Link to post Share on other sites