Leaderboard

Popular Content
Showing content with the highest reputation on 12/30/2021 in all areas
-
3 pointsi'm all for oem, never would i '' jerry rig '' wires on my toys. if funds is an issue ?, then just install a fan bypass switch, be done with it.
-
2 pointsOne of my street bike buds is doing this today.
-
2 pointsMain problem is not using OEM parts. Sounds like you also need ignition switch. Since this thing is a project you may as well start a project thread. Start by using punctuation and clearly state what the quad is doing. Use the edit feature to correct misspelling. Download the service manual from this site and or buy printed manual off fleabay. use the OEM parts finder at Rocky Mountain atv and Partzilla.
-
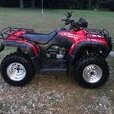
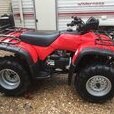
2 pointsHi , here is a used fan control module , to fit a 1986-1989 TRX350D for $123 on e-bay with free shipping ---- i think your asking for trouble modifing the wiring harness , that would be a last resort https://www.ebay.com/itm/362868015158?chn=ps&_trkparms=ispr%3D1&amdata=enc%3A1SAa2XchXTTGlbbdDzTqi4Q97&norover=1&mkevt=1&mkrid=711-213727-13078-0&mkcid=2&itemid=362868015158&targetid=4581046488761455&device=c&mktype=&googleloc=&poi=&campaignid=418640322&mkgroupid=1239149842233245&rlsatarget=pla-4581046488761455&abcId=9300602&merchantid=51291&msclkid=171cd8536b3c1dd8ab4eb99ef89681d7
-
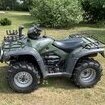
2 pointsI got well in time to plow snow with the Rubicon. Back to back snowstorms, 20" total. 7 hours plowing. Then it went to -12 F last night. Didn't need to use bug spray 😁
-
1 pointBy-Pass like Shade says is a good way to go ------- and you can take the by pass to the next level with a Summit fan controller , on my 95 300 I have two fans and the oil coolers relocated , this little Gizmo controls which temp the two fans kick on indepently , cost was $75 two years ago , made by David White out of Australia , sold by Summit Racing , and you don't have to cut into the existing harness ---- Retro makes a very nice fan controller from scratch and Goober is his apprentice , I have one on my 450 , there is a nice thread on it here on the site
-
1 pointa clogged fuel injector will make it run lean. check the air filter too.
-
1 pointThe red wire fuse goes to the voltage regulator / rectifier and the ignition switch , being you installed a aftermarket regulator and the wiring does match up to boot , I'd say that is the start of your problem -------- hope you didn't damage the cdi
-
1 pointThat's really sad to hear Freedom. I visited your neighborhood 6 or 7 years ago and thought it quite beautiful. I've heard about how this is really disrupting wildlife movement.
-
1 point
-
1 pointRead a Sci-Fi short story as a kid. Can't remember or find the name of it. Earth is overpopulated, everything is concrete and a search has begun for a new planet with natural resources intact for mankind to transition to. Main character is a young girl who helps out her elderly neighbor some, and as the last ships are leaving Earth, she realizes that her neighbor is still back at home. She rushes there to find him digging a hole in the concrete, and she panics as the last ship leaves earth in a cloud of exhaust. She says they've missed their chance to go to "New Earth" and the old man responds "No we didn't. This is the new earth. They took the old one with them" as he plants a tree in the hole he's busted in the concrete.
-
1 pointDid you know lodge has been making pans far longer that one would think? Some of there pre 60s stuff (like any cast) is very desirable.
-
1 pointmaybe my eyes are worse than i thought ?, but why do i see dark gray sealant on the starter cover ?, and dark gray sealant around the gasket and where the wires come out the top of side cover ?. yamabond is NOT dark gray, did you use rtv sealant ?..cuz it sure looks like it to me.
-
1 pointThen there is Partzilla which many here have used. But I believe to get free shipping RMATV has a lower $$$ value than Partzilla. But as jeep said it's best to do a parts check on different sites, just remember as I found out a few years ago, one site may have the lower price on a particular part but higher on others. Don't forget to factor in shipping costs and also important, do they have your part(s) in stock.....
-
1 pointDLB your comment saying air is being pushed from the carb into the airbox to me leads to timing being off, valves are not working as they should. Could be a cam chain that has jumped a notch or two. That was my issue a few years ago on my 450, backpressure into the airbox. Good luck....
-
1 pointanswer: the timing is off, maybe from a jumped cam chain ?. or a bent valve ?, or not enough compression from worn rings ?.do this test first, take a can of starting fluid, give the carb a SHORT burst of it, if it fires off them ?, then its a fuel issue, if it does not ?, then this leads me to think its a timing issue ?, or bent valve ?, which leads to not enough compression to fire off.
-
1 pointutility atvs are not, were not made to set land speed records for the this, move up to sport quads, utility atvs will never do this. ( least not without deep pockets ! ).
-
1 pointdon't need to do anything but tilt it on its right side, pull the foot rest, shift lever, then remove the left side cover. BE VERY CAREFUL WHEN YOU PULL LEFT SIDE COVER, YOU DO NOT WANT TO PULL THE SHIFTING SHAFT OUT AT ALL WHEN YOU PULL THE LEFT SIDE COVER !!!. you only need a gasket for the left side, maybe ?, some yamabond for where the wires come out the top of the side cover...DO NOT USE RTV SEALANT !.
-
1 pointi'll save you the trouble. clean it all off the top of the engine, go buy a tube of yamabond or hondabond ( DO NOT USE RTV SEALANT ! ), get yer hands on the oil seal for the decompression release lever, the o-rings that go in the valve inspection caps ( 2 ), and there is two small o-rings that are around the rocker shafts ( slotted ends on spark plug side ) that will need replacing ( very common to leak oil ). the hardest part you will face is getting the rocker shafts out of the rocker box, reason : they are held in place by dowel pins ( or used to be ?), and can be tricky to remove. what i do is clamp these pins in my bench vise, slowly turn the rocker box back and forth, while i pull up on the rocker box, this allows me to remove the pins. once the pins are out of the rocker box, then you can pull the rocker shafts out of the rocker box, PAY CLOSE ATTENTION TO WHICH ROCKER GOES WHERE !.
-
1 pointso just as i said, timing was off. word from the wise owl, ALWAYS DOUBLE, TRIPPLE CHECK ALL TIMING MARKS BEFORE YOU GO BOLTING ANYTHING UP !.
-
1 pointwhen doing engines from scratch ?, ALWAYS MAKE DANG SURE THE CAM CHAIN IS INSTALLED CORRECTLY !!. you will need to pull front cover, and make sure you installed the cam chain with the punch mark facing up on cam sprocket to the timing mark right above the sprocket , it faces down. these two marks MUST LINE UP !. once that is done, at back of motor, pull start cage has a line on one of the tangs, it runs from front to back on tang. behind the cage, a raised arrow is stamped into the stator cover, both of these timing marks, cover and tang MUST line up. once you have both front and back inline ?, the piston will be top dead center. once you get to the valves, i always rotate the crank from the back on the 17mm flywheel bolt, as i turn the crank backwards, i watch the intake valve, if you had the marks set all correctly ?, the intake valve will start to go down as you rotate the crank backwards..keep in mind, you will have to turn the crank backwards a good bit before the intake valve starts to go down. if after a good ways..the intake valve does not move...the exhaust valve moves instead ?, then you were on top dead center on the exhaust stroke on top dead center instead of compression stroke top dead center. also..as you very well know..i do not use feeler gauges !..lol.
-
1 pointtells me the injector is dirty ?, or bad ?.
-
1 pointI really enjoy my cast iron, dutch ovens specifically.