
shadetree
-
Content Count
5,645 -
Joined
-
Last visited
-
Days Won
195
Everything posted by shadetree
-
jet drives on out board motors has been around for a very long time, first time i seen one was about 1996 , 1997 on a mercury.
-
lol, mine is filthy !..lol, i need to clean it out soon, i got a 5 gal bucket, with pipes leading to it, installed a ball valve, just open, drain, clean, pour back in..lol
-
i'll bet ya a dollar to a doughnut , if ya tell them the next time they will have to pay you to fix it ?, they might think twice before they tear it up, then bring it to ya !..lol.
-
pretty much. as retro said ^^..if there is worn crank teeth ?, then chances are your timing marks may never line up 100% ?, but most times, all mine have been dead on.
-
what are you using for cleaning fluid ?, the stuff from tractor supply does dry my hands some ?, but not enough to crack my hands/skin.
-
I wont make this a sticky , yet !, but wanted to post this, so some of our members here can get an idea just how easy it is to clean/over haul their atv carbs. How to clean a carb Ok, i've seen this problem come up alot lately....sooo..i thought i'd post a thread on how to clean a carb. now..first off..let me say..not everyone will have the same carb !..sooo..with that being said..let's move on. first..turn your gas off on your tank, next..loosen the intake boot screw to the cylinder, and also the intake boot from the air box to the carb, now..if you own a trx300 ?..( makes no difference what year )..on the right hand side of the carb..you will see a tiny screw holding the side cover on the carb, remove it..next..on top of that same side of the carb..you will see a 10mm nut..this is your throttle cable tie down nut...loosen it...now remove the side cover...reach in..and lift the throttle cam up..as your doing this..lift the throttle cable's end out of the cam...now on the left top side of the carb..is your choke knob..it's a 14mm..loosen it..remove it..becareful not to strip the threads..it's plastic !!..pull the choke out of the carb..you should now be able to remove the carb from the bike ..now..take it over to a good clean..wel lighted area...a nice work bench does wonders !..if you happen to have a bench vise ? ( these come in very handy at times ! )..put the carb in the jaws of the vise upside down..you should now be looking at 4 screws holding the float bowl on ?..if your not..you have your carb right side up..lol. now..remove those 4 screws..lift the bowl off the carb..your now looking at the guts of your carb..there is roughly 3 jets your looking to find ?..your main jet is the tall brass one..your idle jet is the small jet down inside a holder right next to it..there is a starter jet..( on some models..they are on the side of where the rubber plug is )..on some models..they are sitting right where that rubber plug is. now..with a flat head screw driver..remove the main jet from the carb..you can also use a 7mm socket to remove the whole assmebly..this is how i do it...as you will need to clean the whole thing..lay it on the bench..now..with a narrower flat head screw driver..remove the idle jet from the carb..lay it on the bench. now..with a very small screw driver ... a jewlers screw driver works great..or you can even use a small spoke from an old motor cycle wheel..anything that you can use as a punch..thats small enough to tap the float's holding pin out. after you get the float's holder pin out..pull the float and float needle out..becareful not to loose or drop the float needle !..lay it on the bench. now..on one side ( depends on which way you got your carb in the vise ? ) there is your pilot/fuel mixture screw sitting on the outside of your carbs float bowl....as we have mentioned..count the amount of turns you go inwards lightly !.but..in this case..were not gonna cover that..( that part is covered later )..remove the pilot needle..be very careful when you remove it !!..there is a tiny washer that some ppl drop..and the cats drag off..and never see them again !..lol. now..if your lucky ?..when you remove this needle..you will get all the parts out at once !..if your luck is like mine..you always get the tiny o-ring staying in the bottom of that hole !..!....if it stays in there..try to dig it out with some kind of pick..a mechanics pick works great !..after you get that out..look to see if you missed any jets still in the carb ?..most times..i leave the starter jet ( the tiny jet that's either where the rubber plug is ?..or on the side where the rubber plug is ?..i hardley ever take this out..as most try to strip out when removing them !..but if you can get it out..all the better !..now..if your carb has that rubber plug..remove it. ..take the carb out of the vise..flip it right side up..remove the 4 screws from the top cover..as you get down to getting that last screw out..the top will want to spring off..this is because it's got a large spring under it..hold the top down..as your removing that last screw..now lift the cover off..remove the spring..lift the main jet's plunger out of the carb..it's round..and has a rubber diaphram around it, now..with your carb spray cleaner..spray down inside the top..all the holes..everything..BE VERY CAREFUL NOT TO GET THIS IN YOUR EYES !!..IT BURNS !..LOL..sooo..please wear safety glasses !!..with your air compresser..blow the carb out really good..every nook and cranny you can stick that air too. ok..now comes the hard part..as this will make or break your carb cleaning..lol. grab your main jet..with some wd-40..and one wire from a wire brush..spray the main jet down..work that wire through the middle of that jet...then with some air..blow it out..if you got a bench grinder...and has a wire wheel on it..this next part is a breeze..if not..your gonna have to do it old school..depending on which way you go..i use my bench grinder with a wire wheel..( faster !..lol ) i clean the outside of the main jet holder..as you can tell..this has a few small holes on the outside of it ??..these have to be cleaned..carb cleaner ( gum out )..and that wire..poke it through the holes..then blow it out with air. now..grab the idle jet..and do the same thing to it. inspect your float needle..is it dirty ?..gummed up ?..if not..leave it alone. if it is..try taking some very fine steel wool..and lighty.. AND I MEAN LIGHTLY..scuff the outside of the needle..do not rub the tip !!!..now comes the easy part..putting it all back together..and i'm sure you know where everything goes ??..if not..main jet goes in tall holder..idle jet goes in right next to that..and if you removed the starter jet..that's easy to see where it goes..now..lay the float assembly back in the holder..slide the float's holder through the tabs..put the bowl back on..flip the carb right side up..slide your main jet plunger back down in the carb..make sure you put the rubber part back in the right way..there is a round outter part..with a tiny hole in the middle of it..slide the big spring down in the top..place the top on..while holding the top down..get a screw started..then put the other 3 in. now..turn the carb back over upside down..remember that jet needle that had the tiny washer that the cat draged off ?..slide the spring on..then the washer that you had to fight the cat to get back..then the tiny o-ring..put the needle down in the carb..turn the needle down all the way..go very easy..do not over tighten it !..if you break the tip off in the carb..your screwed !..lightly seat the needle down in the carb..now back the needle out 2 1/2 turns..count the turns as your watching the very end of the slot in the screw..so you will know when your turns are 2 1/2 turns out. now put the carb back in the bike. i hope this helps everyone out. if you own a trx250..the top of the carb is flat..3 screws hold it on..this is a little different set up. id get into that..but thats another chapter..lol. added : don't forget to clean the float needle seat with some carb cleaner spray and a Q-tip !..very important. I will clean this up late on, this is just a test for now :-).
-
do you have a c.d.i. from another trx500 ?. if ya do ?, give that a shot first.
-
i've had great luck with namura piston kits, too me, they are just as good as oem
-
for a little bit more, has can take his chances with d&b , get a 1 yr warranty for 37 bucks, i know what i would do. i think d&b also used to sell starters with a 3 yr warranty ? not sure if they still do anymore ?.
-
Sold 2010 Rancher ES-Purchased 2020 Rancher Foot Shift
shadetree replied to Scotticus's topic in General Chat
ummm..i can get big boots under my shift lever ( if i wore them..lol ) i dont have floor boards..now this would make a difference for sure !. -
Sold 2010 Rancher ES-Purchased 2020 Rancher Foot Shift
shadetree replied to Scotticus's topic in General Chat
not understanding the rider shifting thing because of where your at ?, this makes no sense to me ??. what does the hill/rut, what ever have to do with how a rider shifts ?, es or manual ..should not make a diff..this is all on the rider..not the machine..least to me anyway :-). -
i dont doubt it bro. but i did buy my last starter for this trx300fw from them, it seems to be good ..for now ?!..lol.
-
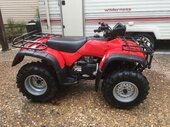
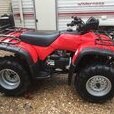
almost ready for some paint !.
-
behind front bumper, a metal plate welded across frame tube, sits back a bit, its flat, has 17 digits stamped across it, read from left to right, look for the 10th digit, then look it up on this chart.
-
this is not a trx350D ?, but it does show you how the timing marks should line up !.
-
like i told ya louis, your in great hands here !.
-
very nice !!!, yeah, debts on new stuff ?..haha..no thanks !. when i bought all my newish toys ?, i paid cash, OTD, no payments !. my jey ski ( '15 ), my outboard merc ( '10 ), and my boat ( '10 ), was all bought with cash, that sales man asked, how are we financing it today ?, i said..umm..nope..sorry..its cash, ya shoulda seen the look on his face !..lol.
-
Sold 2010 Rancher ES-Purchased 2020 Rancher Foot Shift
shadetree replied to Scotticus's topic in General Chat
i'm just too old fashion, i don't like sensors, electronics, anything that jacks up the price, but yet always fails us at the worse time. simple stuff made 30 years ago did one thing, and one thing only..IT LASTED WITH NO PROBLEMS. but, fast forward to now, well, we cant have this, we all live in a throw away word today, no matter what you buy ?, its gonna be some kind of energy saving, time saving, water saving piece of junk !, lol. its sad we cant buy something , use it, and not worry if its gonna last 20-30 yrs before we have to replace it. -
looking at your battery ^^^, it dont look to healthy..lol.
-
looks right too me ?, but hey, ya never know with all these china parts out here today !..lol.
-
they musta just changed lately ?, i've had great luck with them in the past. his problem might be, as we are learning, honda is now discontinuing so many oem parts !..lol.
-
yw, i hope ya don't ever have to use it either !..lol.
-
this far in, it would be smart to pull the cylinder, have it bored over if out of spec's ?. new namura piston kit, check the rod !!!, new top end gasket kit. cam chain looks stretched a tad, i can see that the timing marks are not quite lined up with the top edge of cylinder in your pics ^^. deff pull the valves, check for bent valves ?, clean them up if they are good ?. all said and done, i think your doing great digging in !!!.
-
haha..i think most of us fall into the old spot !..lol.
-
wow, can not believe no one wants to own a classic '88 trx300fw for $ 2,500.00 ??!. hmm..well..its tax time, so maybe someone will buy it !.

