Leaderboard


Popular Content
Showing content with the highest reputation on 03/28/2024 in all areas
-
2 pointswith it being 24 yrs old ?, its hard to narrow your issue down. the piston, or bore can be worn ?, the connecting rod can have play in it ?. wrist pin top at rod can be worn out ?, valves can be out of adjustment ?. really hard to tell you what it can be. the only way you will find out, is too tear the top end down, and inspect the piston, bore, valves, rings, connecting rod. BEFORE you tear it down !!. make sure to have a top end gasket kit, and a tube of yamabond or hondabond on hand !...DO NOT USE RTV SEALANT ANYWHERE ON THIS ENGINE !!!. i'll go out on a limb here, and say your piston, jug, connecting rod is worn out..one of these..or all 3 need to be fixed.
-
2 pointsThanks Jeep for your humility concerning this subject. Thanks Wilson for the personal message to say hi. I'm back for the first time in many months.....many months. I enjoyed this forum for the most part but left several years ago (with just a few visits per year) because of the politics and religion. This is the first post I viewed and to my pleasure discovered this new opinion concerning volatile issues. I am a strong conservative Christian man that has learned to be very careful.....I have very strong opinions like everybody else but realized that Truth in Love trumps all else. I'm back for a while to see how it goes. You "old timers" may remember that I'm not a huge four wheeler enthusiast yet I own two and that my real passion is dirt bikes. I do enjoy listening to conversations about certain problems and even contributing if I have some insight. This feels good and it's good to be back.
-
1 pointWelcome aboard. Is it smoking? Have you tried upping the idle a bit with the knob on the bottom of the carb? And check and make sure your stator is charging with the machine running. Use a multimeter and make sure you are charging. If not, you might have a bad regulator.
-
1 pointjust guessing, lack of round up ?..lol.
-
1 pointDouble check that the angle sensor was installed correctly, a common problem. There's a lot of helpful help around here, hope you get it figured!
-
1 pointThese critters again ? Are You sure you want to tangle with that bad attitude looking crew ? Credit for this pic goes to @56Sierra
-
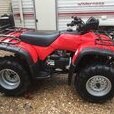
1 pointMy ATV was only running on 1 cylinder.. not sure why 🤣😂
-
1 pointThat 424 might get you a bit of cash. The 300 424's are super expensive, and someone can mod that 350 to fit a 300 by cutting and welding to get the length correct. If you want to go back to full time 4x4, check ebay. https://www.ebay.com/itm/375292677310?epid=1723070222&itmmeta=01HSXRRBWS476BES648KFN4K7C&hash=item57612fccbe%3Ag%3AJZQAAOSwFntl5pFG&itmprp=enc%3AAQAJAAAA0PSIb3heye2jOZaCy%2BrScg1WglXyAloXgM%2BktUfUlrihPL0fnmjF4skd%2BQ3mmpsMSHL5dCvPudwfF%2Bf%2BFKP7xAGZ4Pop79Ztru2kCwGel%2FmJtvguZAixDJvdUi7RvjUc4lfmnTPFmHNoat3i4DO6zgc0VkWnqANNt1lH84jVFfdFSEcjtClaa1xd4hWrkSSrQJK4abtDvFi4CA3ARTgcRa0tUQIFyKSGiZWyUaRFDkp5%2FePVRKFLgZ7eJZHqwXY1ZlqJ5ZMgYQ59W1ciGj%2BgBl4%3D|tkp%3ABk9SR8C-4bjPYw&LH_ItemCondition=4
-
1 pointSo anyways, let me tell you about why our country is going to crap.... 😅
-
1 pointas always Jeep....you have my appreciation and support in your policies. thanks! Ed
-
1 pointYa boy here got a double
-
1 pointThese ES preps are a one-time routine maintenance procedure. By following this guide thoroughly and completely several problems that Honda created at the factory will be solved. Among those ES faults are: Honda ES systems are not waterproofed, neither electrically or mechanically Honda uses the wrong type of grease in their ES systems Honda uses insufficient amounts of grease in their ES systems (which is a good thing because the recommended grease itself is garbage) Due to excessive friction in stock ES systems reliability is non-existent, battery current required for operation is ridiculously high and the ECM is at risk for burning out You will need basic hand tools, a tub of NLGI #2 synthetic grease, dielectric grease, cleaning solvent, warm soapy water and most of the other supplies in this photo. For this guide I am using a 350 Rancher ES. All other Honda ES systems are similarly assembled so these steps apply to all of them. Begin by cleaning up the front cover and ES reduction gears cover and shift motor areas to prevent dirt and grime from getting in your work. Then unplug the harnesses and remove the reduction gears cover assembly which includes the shift motor and angle sensor in this case. Remove the reduction gears from the cover and move them to a work bench for further disassembly and cleaning. Do NOT drop the shift motor or magnets housing as those magnets can shatter or loosen from the housing. Remove the shift motor from the reduction gears cover and disassemble the shift motor completely. Inspect the copper commutator bars and the brushes for sticking, arcing or excessive wear. The commutator should be smooth and blackened with no signs of heavy arcing or erosion. Do NOT polish or sand on those commutator bars. Those bars have a thin layer built up of graphite lubricant on them. If you remove that layer you are forcing the commutator to wear in to the brushes again, which greatly reduces the life expectancy of the motor. Leave them alone. Clean the magnets housing and the armature with warm soapy water and soft plastic brushes and rinse, then squirt them both down with rubbing alcohol to remove the rinse water from them. Set them aside to dry. If you see any corrosion around the gasket sufaces of the housing or nose, remove the corrosion using sandpaper or a scotchbrite pad. You'll need clean, shiny surfaces for sealing watertight during assembly. Prep those previously leaky gasket surfaces now. Clean the reduction gears cover and small support bearings thoroughly in solvent. Clean the gears and all of the remaining metal parts in cleaning solvent as well and blow them all dry. Using a finger tip, push synthetic grease past the gaps in the metal bearing shields into each of the support bearings in the reduction gears cover until those bearings are completely packed with synthetic grease. Each bearing will take ya about 3 or 4 minutes to pack so expect to spend at least 15 minutes on them. You should feel them drag on the thick grease while turning them once you get them packed full. Now is a good time to clean up inside the front cover on the motor too, and get those support bearings repacked with synthetic grease. Note: It is very common to find one or more of those tiny reduction gear support bearings installed crooked in their bores from the factory. If you find one not installed properly, straighten it up in its bore by tapping on its outer race with a plastic screwdriver handle. The outer edges of the races should be flush with the chamfer of the bore. Failure to fix crooked bearings results in reduction gear(s) rubbing on the aluminum housings causing them to bind up. Binding gears can cause the shift motor and/or the ECM to burn up. Repack the ball bearing on the end of the armature with synthetic grease by pushing grease inside the bearing past the gap in the metal shield. Add syn grease to the bronze bushing inside the magnets housing and wet the shaft where it fits into that bushing. Be careful not to get any grease on the armature outside of that bushing and shaft end. Put a small amount of grease inside the rubber seal lips in the nose of the motor to lubricate that seal. Reassemble the brushes assembly. Coat the rubber gasket (o-ring on some models) liberally on both sides with silicone gasket maker. Depress the brush springs & brushes into their holders and place two small alligator clips (or bent pieces of wire) to hold those two brushes back so you can set the nose of the armature shaft down into the nose housing. Remove the two alligator clips from the brushes once the armature is down in the nose and clamp the end of the shift motor shaft lightly in a vise (or you can get a good grip on it with your fingers and hold on tight) while you lower the magnets housing down over the armature. If you let go of the end of the armature shaft while lowering the magnets housing down the armature will pull out and your brushes and brush springs will fly away. Hold on tight... then put your final two or three bolts in and snug them up. That completes the shift motor and reduction gears cover assemblies preps. The shift motor is now properly lubricated and is sealed up tight. Its fully submersible, you can shoot it with a pressure washer as often as ya want to and it won't ever need any more of your attention. Now move your shift motor back to your ATV... where you have already repacked the support bearings in the front cover. Remove the rubber o-ring gasket from the cover and coat it liberally with silicone gasket maker. Stuff it back into its groove in the front cover once it has been completely wetted with gasket maker. Also remove the o-ring gasket from the nose of the shift motor and coat it liberally on all sides with silicone gasket maker before putting it back in its groove. Coat each of the reduction gears liberally with syn grease. Don't be shy with it... stuff those gear teeth full of grease and make sure both sides of the gears are wetted with grease before installing them into their repacked support bearings. Then install the shift motor assembly onto the dowel pins in the cover. Apply silicone gasket maker to both sides of the o-ring gasket for the angle sensor and install the angle sensor into the reduction gears cover. In this case (350 Rancher) the shift motor harness must be routed underneath the angle sensor before the sensor is snugged down. Do NOT overtighten those screws. Now hold the bracket in place and snug each of the four mounting bolts down in a criss-cross tightening pattern. Do NOT overtighten any of those mounting bolts. You are now back where you began. Next up, adjust the change clutch per the service manual. Remove both front and rear fenders. Open EVERY wiring harness connector pair on the ATV and pack dielectric grease into each connector to seal out oxygen and water. Do NOT skip this step, this is very important, saves you 100s of $$$ and countless hours of your time! Just do it and don't be caught whining about it! 🙂 Finally, clean the frame and motor grounds and clean and dielectric grease the battery terminals. You will need a battery installed in your ATV that is in decent condition. Put your fenders and trim back on the ATV. Enjoy your properly prepped and now bulletproof Honda ES system. You're done working on it for at least ten more years, more 'n likely 20. Have fun with it!